1. Removing (Uninstalling) Programs
Unlike documents and other files, copying a program to your hard disk isn't enough to make it usable. You have to install
programs before you can use them. Likewise, simply deleting the startup
icon for a program isn't enough to remove the program from your system.
You have to uninstall the program. All
of this is because a program often consists of many files. For example,
Microsoft Office comprises hundreds of files! Furthermore, installing a
program makes other changes to the system. Uninstalling is necessary to
undo those changes.
NOTE
You must be logged in to an administrative account, or know the administrator password for your PC, to remove a program.
Before you remove (uninstall) any program, make sure
you know what you're removing and why. Just because you don't know what a
program is or what purpose it serves, that doesn't mean you should
remove it. Removing programs isn't likely to solve any computer
programs, so you shouldn't remove a program as a means of solving some
problem through sheer guesswork.
|
There is no Undo or Recycle Bin for reinstating
removed programs. The only way to get a removed program back is to
reinstall it from its original installation CD or download it again from
the original Web site.
|
|
With all those cautions out of the way, removing a
program is quite simple. Assuming you're already on the Programs and
Features applet, right-click the name of the program you want to remove
and choose Uninstall. Or, select that program's icon or name and click
the Uninstall button in the toolbar. If prompted, enter an
administrative password. Follow any additional instructions that appear
on the screen.
1.1. Uninstalling from the All Programs menu
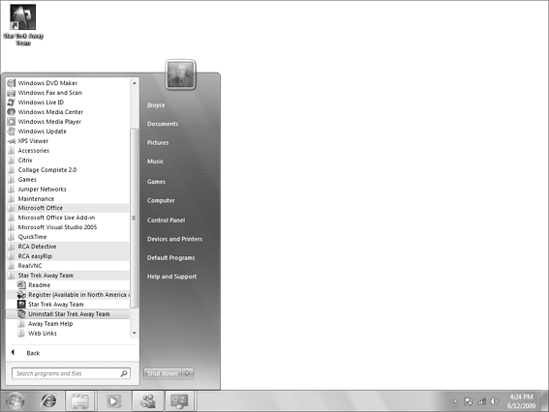
If you don't find a program that you want to remove
in Programs and Features, you might still be able to remove it right
from the All Programs menu. Click the Start button, choose All Programs,
and then look for an Uninstall or Remove option like the example in Figure 1. If you find such an option, you can click it to remove the program from your system.
1.2. Dealing with stuck programs
Occasionally you might come across a situation where
removing a program generates an error message before the program is
completely removed. The first thing to do, of course, is to read the
error message and see what options it offers. You may be able to finish
the removal just by choosing options that the error message provides.
If you can't get rid of a program through
the normal means or error message, your next best bet would be to
install the program again. That might seem counterproductive, but the
problem might be that the program only partially installed in the first
place. A partially installed program may not have enough stuff installed
to do a thorough removal. Once you've completed the initial
installation, you should be able to remove the program without any
problems.
2. Returning to a Previous Version
|
Returning to the previous version of a program is a
quick and easy way to deal with program updates that cause more problems
than they solve.
|
|
It seems computer programs are never done. Every
program evolves through versions, each version a little bigger and
better than its predecessor. But sometimes the latest and greatest
version of a program won't quite work correctly on your computer. When
that happens, you may be able to return to the previous version of the
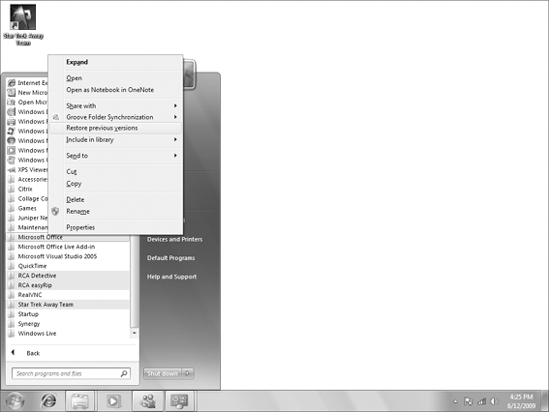
program with minimal fuss. Get to the program's startup icon on the All
Programs menu and right-click it. If you see a Restore Previous Versions
option like in Figure 2, click it. Then follow the on-screen instructions to return to the previous version.
Updates to programs are a little different
than upgrades and can't always be removed using the Restore Previous
Versions option. But should an update cause problems on your system, you
can remove it. Click View Installed Updates in the left column of the
Programs and Features window. The list of installed programs changes to a
list of installed updates. As with programs, you can click an installed
update to remove or change it.
3. Turning Windows Features On and Off
|
Unlike Add/Remove Windows Programs in Windows XP,
Program Features in Windows Vista and Windows 7 allow you to turn
features on and off without the hassles of installing and uninstalling.
|
|
Windows 7 comes with many programs and features built
right in. How many depends on which edition of Windows 7 you purchased.
Regardless of the edition you bought, there may be some features you do
want to use and some you don't.
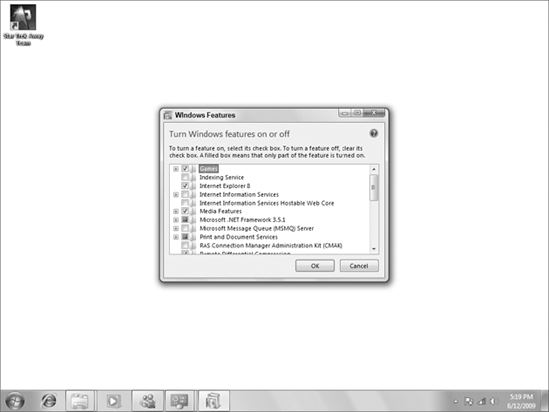
To turn Windows Features on or off, get to the
Programs and Features Control Panel applet . (Press  , type fea,
and choose Programs and Features.) Then click Turn Windows Features On
or Off in the left pane. A list of available Windows Features opens as
in Figure 3.
Items that are checked are currently installed and working. Unchecked
features are not active. A filled check box represents a feature that's
active, but also has additional subfeatures. Click the + sign next to a
feature to see what subfeatures it offers.
, type fea,
and choose Programs and Features.) Then click Turn Windows Features On
or Off in the left pane. A list of available Windows Features opens as
in Figure 3.
Items that are checked are currently installed and working. Unchecked
features are not active. A filled check box represents a feature that's
active, but also has additional subfeatures. Click the + sign next to a
feature to see what subfeatures it offers.
|
Only turn off program features that you know and are
certain you don't need. If you don't know what a feature is or does,
better to err in favor of keeping it active than to find out, the hard
way, that you shouldn't have disabled it!
|
|
The rest is easy. To disable a feature or
subfeature, deselect its check box. To enable a disabled feature, click
its empty check box to select it. Click OK after making your changes.
