3. Adding menus and toolbars
Most Windows applications
have menus and toolbars that give users access to commands. Visual
Studio provides these two menu controls and three toolbar controls:
ContextMenuStrip: The shortcut menu that appears when a user right-clicks
MenuStrip: A standard menu that usually appears at the top of a form
StatusStrip: A band that usually appears along the bottom of a form that displays status feedback information
ToolStrip: A control that creates toolbars
ToolStripContainer: A container for hosting menu and toolbar controls
The ToolStrip control, the granddaddy of all the menu and toolbars controls, has these features:
Items that you can add to the menu and toolbar controls, such as ToolStripMenuItem
Container controls that allow menus and toolbars to coexist in the same container
Properties that allow you to set the look and feel of menus and toolbars
Because all menu and toolbar controls are related, they share the ToolStrip
control's features. The procedure for adding items, working with
containers, and setting properties is consistent across all menu and
toolbar controls.
To add a menu to a form and configure the menu, follow these steps:
Drag a MenuStrip control to a form and drop it.
The menu docks itself to the top of the form.
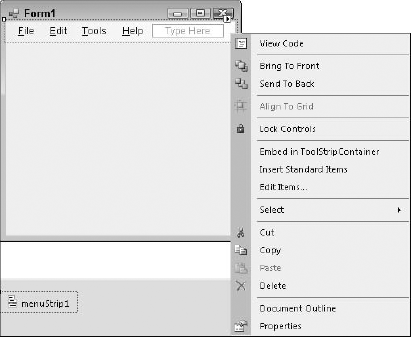
Click the arrow in the upper-right corner of the MenuStrip control to display a list of tasks.
In the MenuStrip Tasks dialog box, click Insert Standard Items.
The MenuStrip control adds menu items for File, Edit, Tools, and Help, as shown in Figure 3.
Repeat Steps 1–3 to add a ToolStrip control to the form and insert standard items on the toolbar.
All the menu and toolbar
controls are smart tag-enabled. A smart tag-enabled control has a little
arrow in its upper-right corner. Click this arrow to access a task
dialog box that displays common tasks for each control. The MenuStrip and ToolStrip controls display the same task dialog box. (Figure 3 shows the MenuStrip Tasks dialog box.) The available MenuStrip and ToolStrip tasks are shown in this list:
Embed in ToolStripContainer: Moves the control inside a ToolStripContainer control
Insert Standard Items: Adds standard command items to the control
RenderMode: Sets a specific style for the control
Dock: Sets the control's location to the top or bottom, or the left or right side, of the form
GripStyle: Makes the control's move handle hidden or visible
Edit Items: Opens the Items Collection Editor, which you use to edit the control's items
Menus and toolbars
display commands that users can execute. Each command is an item on the
menu or toolbar control. A control's entire set of commands is the
control's items collection. You can edit a control's items collection by
using the Windows Forms Designer or the Items Collection Editor.
To edit items by using the Windows Forms Designer, follow these steps:
Drag and drop a StatusStrip control on the form.
The control docks itself to the bottom of the form by default.
Click the drop-down arrow in the control.
A list of available StatusStrip items appears, as shown in Figure 4.
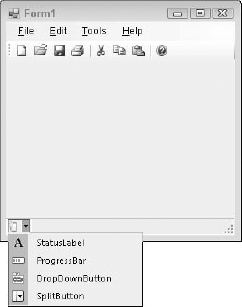
Select a StatusLabel control from the list.
The StatusLabel control is added to the StatusStrip control.
Repeat Steps 2 and 3 to add a progress bar.
To add items to a MenuStrip control by using the Windows Forms Designer, follow these steps:
Click the MenuStrip control in the form.
A command placeholder named MenuItem, with the prompt Type Here, appears; see Figure 5.
|
To insert a command between
existing commands, right-click a command and choose Insert from the
shortcut menu. Choose an item to insert from the list of available
items.
|
|
Type a command name, such as View, and then press Enter.
The placeholder expands for you to add more commands.
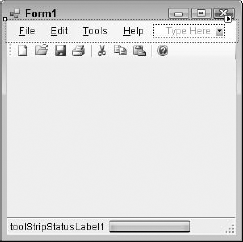
Table 4 lists the items you can add to the menu and toolbar controls.
Table 4. Items You Can Add to the ToolStrip Controls
| Control Name | Item You Can Add |
|---|
| MenuStrip | MenuItem |
| | ComboBox |
| | Separator |
| | TextBox |
| ToolStrip | Button |
| | Label |
| | SplitButton |
| ToolStrip | DropDownButton |
| | Separator |
| | ComboBox |
| | TextBox |
| | ProgressBar |
| StatusStrip | StatusLabel |
| | ProgressBar |
| | DropDownButton |
| | SplitButton |
You can start a control's Items Collection Editor in one of three ways:
From the control's Tasks dialog box
By using the control's Properties window
From the control's shortcut menu
To use the Items Collection Editor from the control's shortcut menu:
Right-click the form's StatusStrip control.
The control's shortcut menu appears.
Choose Edit Items.
The Items Collection Editor appears.
Click the drop-down list at the top of the editor to display a list of available items for the control.
Select DropDownButton from the list.
Click Add.
A DropDownButton control is added to the members list, as shown in Figure 6.
Click the up arrow to move the DropDownButton control to the top of the list.
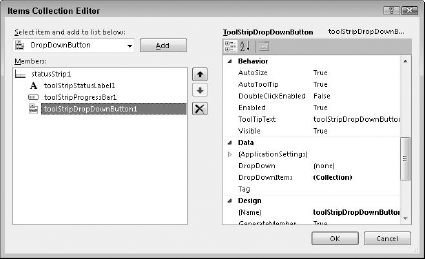
Select the progress bar control from the Members list.
The progress bar control is named ToolStripProgressBar1.
Click the button with the X on it to delete the progress bar.
Click OK.
The Items Collection Editor closes.
|
The properties of individual
items on menu and toolbar controls are easier to manage if you use the
Items Collection Editor instead of the Properties window.
|
|
3.1. Using a ToolStripContainer
The ToolStripContainer control makes it easy to host multiple menu and toolbar controls on a single form. The ToolStripContainer control has panels, as shown in Figure 7, where you place your menu and toolbar controls. The advantage of using ToolStripContainer is that your controls automatically stack horizontally and vertically in the panel.

To use a ToolStripContainer control in a Windows Form, follow these steps:
Drag and drop a ToolStripContainer control on a Windows Form.
Click Dock Fill in Form in the ToolStripContainer control's Tasks dialog box.
The control expands to fill the form. The control's top panel is visible by default.
Drag and drop a MenuStrip control on the top panel.
Click the arrow tab on the ToolStripContainer control's top pane.
The pane expands to accommodate another menu or toolbar.
Drag and drop a ToolStrip control on the top panel, positioned below the MenuStrip control.
Click the tab on the bottom panel to make the panel visible.
Add a StatusStrip control to the bottom panel.
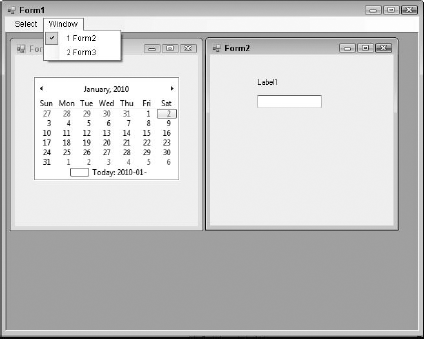
Users can use the ToolStripContainer control to customize their work environments by moving toolbars and menus around within the panels of the ToolStripContainer control. Figure 8 shows you an example of a toolbar being moved.
3.2. Controlling styles
You can style the menu and toolbar controls by using the RenderMode
property. You can use it to specify how you want Windows to draw the
menu or toolbar. The .NET built-in styles render your menus and toolbars
to look like Office or Windows. You can set the RenderMode property to one of these four values:
Custom: Sets the style to a custom renderer
ManagerRenderMode: Uses the renderer specified in the ToolStripManager
Professional: Uses a style that looks like Office 2003 and Windows XP
System: Uses a flat Windows style
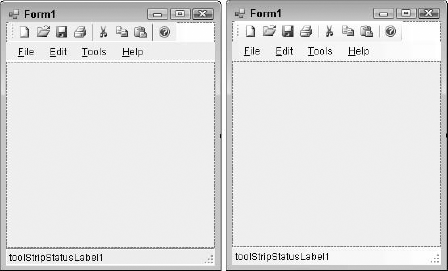
Figure 9
shows the same form with two different rendered styles. The form on the
left uses system styling, and the form on the right uses professional
styling. The professionally styled menus and toolbars are rounded and
more elegant. You can set these styles by using the Tasks dialog box for
each of the controls. The most obvious difference is the use of hot
keys.
You use ToolStripManager to set a single style for all ToolStrip controls. For example, to set all the menus and toolbars to Professional, follow these steps:
Set the RenderMode property for each menu and toolbar control to ManagerRenderMode.
Set the RenderMode property on ToolStripManager in the form's Load event by using this code:
You access ToolStripManager in code. It's not a control that you can access from the toolbox, like on other menus and toolbars.
