6. Searching with Natural Language
If you don't fancy
Boolean formulations, try the natural-language approach to searching.
With natural language enabled, the search engine promises to accept
queries in plain English. So, instead of typing kind:email from:(Carl OR Ed) received:this week, you can enter email from Carl or Ed received this week.
The system looks for key words (like "email"), filters out prepositions
(such as "from"), handles conjunctions without making you capitalize
them, and assumes the rest of what you type consists of property values
that it should try to match.
To turn natural
language searching on, choose Organize, Folder And Search Options in
Windows Explorer. In the Folder Options dialog box, click the Search
tab. On the Search tab, select Use Natural Language Search.
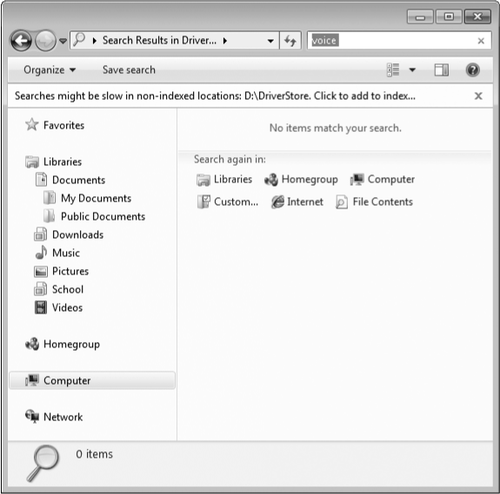
7. Searching Nonindexed Locations
When you search a folder that isn't included in the search index, Windows does a (relatively) slow grep search of the folder's contents. An information bar, similar to the one shown in Figure 1
appears to warn you that the search is likely to be slow. You can click
the information bar to add your current search target to the index
manually. Be aware that just adding the folder to the index won't make the search
any quicker until the system has had time to update the index.
The search engine's initial
pass in an unindexed location goes blazingly fast, because it looks only
at file names and basic properties (Date Modified and Size). Look
carefully at the Search Again In box along the bottom of the window and
you'll see a File Contents option asking if you would like to search
properties (such as tags) and the contents
of files that include a property handler and filter. Click this option
and watch the green progress bar move slowly across the address bar
(depending on the number of files that need to be cracked open and
inspected, this can take a very long time).
If you're
willing to put up with occasionally slow searches, you can change this
default. To do so, open the Folder Options dialog box, click the Search
tab, and click Always Search File Names And Contents under the What To Search heading.
|
The search index excludes system
folders, even when you've explicitly added the root of the system drive
to the index. If you're hunting for a critical system file, that
default will frustrate you, because your searches will completely ignore
files in those locations that would otherwise be indexed. For most users, this default is correct; you really don't want stray files from system
folders to clutter up search results. But if you're a programmer or IT
professional, you might be intensely interested in the contents of
system folders and would thus want to override this default, either
temporarily or permanently. To do so, open the Folder Options dialog
box, click the Search tab, and click the first option, Include System
Directories, under When Searching Non-Indexed Locations. You might also
consider selecting the final option under How To Search: Don't Use The
Index When Searching In File Folders For System Files. This option
forces a grep search and ensures that you'll get the results you're
looking for.
|
When you connect to a shared
folder on a networked computer, the search engine can detect whether
Windows Search is running and whether the location you've accessed is
already part of the remote
index. If it is, great! Your query gets handed off to the remote search
engine, which runs it on the other machine and returns its results to
your computer. If the remote folder isn't indexed, you'll have to do a
grep-style search.
8. Saving Searches and Clearing Search History
After you have completed a
search and displayed its results in Windows Explorer, you can save the
search parameters for later reuse. Click the Save Search button that
appears on the toolbar in a Search Results window (or drag the search
icon from the address bar into the Favorites node in the navigation
pane). The saved search is added to the Favorites list in the navigation
pane and is also stored in %UserProfile%\Searches. A default
installation of Windows 7 doesn't make this folder easy to find; you'll
need to click Start, click your user name at the top of the right
column, and then double-click Searches. If you use this location
regularly, consider adding it to a library or to the Favorites list in
the navigation pane.
When you save a search, you are saving its specification (technically, a persistedQuery),
not its current results. The next time you double-click the Saved
Search icon, Windows re-executes the search against the current contents
of the search index. (If you're interested in the XML data that defines
the search, right-click the saved search in your Searches folder,
choose Open With, and choose Notepad or WordPad.)
Each of your
previous searches are also included in a history list. When you click in
the search box, you'll see a drop-down list of searches that are
available for reuse. In some cases, this is a tremendous convenience.
But it's a nuisance if you mistyped a search term or created a set of
search parameters that didn't produce useful results. To clear a single
item from the list, click in the search box and then use the Up Arrow
and Down Arrow keys to move through the list. Press Delete to remove the
highlighted entry.
