New in the Windows 7
version of Disk Management is the ability to create virtual hard disks in
the .VHD format used by Microsoft Virtual PC and the Hyper-V feature of
Microsoft Server 2008 Release 2 (R2). A .VHD file encapsulates all the
characteristics of a simple disk volume in a single file. Once created,
initialized, and formatted, it appears as a disk drive in Windows
Explorer and Disk Management, but you can copy it, back it up, and do
anything else with it that you might do with an ordinary file.
To create a virtual hard
disk, open Disk Management and choose Action, Create VHD. Disk Management responds with the
Create And Attach Virtual Hard Disk dialog box:
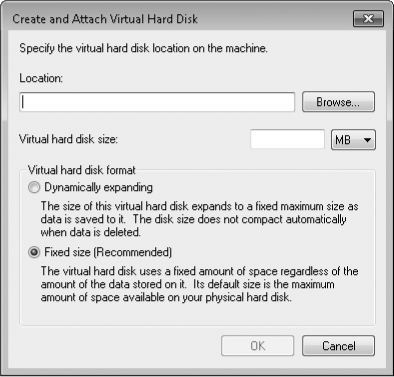
Specify a file name
with a fully qualified path. It's easiest to do this with the help of
the Browse button, but note that the file cannot be stored in your
Windows folder. If you want the disk to expand in size as you add files
to it, choose Dynamically Expanding. Otherwise, choose Fixed Size
(Recommended). Either way, you must also specify a size (that's an
initial size if you have chosen Dynamically Expanding). The minimum size
is 3 MB; the maximum is the amount of free space available on your
(real) disk.
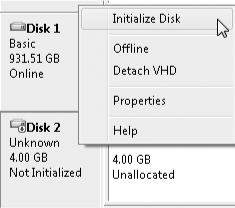
After you have
completed these steps, Disk Management adds the disk to its graphical
display as an unknown, uninitialized disk with unallocated space:

Right-click the box at
the left side of this display (the one with the disk number), and choose
Initialize Disk:
The Initialize Disk dialog
box will give you the option of setting up a disk with a master boot
record or a GUID Partition Table:
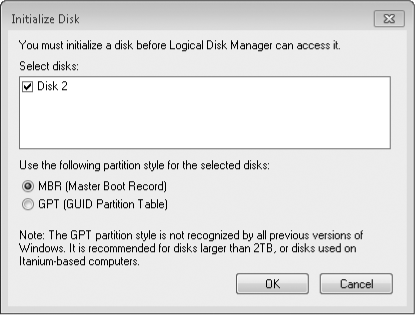
Choose MBR (Master Boot
Record) unless you're working with a very large disk. On completion of
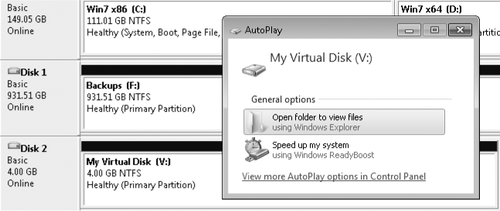
these steps. When you have created a volume,
formatted it, and assigned it a drive letter, the disk will appear like
any other in Disk Management and Windows Explorer:
To remove a virtual
hard disk, right-click the disk-number box at the left side of Disk
Management's graphical display and choose Detach VHD. Disk Management
will give you the option of deleting the disk file that encapsulated
your virtual hard disk:

If you think you might
need to use the virtual disk again, leave the check box clear. You can
remount the disk subsequently by choosing Action, Attach VHD in Disk
Management.
