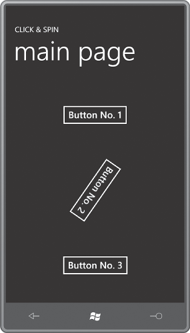
Suppose you want to enhance a button to give some extra visual feedback to the user. You decide you actually want a lot
of visual feedback to wake up a drowsy user, and therefore you choose
to spin the button around in a circle every time it’s clicked.
Here are a few buttons in a XAML file:
Example 1. Silverlight Project: ClickAndSpin File: MainPage.xaml (excerpt)
<Grid x:Name="ContentPanel" Grid.Row="1" Margin="12,0,12,0">
    <Grid.RowDefinitions>
        <RowDefinition Height="*" />
        <RowDefinition Height="*" />
        <RowDefinition Height="*" />
    </Grid.RowDefinitions>

    <Button Content="Button No. 1"
            Grid.Row="0"
            HorizontalAlignment="Center"
            VerticalAlignment="Center"
            RenderTransformOrigin="0.5 0.5"
            Click="OnButtonClick">
        <Button.RenderTransform>
            <RotateTransform />
        </Button.RenderTransform>
    </Button>

    <Button Content="Button No. 2"
            Grid.Row="1"
            HorizontalAlignment="Center"
            VerticalAlignment="Center"
            RenderTransformOrigin="0.5 0.5"
            Click="OnButtonClick">
        <Button.RenderTransform>
            <RotateTransform />
        </Button.RenderTransform>
    </Button>

    <Button Content="Button No. 3"
            Grid.Row="2"
            HorizontalAlignment="Center"
            VerticalAlignment="Center"
            RenderTransformOrigin="0.5 0.5"
            Click="OnButtonClick">
        <Button.RenderTransform>
            <RotateTransform />
        </Button.RenderTransform>
    </Button>
</Grid>
|
Each of the buttons has its RenderTransform property set to a RotateTransform, and its RenderTransformOrigin set for the element center.
The Click event handler is responsible for defining and initiating the animation that spins the clicked button. (Of course, in a real application, the Click handler would also perform something important to the program!) The handler begins by obtaining the Button that the user touched, and the RotateTransform associated with that particular Button:
Example 2. Silverlight Project: ClickAndSpin File: MainPage.xaml.cs (excerpt)
void OnButtonClick(object sender, RoutedEventArgs args)
{
    Button btn = sender as Button;
    RotateTransform rotateTransform = btn.RenderTransform as RotateTransform;

    // Create and define animation
    DoubleAnimation anima = new DoubleAnimation();
    anima.From = 0;
    anima.To = 360;
    anima.Duration = new Duration(TimeSpan.FromSeconds(0.5));

    // Set attached properties
    Storyboard.SetTarget(anima, rotateTransform);
    Storyboard.SetTargetProperty(anima, new PropertyPath(RotateTransform.
AngleProperty));

    // Create storyboard, add animation, and fire it up!
    Storyboard storyboard = new Storyboard();
    storyboard.Children.Add(anima);
    storyboard.Begin();
}
|
Getting the animation going requires three steps:
Define the animation itself. The animation needed here will target the Angle property of a RotateTransform, and the Angle property is of type double, so that suggests a DoubleAnimation:
DoubleAnimation anima = new DoubleAnimation();
anima.From = 0;
anima.To = 360;
anima.Duration = new Duration(TimeSpan.FromSeconds(0.5));
This DoubleAnimation will animate a property of type double from a value of 0 to a value of 360 in ½ second. The Duration property of DoubleAnimation is of type Duration, and in code it is very common to set it from a TimeSpan object. But the Duration property is not itself of type TimeSpan primarily due to legacy issues. You can alternatively set the Duration property to the static Duration.Automatic value, which is the same as not setting Duration at all (or setting it to null), and which creates an animation with a duration of 1 second.
Set the attached properties. The DoubleAnimation
must be associated with a particular object and property of that
object. You specify these using two attached properties defined by the Storyboard class:
Storyboard.SetTarget(anima, rotateTransform);
Storyboard.SetTargetProperty(anima, new PropertyPath(RotateTransform.AngleProperty));
The attached properties are Target and TargetProperty. As you’ll recall, when you set attached properties in code, you use static methods that begin with the word Set.
In both cases, the first argument is the DoubleAnimation just created. The SetTarget call indicates the object being animated (in this case RotateTransform), and the SetTargetProperty call indicates a property of that object. The second argument of the SetTargetProperty method is of type PropertyPath, and you’ll note that I’ve specified the fully-qualified dependency property for the Angle property of RotateTransform.
Define, set, and start the Storyboard.
At this point, everything seems to be ready. But there’s still another step. In Silverlight, animations are always enclosed in Storyboard objects. A particular Storyboard
can have multiple children, so it is very useful for synchronizing
multiple animations. But even if you have just one animation running by
itself, you still need a Storyboard:
Storyboard storyboard = new Storyboard();
storyboard.Children.Add(anima);
storyboard.Begin();
As soon as you call Begin on the Storyboard object, the clicked button spins around in half a second, giving the user perhaps a little too much visual feedback.