As a Windows administrator,
you should understand the various aspects of creating, securing, and
managing Windows file services. Basic file-sharing services and advanced
file server features such as DFS, Quotas, and Branch Cache all require
the addition of the File Services role. In this section, we will take a
look at the basics of file sharing.
Creating shared folders
Before you can share files
and folders from a Windows Server, you need to enable the service. This
is done via the Network Sharing Center. To enable file sharing, perform
the following:
1. | Open Network and Sharing Center from Start | Control Panel then click on the Network and Internet link. Then open Network and Sharing Center.
|
2. | Click the Advanced sharing settings link in the left pane.
|
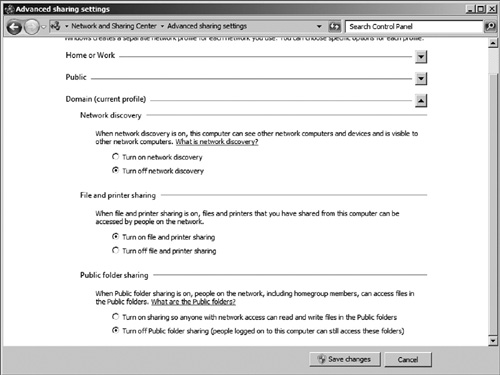
3. | You should now see the options to enable file and printer sharing and to enable public folder sharing (see Figure 1).
Public folder sharing, as the name implies, sets up public share
folders that anyone on the network can access. In our exercise, we will
enable only file and printer sharing. We will enable file sharing by
selecting the option Turn on file and printer sharing. Then click Save Changes.
By turning on the file and printer sharing, the file server role is
automatically added to the server. In our example, we will not enable
public folder sharing.
|
Public folder sharing
Be careful when you enable
public folder sharing, as it does not restrict access to the public
share folders. By default the Everyone group is given read/write access
to the public share folders. In many organizations, this is not a best
practice for file servers and you may want to ensure that this feature
remains disabled.
|
|
4. | Now
that we have enabled file and printer sharing we can set up a new
shared folder. To do this, right click on a folder you wish to share,
and then click Properties.
|
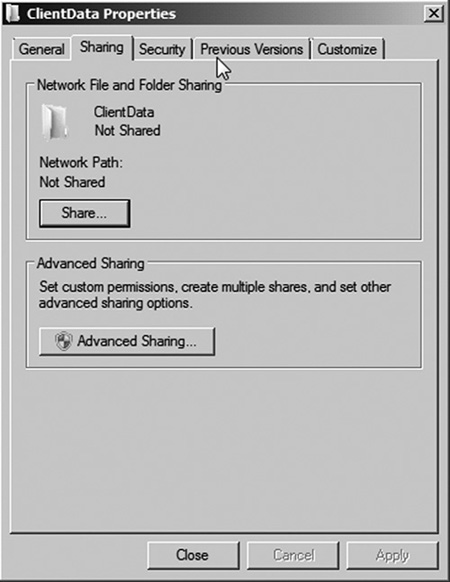
5. | Click the Sharing tab as seen in Figure 2.
|
6. | Click the Share button.
|
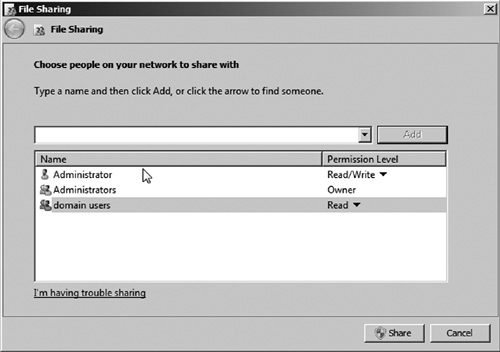
7. | You
must now select whom you want to have access to the shared folder and
what level of access they should have. For our example, we will give
Domain Users read access to the ClientData shared folder as seen in Figure 3.
|
8. | Click the Share button when you have added all groups or users who should have access to the shared folder. Then click Done in the confirmation window.
|
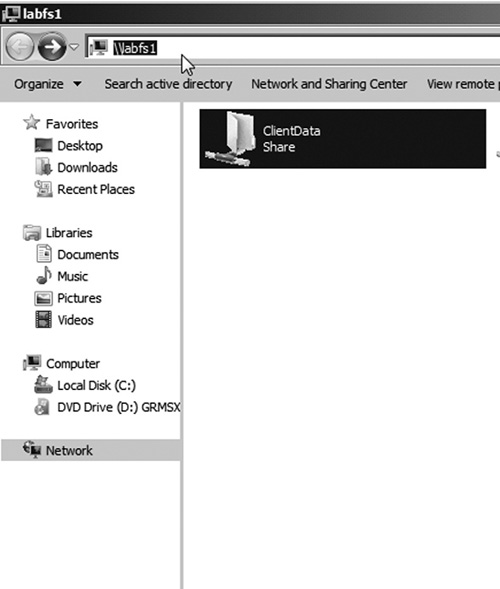
You can now see the shared folder by browsing the UNC path of the server as seen in Figure 4.