5. Inviting People to the Meeting
You can’t collaborate unless there are other
people in the meeting, so your next step is to send invitations to those
people you want to join the meeting. Here are the steps:
1. | Click Invite in the menu bar or click the Invite People icon to display the Invite People dialog box.
|
2. | Activate the check box beside each person you want to invite.
|
3. | Click Send Invitations.
|
Note
The list of users you see in the Invite People
dialog box consists of those people signed in to People Near Me on your
network. If you want others to attend, you can send them an email
message. In the Invite People dialog box, click Invite Others then click
Send and Invitation in E-mail.
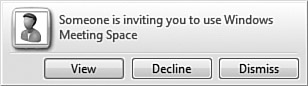
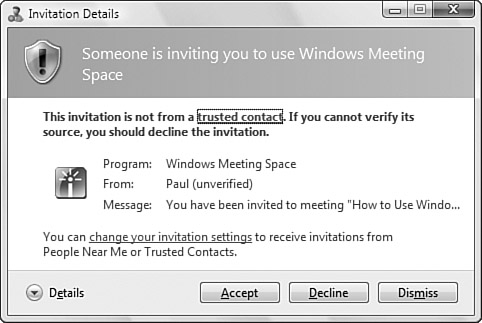
A user who receives your invitation first sees the notification shown in Figure 4. Click View (or wait a few seconds), and you see the Invitation Details dialog box shown in Figure 5.
Click Accept to join the meeting (this also loads Windows Meeting Space
on the user’s machine; at this point, you enter the meeting password);
click Decline to refuse the invitation or click Dismiss to do nothing.
As people accept the invitations, their People Near Me name appears in the Windows Meeting Space Participants list.
6. Sharing a Handout
Before getting to the presentation, you might
have some notes, instructions, background material, or other type of
handout that you want to share with each participant. You do this by
following these steps:
1. | Click
Add in the menu bar or by click the Add a Handout icon. Meeting Space
tells you the handouts will be copied to each computer.
|
2. | Click OK.
|
2. | Select
your file and then click Open. The file appears immediately in the
Handouts area, which shows the filename and the name of the person who
added it.
|
Caution
You can share any type of file you want as a
handout. However, remember that the remote users will only be able to
view and work with the handout file if they have an application
installed that’s associated with the handout’s file type.
7. Starting a Shared Session
When all your participants have joined the
meeting and you’ve shared your handouts, it’s time to start the shared
sessions. In Meeting Space, a shared session involves one of the
participants performing some sort of action on his or her computer; the
other participants see the results of those actions within their meeting
window. You can perform three basic actions:
Demonstrating a specific program— This involves running the program on your computer so that other people in the meeting can watch what you do.
Collaborating on a document—
This involves running a program and opening the document. The person
who starts the shared sessions initially has control over the document,
but control can pass to any participant.
Demonstrating any action— This involves sharing your desktop, which means that the other participants see anything you do on your computer.
Follow these steps to start a shared session:
1. | If you’re going to demonstrate a specific program or collaborate on a document, start the program or open the document.
|
2. | Click Share in the menu bar. Meeting Space asks whether you want the other participants to see your desktop.
|
3. | Click OK. The Start a Shared Session dialog box appears.
|
4. | You have three choices:
To share a program, select the program from the list of running applications. To share a document, select Browse for a File to Open and Share. To share your desktop, select Desktop.
|
5. | |
6. | If you are sharing a document, the Open dialog box appears. Select the document and then select Open.
|
Caution
Vista might automatically switch to a different
color scheme if one of the participating computers can’t handle your
current color scheme. For example, if you’re running the Aero scheme and
a participating computer is running only Vista Basic, Vista switches to
Basic.
Tip
To present your handout, right-click the handout and click Share to Meeting.
8. Controlling the Shared Session
After you begin a shared session, the Meeting Space window displays a You are sharing
X message, where X is the object you’re sharing. You also see two links:
Show Me How My Shared Sessions Looks on Other Computers— Click this link to see your shared session from the point of view of a remote computer.
Stop Sharing— Click this link to shut down the shared session.
Vista also displays a You are sharing message as well as the meeting title in a title bar across the top of the desktop, as shown in Figure 6. You can use the controls in this bar as follows:
Click Pause to stop the shared session temporarily.
Click Give Control and then click a participant’s name to give that person control of the shared session.
Click Give Control, Take Control (or press Windows Logo+Esc) to resume control of the shared session.
Click Options, Shows Windows Meeting Space Window to switch to the Windows Meeting Space window.
Click the Stop button to stop the shared session.

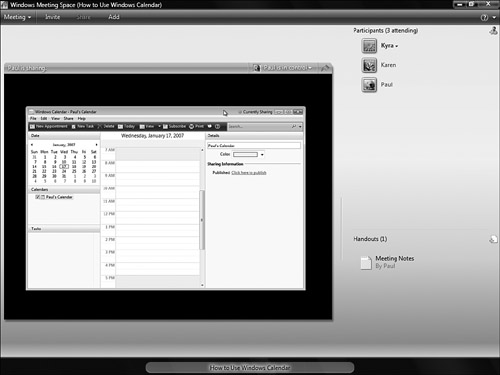
Figure 7 shows what the shared session looks like on a remote computer.
9. Ending the Shared Session
When the shared session is over, click the Stop
Sharing link in the Meeting Space window or click the Stop Sharing
button in the session title bar. If you don’t want to share anything
else, select Meeting, Leave Meeting, or close the Meeting Space window.
