In order to move the book in 3D space, you’ll need to
create the 3D object. You’ll build it piece by piece. Initially, any
layer is flat, with only x (width) and y (height) dimensions and can be
moved only along those axes. But all you have to do to move a layer in
three dimensions is to turn on its 3D Layer switch. With that switch on,
you can also manipulate the object along its z axis (depth).
Before you build the book, you’ll create an environment to help you work in perspective.
Creating the 3D floor
A grid layer, serving as a floor for the 3D space, can help you maintain perspective.
1. | Click in the Timeline panel to make it active.
|
2. | Choose Layer > New > Solid.
|
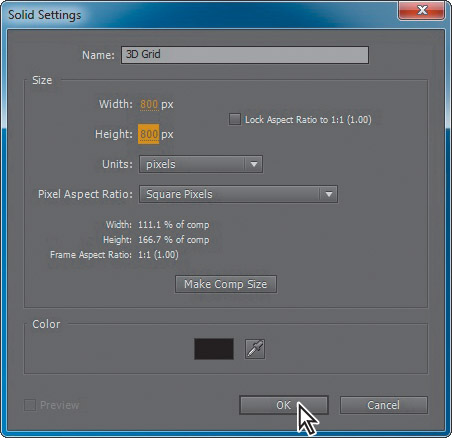
3. | In the Solid Settings dialog box, name the layer 3D Grid.
|
4. | Enter 800 pixels for the Width and the Height, and then click OK to create the layer.
|
5. | With the 3D Grid layer selected in the Timeline panel, choose Effect > Generate > Grid.
|
The Effect Controls panel
displays the Grid effect properties. You can customize the grid if you
want to, but the default settings will work for this lesson. The grid is
simply to help you see objects in perspective as you work.
6. | In
the Timeline panel, expand the 3D Grid Transform properties. The
Position property is 360, 240, the center of the composition. Whenever
you add an element to the Timeline panel, its anchor point will be at
this center point.
|
7. | In the Timeline panel, select the 3D Layer switch ( ) for the 3D Grid layer to give the layer three dimensions. ) for the 3D Grid layer to give the layer three dimensions.
|
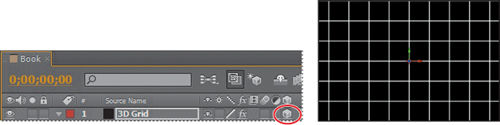
Three 3D Rotation properties
appear in the Transform group for the layer, and properties that
previously supported only two dimensions now display a third value for
the z axis. In addition, a new property group named Material Options
appears.
A color-coded 3D axis appears
over the layer’s anchor point in the Composition window. The red arrow
controls the x axis, the green arrow controls the y axis, and the blue
arrow controls the z axis. At the moment, the z axis appears at the
intersection of the x and y axes. The letters x, y, and z
appear when you position the pointer over the corresponding axis. When
you move or rotate the layer while the pointer is over a particular
axis, the layer’s movement is restricted to that axis.
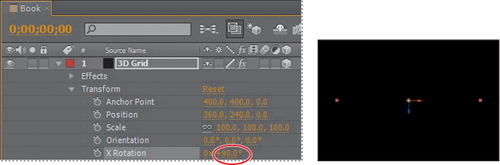
8. | In the Timeline panel, change the X Rotation angle to 90 degrees. The grid seems to disappear, but don’t worry—it’s still there!
|
Using 3D views
Sometimes the appearance of
3D layers can be deceptive. For example, a layer might appear to be
scaling smaller along its x and y axes when it’s actually moving along
the z axis. You can’t always tell from the default view in the
Composition panel. The Select View Layout pop-up menu at the bottom of
the Composition panel lets you divide the panel into different views of a
single frame, so you can see your work from multiple angles. You
specify the different views using the 3D View pop-up menu.
1. | At
the bottom of the Composition panel, click the Select View Layout
pop-up menu, and choose 2 Views – Horizontal. The left side of the
Composition panel displays the Top view of the frame, and the right side
displays the Active Camera view, which you’ve been viewing.
|
2. | Click in the left side of the Composition panel to make the Top view active. Orange corner tabs appear around the active view.
|
3. | Choose Custom View 1 from the 3D View pop-up menu at the bottom of the panel.
|
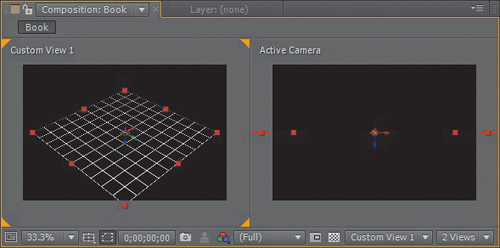
In the Custom View 1 window, you can see that the layer is a grid that can offer true perspective in 3D space.
4. | Hide the properties for the 3D Grid layer in the Timeline panel.
|
5. | Choose File > Save to save your work so far.
|
Creating a guide layer
Guide layers help you
position and edit elements in the Composition panel. For example, you
can use guide layers for visual reference, audio timing, timecode
reference, or even to store comments to yourself. In this project, you
want to use the 3D Grid layer to help you place objects, but you don’t
want to render it in the final artwork. You’ll convert it to a guide
layer and lock it to ensure it stays in place.
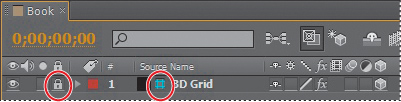
1. | Select
the 3D Grid layer in the Timeline panel, and choose Layer > Guide
Layer. A cyan grid appears next to the layer name in the Timeline panel
to indicate that it’s a guide layer.
|
2. | Select the Lock switch ( ) for the 3D Grid layer in the Timeline panel to lock the layer. ) for the 3D Grid layer in the Timeline panel to lock the layer.
|
Adding the first side of the object
With your grid in place as a
guide layer, you’re ready to start building the book. What better place
to start than the front cover?
1. | Click
the Project tab to make the panel active. Then drag the AEFront.jpg
item into the Timeline panel, placing it at the top of the layer stack,
above the 3D Grid layer.
|
2. | Select the 3D Layer switch () for the AEFront.jpg layer.
|
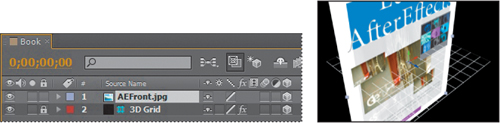
The book cover is much larger
than the composition, and it intersects the grid. You’ll scale the
AEFront.jpg layer later, after the entire object is built. But you’ll
reposition the cover to rest firmly on the floor of the grid now. To do
this, you’ll reposition the layer’s anchor point to the bottom of the
book cover.
3. | With the AEFront.jpg layer selected in the Timeline, press the A key to display the layer’s Anchor Point property.
|
Currently, the anchor point
for the AEFront.jpg layer is in the center of the book. You want the
anchor point to be at the bottom of the book cover, to match the anchor
point at the center of the grid. Because the current y-axis value is at
the center, and therefore halfway down the book, you can simply multiply
that value by 2 for the new Anchor Point value.
4. | Click the y-axis value (the middle value), and add *2 to the value, so that it reads 617*2. Press Enter or Return to accept the calculation. The layer moves to sit on the grid.
|
Note
Positive values on the x axis
move an element to the right; positive values on the y axis move an
element down; and positive values on the z axis move an element away
from the active camera.

Adobe Photoshop Extended can
import and manipulate 3D models in several popular formats. You can
manipulate these models in Photoshop Extended, and then save one or more
frames as PSD files for import into After Effects.
Alternatively, you can use
the Vanishing Point feature in Photoshop Extended to create 3D images,
and then use the Export For After Effects command to save the results as
a collection of PNG files—one for each plane—and a VPE (Vanishing Point
Exchange) file that describes the geometry of the scene. When you
import the VPE file, After Effects uses its information to re-create the
scene as a composition containing a camera layer and one
perspective-corrected 3D layer for each PNG file.
