Positioning 3D elements
When you build a 3D object, you need
to position the 3D layers in relationship to each other. You’ll
position the spine of the book by moving its anchor point and then
adjusting the front cover as necessary.
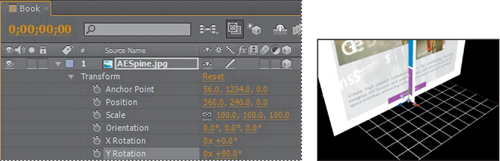
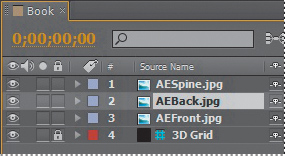
1. | Drag the AESpine.jpg item from the Project panel into the Timeline panel, placing it at the top of the layer stack.
|
2. | Select the 3D Layer switch ( ) for the AESpine.jpg layer. ) for the AESpine.jpg layer.
|
3. | Ctrl-click
(Windows) or Command-click (Mac OS) the triangle in the Label column
for the AESpine.jpg layer to display all of its Transform properties.
|
4. | Click the y-axis value (the middle value) for the Anchor Point property, and then add *2, so that its value is 617*2. Press Enter or Return to accept the calculation.
|
As with the front cover,
moving the anchor point for the spine positions it to sit on the floor
of the 3D space. However, the spine is facing the same direction as the
front cover. You’ll need to rotate it.
5. | Change the Y Rotation property for the AESpine.jpg layer to +90.
|
Now the spine is facing the
right direction, but it’s in the middle of the front cover. To move it
into place, you’ll use the same simple math trick you used to position
the book on the floor.
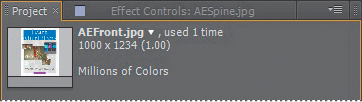
6. | Select the AEFront.jpg item in the Project panel, and note its width. It’s exactly 1000 pixels wide.
|
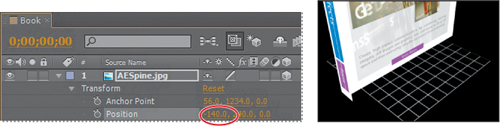
The AESpine.jpg layer
currently intersects the middle of the AEFront.jpg layer. Therefore,
moving the spine 500 pixels to the left will align it appropriately. To
move an object to the left on the x axis, subtract pixels.
7. | In the Timeline panel, click the x-axis value (the first value) for the Position property, and then append -500 to the value, so the new value is 360.0-500. Press Enter or Return.
|
The spine moves to the end of
the book. It’s close, but it protrudes from the front of the book.
You’ll move the AEFront.jpg layer forward to fix that.
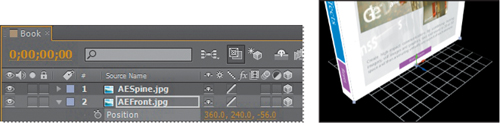
8. | In the Timeline panel, select the AEFront.jpg layer, and then press P to display its Position property.
|
9. | Click the z-axis value (the third value) for the Position property of the AEFront.jpg layer, and change the value to -56. A negative value on the z axis moves the layer toward the active camera view (forward).
 |
10. | Close all properties for the AESpine.jpg and AEFront.jpg layers to keep the Timeline panel neat.
|
Replacing a 3D element with another
Instead of repeating all the
steps to position the back cover, you’ll duplicate the front cover and
replace it with the back cover.
1. | Select the AEFront.jpg layer in the Timeline panel, and press Ctrl+D (Windows) or Command+D (Mac OS) to duplicate the layer.
|
2. | With the duplicate layer selected, press P to display its Position property.
|
3. | Change the z-axis value to +56
to move the layer away from the active camera view. Because this will
be the back cover, you want to position it at the back of the spine,
which is 112 pixels wide.
|
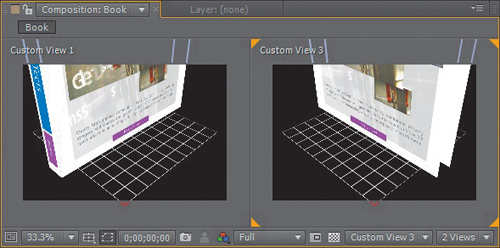
4. | In the Composition panel, change the right view to Custom View 3 so you can see both ends of the book.
 |
5. | With
the duplicate layer selected in the Timeline panel, press R to display
the layer’s Rotation properties, and change its Y Rotation value to 180 degrees. The rotation flips the layer.
|
6. | With
the duplicate layer selected in the Timeline panel, press Alt (Windows)
or Option (Mac OS) as you drag the AEBack.jpg item from the Project
panel onto the duplicate layer. After Effects replaces the front cover
with the back cover, and changes the layer name to AEBack.jpg.
|
Adjusting views with the camera tools
By definition, 3D
objects can appear different from different angles. You can adjust the
camera view to see the object from other directions so that you can
identify gaps, make positioning adjustments, and otherwise evaluate and
plan your project.
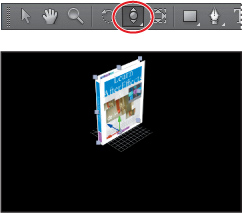
1. | Select the Track Z Camera tool ( ), hidden behind the Unified Camera tool ( ), hidden behind the Unified Camera tool ( ) in the Tools panel. The Track Z Camera tool lets you zoom in and out of a composition view. ) in the Tools panel. The Track Z Camera tool lets you zoom in and out of a composition view.
|
2. | Click
in the left view (Custom View 1) in the Composition panel to ensure
it’s active. Then click and drag to the left or down to zoom out from
the scene and see the entire book. You may need to click and drag
multiple times.
|
3. | Select the Orbit Camera tool ( ),
hidden behind the Track Z Camera tool in the Tools panel. The Orbit
Camera tool rotates the current 3D view by moving the camera around the
point of interest. ),
hidden behind the Track Z Camera tool in the Tools panel. The Orbit
Camera tool rotates the current 3D view by moving the camera around the
point of interest.
|
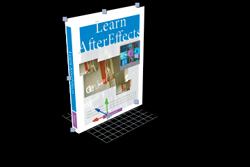
4. | Drag
the Orbit Camera tool to the left or right in the left view of the
Composition window so that you can see the back of the book. Remember,
when you’re using the Orbit Camera tool, you’re rotating the view, not
the object itself.

|
5. | Drag the Orbit Camera tool again so that you are viewing the front of the book.
|
6. | Select the Selection tool ( ) in the Tools panel, and choose File > Save to save your work so far. ) in the Tools panel, and choose File > Save to save your work so far.
|
Adding solid layers to a 3D object
You’ve assembled the front
cover, back cover, and spine of the book. But it’s still lacking a top
and right side (opposite the spine). Because these sides don’t require
specific content, you can create them using solid layers.
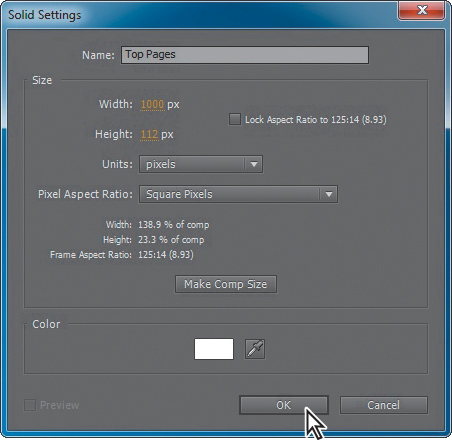
1. | Click in the Timeline panel. Then press Ctrl+Y (Windows) or Command+Y (Mac OS) to create a new solid layer.
|
2. | In the Solid Settings dialog box, name the layer Top Pages, change the width to 1000 pixels (to match the cover width), and the height to 112 pixels (to match the width of the spine).
|
3. | Click the eyedropper, and click a white area of the book cover to sample it. Click OK to create the layer.
|
4. | Select the 3D Layer switch ( ) for the Top Pages layer. ) for the Top Pages layer.
|
5. | Press R to display the Rotation properties, and change the X Rotation property to 90 degrees.
|
6. | Press P to display the Position property. Click the y-axis value, and type 240-1234. Press Enter or Return to accept the calculation.
|
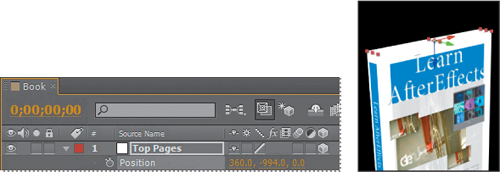
Why those numbers? The current position is 240, and you want to move it up the height of the book, which is 1234 pixels.
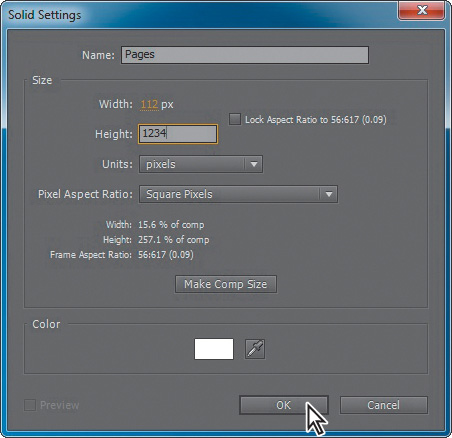
7. | Press
Ctrl+Y (Windows) or Command+Y (Mac OS) to create another solid layer
for the right side of the book, representing the edges of the pages that
are bound by the spine on the left side.
|
8. | In the Solid Settings dialog box, name the layer Pages, change the Width to 112 pixels (the width of the spine) and the Height to 1234 pixels (the height of the covers). Make sure the layer is white, and then click OK.
|
9. | Select the 3D Layer switch () for the Pages layer.
|
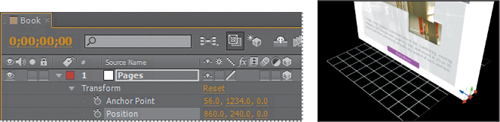
The Pages layer needs to be on
the right side of the book. You’ll change its Anchor Point, Rotation,
and Position properties to get it there.
10. | Ctrl-click
(Windows) or Command-click (Mac OS) the triangle next to the Label
column for the Pages layer to display all its Transform properties.
Note
For this project, it’s
unlikely that anyone will see the bottom of the book. But if you want to
add a bottom layer, duplicate the top layer and move it into position.
|
11. | Change the y-axis value for the Anchor Point property to 1234 (placing the layer on the virtual floor); change the Y Rotation amount to 90° to make it face the right direction; and change the x-axis value for the Position property to 360+500 to move the layer to the right side of the book.
Tip
Pressing the U key multiple times cycles through the reveal/hide options.
|
12. | With
the Timeline panel active, press Ctrl+A (Windows) or Command+A (Mac OS)
to select all the layers. Then press the U key to close all the
properties for the layers.
|
