Configuring Other Windows Display Options
In addition to the
primary display-related settings you’ve covered thus far, Windows Vista
includes several other options that enable users to change the
appearance of their desktop. In this section, you’ll look at these
settings and their effects.
Configuring Theme Settings
So far, you’ve
looked at many different settings that can affect the overall look of
Windows Vista. In some cases, you might want to tweak one or two
settings manually, but what if you want to save a collection of settings
so that you can use them again? That’s where Theme Settings come in. As
shown in Figure 10, the Theme Settings dialog box enables you to select or save a theme.
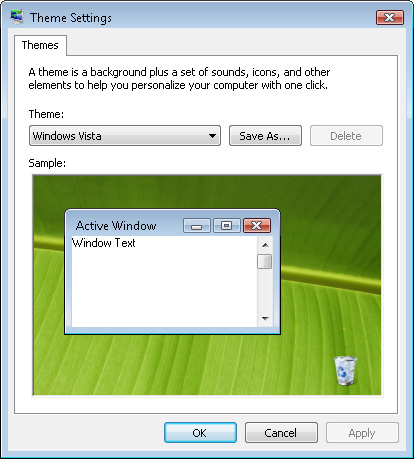
The
themes that are built in and included by default are Windows Vista
(which reverts to the initial display that you see after you complete
the installation process) and Windows Classic (which looks like earlier
versions of the Windows platform). You can also click Browse to find
additional theme files. These files have a default file extension of
.theme and can be found on the Internet. Finally, after you have a
collection of settings that you’d like to use later (or that you might
want to share with others), you can click Save As to save your own
.theme file. Using the Theme Settings dialog box is a good way to store
and apply collections of visual settings.
Choosing a Desktop Background
A quick and easy way for a
user to personalize his or her desktop settings is by changing the
desktop background. Windows Vista ships with numerous wallpapers that
have been professionally composed and optimized for viewing on computer
displays. In addition, users can choose to use their own images as
wallpapers. To access these options, in the Personalization Control
Panel window, click Desktop Background. The available options are shown
in Figure 11.
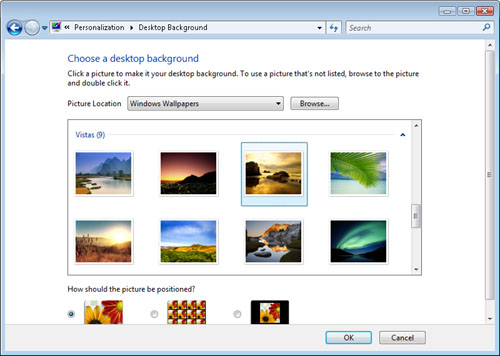
The
Picture Location drop-down list defaults to Windows Wallpapers, which
is the initial location of built-in backgrounds. Users can also select
from other commonly used file locations, such as the user account’s
pictures folder, or they can choose to use a solid color. To specify the
location of a background file manually, click Browse. Some pictures are
intended to fill all or part of the screen, whereas others are designed
to be tiled. The picture position options at the bottom of the dialog
box enable you to specify the most appropriate option: stretched to fit
the whole screen, tiled, or centered.
Selecting a Color Scheme
Windows Vista includes
several different color schemes that can alter the appearance of the
user interface. If Windows Aero is enabled, the best method for changing
color settings is through the Window Color And Appearance dialog box . If you’re not using Windows Aero,
however, you can access the classic display settings in Window Color And
Appearance by clicking Open Classic Appearance Properties For More
Color Options. Figure 12 shows the available options.
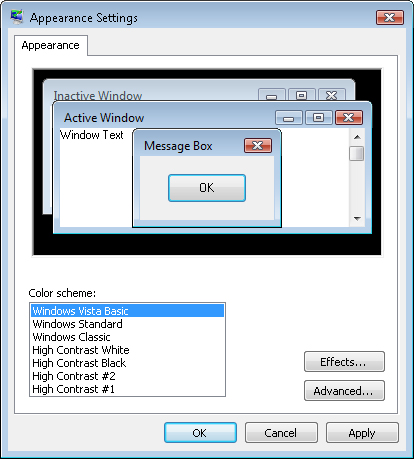
The available color schemes include the following:
Windows Aero
Assuming that the installed edition of Windows Vista supports the
Windows Aero feature, this option enables features such as transparency
within the user interface.
Windows Vista Basic This color scheme provides the basic look and feel of Windows Vista without the 3-D features of Windows Aero.
Windows Standard
For users who prefer the look of versions of Windows released prior to
Windows Vista, this color scheme provides window titles that use a fade
effect.
Windows Classic The Classic color scheme is based on early versions of the Windows user interface.
High Contrast
For some users who are visually impaired, increased contrast can help
make windows and text more readable. Several different options are
available, each of which provides a different set of high-contrast
colors.
In addition to the
basic color scheme options, users can also specify whether effects such
as font smoothing, shadows under menus, and showing window contents
while dragging are enabled. You access these settings by clicking
Effects in the Appearance Settings dialog box. When running on older
hardware, disabling some of these options might make the user interface
more responsive.
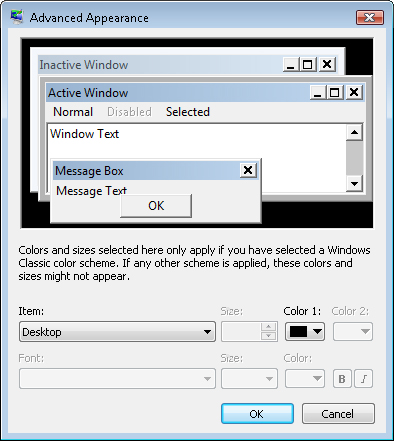
Finally, for the most
in-depth customization, in the Appearance Settings dialog box, users can
click Advanced to specify the exact colors they want to use for each
component of the user interface. As shown in Figure 13,
you can specify details such as fonts for title bars and icon spacing.
Users who have particular preferences for fonts and colors should be
able to get the effect that they need using the many different user
interface options.
Working with Desktop Usability Enhancements
So
far, you have focused on user interface enhancements and options that
control the display of the desktop itself. Windows Vista also includes
several features that can help make operating system users more
productive. This is especially true for users who often have many
different programs open at once.
Using Flip 3D
One of the
most visually impressive features of the Windows Vista user interface is
the Windows Flip 3D window navigation option. After Windows Aero is
enabled, users can access Flip 3D by pressing the Windows key along with
the Tab key. When users press these keys, a live view of each open
window is presented at an angle so that they can see the contents of all
windows at the same time. Windows that have actively changing contents
(such as a video playing in Windows Media Player) are viewable in a
“live” format.
Using Flip 3D should
be intuitive to most users. Repeatedly pressing the Tab key while
holding down the Windows key cycles through the programs in forward
order. Holding down the Shift key in addition to the Windows key and
then pressing the Tab key enables you to cycle through the programs in
reverse order. Additionally, users can click any of the windows with the
left mouse button to make that window active.
Enhancements to Alt+Tab
Many
Windows users routinely use the Alt+Tab keystroke combination to switch
between applications. In addition to the Flip 3D method of navigating
among open applications, Windows Vista now presents a live preview of
all open windows when you press the Alt+Tab keystroke combination. This
makes it significantly easier for the user to determine which
application or window he or she wants to select. For example, if
multiple presentations are open in Microsoft PowerPoint, the live
preview can show the contents of each open document.
Another useful enhancement
is the ability to use the mouse to click one of the items in the Alt+Tab
list of programs. This is particularly helpful when several programs
are running concurrently, and you want to avoid pressing Tab multiple
times to cycle through them all.
Using Live Taskbar Previews
For users who
commonly run multiple programs, it can be helpful to get information
about a running program quickly without actually switching the focus to
it. For example, you might want to check on the progress of a file
download or other long-running task quickly without moving away from
your e-mail program, or you might have several different documents of a
similar type open, and you want to switch to a particular one.
Live taskbar previews are a
new feature in Windows Vista that enables the user simply to hover the
mouse pointer over the title of an application in the Windows taskbar to
see an immediate preview of the contents of the window. Because this is
a “live” preview, the user can see any changes or progress as it’s
occurring.
