Controlling Taskbar Grouping
One of the new things built
into the Windows XP taskbar is the grouping feature. When the taskbar
fills up with buttons, Windows XP consolidates icons from the same
program into a single button, as shown in Figure 3. To access one of these grouped windows, you click the button and then click the window you want.

Tip
You can close all of a group’s windows at once by right-clicking the group button and then clicking Close Group.
The grouping feature
makes it easier to read the name of each taskbar button, but the price
is a slight efficiency drop because it takes two clicks to activate a
window instead of one. If you don’t like this tradeoff, you can disable
the grouping feature by right-clicking the taskbar, clicking Properties,
and then deactivating the Group Similar Taskbar Buttons check box.
Tip
Another way to prevent
grouping is to give the taskbar more room to display buttons. The
easiest way to do that is to resize the taskbar by dragging its top edge
up until the taskbar expands.
If this doesn’t work, the taskbar is probably locked. Unlock it by
right-clicking the taskbar and then clicking Lock the Taskbar.
Alternatively, you can
tweak the grouping feature to suit the way you work. To do this, open
the Registry Editor and head for the following key:
HKCU\Software\Microsoft\Windows\CurrentVersion\Explorer\Advanced\
Add a DWORD value called TaskbarGroupSize and set it to one of the following values:
| 0 | When
the grouping kicks in (that is, when the taskbar gets full), Windows XP
will group the buttons from only the applications that you have used
the least. |
| 1 | When
the grouping kicks in, Windows XP will group the buttons from only the
application that has the most windows open. If a second application
surpasses the number of open windows in the first application, the
second application’s windows will be grouped as well. |
| x | Windows XP will group any application that has at least x windows open, where x is a number between 2 and 99. Note that the grouping occurs even if the taskbar is not full. |
Note
that you must log off or restart Windows XP to put the new setting into
effect. Note, too, that you can also change this setting via Tweak UI.
Display the Taskbar, Grouping item.
Modifying the Start Menu and Taskbar with Group Policies
The group policies offer unprecedented control
over the Windows XP interface without having to modify the Registry
directly. This is particularly true of the Start menu and taskbar, which
boast more than 40 policies that do everything from removing Start menu
links such as Run and Help to hiding the taskbar’s notification area.
To see these policies, launch the Group Policy editor and select User
Configuration, Administrative Templates, Start Menu and Taskbar.
Most of the policies
are straightforward: By enabling them, you remove a feature from the
Start menu or taskbar. For example, enabling the Remove Run Menu from
Start Menu policy hides the Start menu’s Run command for the current
user. This is a handy feature if you’re trying to restrict a user to
using only those programs and documents that appear on the Start menu.
Here are a few policies that I think are the most useful:
| Remove Drag-and-Drop Context Menus on the Start Menu | Enable this policy to prevent the current user from rearranging the Start menu using drag-and-drop techniques. |
| Prevent Changes to Taskbar and Start Menu Settings | Enable this policy to prevent the current user from accessing the Taskbar and Start Menu Properties dialog box. |
| Remove Access to the Context Menus for the Taskbar | Enable this policy to prevent the current user from seeing the taskbar’s shortcut (also called context) menus by right-clicking the taskbar. |
| Do Not Keep History of Recently Opened Documents | Enable this policy to prevent Windows XP from tracking the current user’s recently opened documents. |
| Clear History of Recently Opened Documents on Exit | Enable this policy to remove all documents from the current user’s recent documents list whenever Windows XP exits. |
| Remove Balloon Tips on Start Menu Items | Enable
this policy to prevent the current user from seeing the balloon tips
that Windows XP displays when it prompts you about new hardware being
detected, downloading automatic updates, and so on. |
| Remove User Name from Start Menu | Enable
this policy to prevent the current user’s name from appearing at the
top of the Start menu. This is a good idea if you need more room on the
Start menu for the pinned or frequent program lists. |
| Hide the Notification Area | Enable this policy to prevent the current user from seeing the taskbar’s notification area. |
| Do Not Display Custom Toolbars in the Taskbar | Enable this policy to prevent the current user from adding custom toolbars to the taskbar. |
Using Screen Space Efficiently
How images appear on
your monitor and how efficiently you use the monitor’s viewable area is a
function of two measurements: the color quality
and the screen resolution. The color quality is a measure of the number
of colors available to display images on the screen. Color quality is
usually expressed in either bits or total colors. For example, a 4-bit
display can handle up to 16 colors (because 2 to the power of 4 equals
16). The most common values are 16-bit (65,536 colors), 24-bit
(16,777,216 colors), and 32-bit (16,777,216 colors).
The screen resolution
is a measure of the density of the pixels used to display the screen
image. The pixels are arranged in a row-and-column format, so the
resolution is expressed as rows by columns, where rows is the number of pixel rows and columns
is the number of pixel columns. For example, an 800 by 600 resolution
means screen images are displayed using 800 rows of pixels and 600
columns of pixels.
How does all this affect productivity?
In general, the
greater the number of colors, the sharper your screen image will
appear. Sharper images, especially text, are easier to read and put less
strain on the eyes.
|
If
you read a lot of onscreen text, particularly if you use a notebook or
an LCD screen, activate Windows XP’s ClearType feature, which
drastically reduces the jagged edges of screen fonts and makes text
super-sharp and far easier to read than regular screen text. To activate
this feature, launch Control Panel’s Display icon, select the
Appearance tab, and click Effects. In the Effects dialog box, make sure
that the Use the Following Method to Smooth Edges of Screen Fonts check
box is activated and then select ClearType from the list below it. Click
OK and then click OK in the Display Properties dialog box to put the
new setting into effect. Note, too, that you can customize some
ClearType settings using the ClearType Tuner PowerToy, available from
Microsoft’s PowerToys for Windows XP site (www.microsoft.com/windowsxp/downloads/powertoys/xppowertoys.mspx).
|
At
higher resolutions, individual screen items—such as icons and dialog
boxes—appear smaller because these items tend to have a fixed height and
width, expressed in pixels. For example, a dialog box that’s 400 pixels
wide will appear half as wide as the screen at 800 by 600. However, it
will appear to be only one quarter of the screen width at 1,600 by 1,024
(a common resolution for very larger monitors). This means that at
higher resolutions your maximized windows will appear larger, so you’ll
get a larger work area.
The key thing to bear in
mind about all this is that there’s occasionally a tradeoff between
color quality and resolution. That is, depending on how much video
memory is installed on your graphics adapter, you might have to trade
higher resolution for lower color quality, or vice versa.
To change the screen resolution and color quality, follow these steps:
1. | Open the Control Panel’s Display icon to get the Display Properties dialog box onscreen.
|
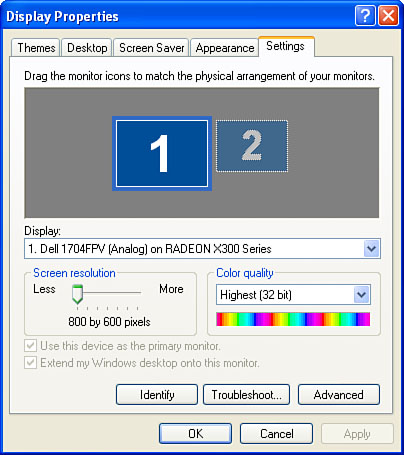
2. | Display the Settings tab, as shown in Figure 4.
|
3. | To set the resolution, drag the Screen Resolution slider left or right.
|
4. | To set the color quality, choose an item from the Color Quality list.
|
5. | Click OK. Windows XP performs the adjustment and then displays a dialog box asking if you want to keep the new setting.
|
6. | Click Yes.
|
Note
If
your graphics adapter or monitor can’t handle the new resolution or
color quality, you’ll end up with a garbled display. In this case, just
wait for 15 seconds and Windows XP will restore the resolution to its
original setting.
