One of the most common uses for session state is to
keep track of information coming from a user even though the information
is posted back through several pages. For example, scenarios such as
collecting mailing addresses, applying for security credentials, or
purchasing something on a Web site introduce this issue.
Sometimes the information to be
gathered is minimal and can be done through only one page. However, when
collecting data from users requires several pages of forms, you need to
keep track of that information between posts. For example, most
commercial Web sites employ a multistage checkout process. After a users places a bunch of items in the shopping cart, he or she clicks Check Out4/27/2010
and the site redirects to a checkout page. From there, the user is
usually required to perform several distinct steps: set up a payment
method, confirm the order, and receive an order confirmation.
Although you could code something like this in ASP.NET 1.x, later versions of ASP.NET include a Wizard control to deal with multistage data collection.
If you were to develop a
multistage input sequence, you'd need to build in the navigation logic
and keep track of the state of the transaction. The Wizard
control provides a template that performs the basic tasks of navigating
through multiple input pages while you provide the specifics. The Wizard control logic is built around specific steps and includes facilities for managing these steps. The Wizard control supports both linear and nonlinear navigation.
This example shows how to use the Wizard
control to gather several different pieces of information from the
client: a name and address, what kinds of software he or she uses, and
the kind of hardware he or she uses. For example, this might be used to
qualify users for entry into a certain part of the Web site or perhaps
to qualify them for a subscription.
Using the Wizard control
Create a new page in the SessionState project named UseWizard.aspx. Drop a WizardControl from the Toolbox onto the page. When the Wizard Tasks window appears in the Designer, click the small arrow near the top right corner of the Wizard. Click Auto Format to style the Wizard. The example here uses the Professional style. The example here also uses a StartNavigationTemplate and a SidebarTemplate so that you have greater control over the look of these aspects of the Wizard. Although they are not used explicitly in the example, they are shown here to illustrate how they fit into the Wizard control. Using these templates, you can define how these parts of the Wizard
look by introducing controls to them. To convert these areas to
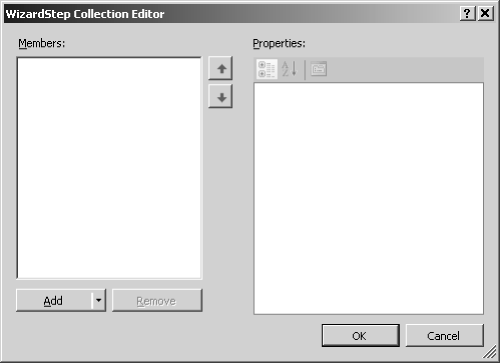
templates, click the small arrow in the upper right corner of the Wizard and select Convert To StartNavigationTemplate. Then, click the small arrow in the upper right corner of the Wizard again, and click Convert To SideBarTemplate. Click the arrow again and select Add/Remove Wizard Steps to open the WizardStep
Collection Editor dialog box. Visual Studio adds two samples steps for
you. Delete them, as the following graphic shows:
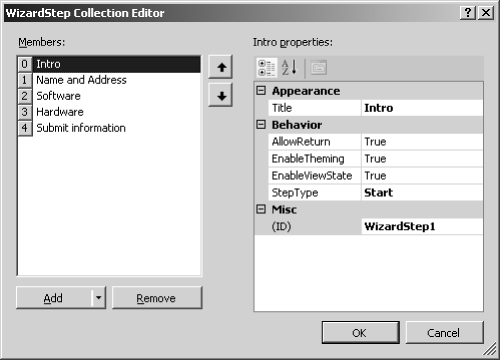
Add
an Intro step, a Name and Address step, a Software step, a Hardware
step, and a Submit information step. That is, click the Add button to
open the dialog box where you can enter steps. "Name," "Address,"
"Software," "Hardware," and "Submit Information" are the Titles for these pages. Make sure Intro uses a StepType of Start. Make sure the Submit information step has its StepType set to Finish, as shown in the following graphic. With all of the steps in place, click OK.
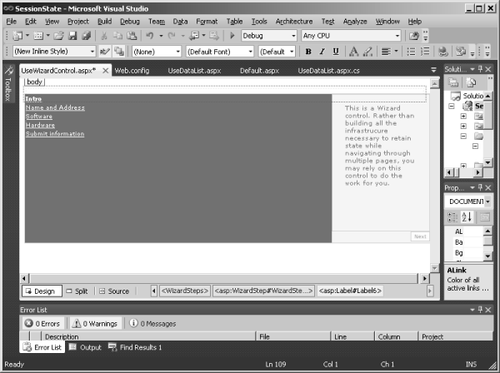
Add controls to the steps. First, select the Wizard in the Designer, and then select Set Position on the Format menu. Select Absolute. Now you can resize the Wizard. Set the Height to 240 px and the Width to 650 px. Navigate to the step by selecting the small arrow that appears on the upper right corner of the Wizard control. Select the Intro step. The Intro step gets a label that describes what the user is entering:
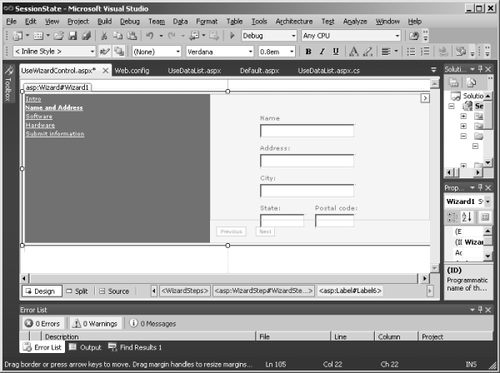
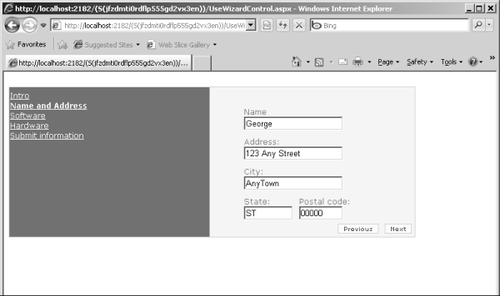
The Name and Address step should include labels and text boxes to get personal information. As you add these controls, select Absolute positioning for each one by selecting Set Position on the Format menu. This lets you change the height and width. Drop the name Label onto the pane on the right side of the Wizard. Below that, add the name TextBox. Below that, drop the address Label on the pane followed below by the address TextBox. Underneath that, add the city Label followed by the city TextBox. Drop the state and postal code Labels next, followed by the state and postal code TextBoxes on that line. Be sure to give usable IDs to the text boxes. The name TextBox should have the ID TextBoxName. The address TextBox should have the ID TextBoxAddress. The city TextBox should have the ID TextBoxCity. The state TextBox should have the ID TextBoxState, and the postal code TextBox should have the ID TextBoxPostalCode. You'll need them during the submission step:
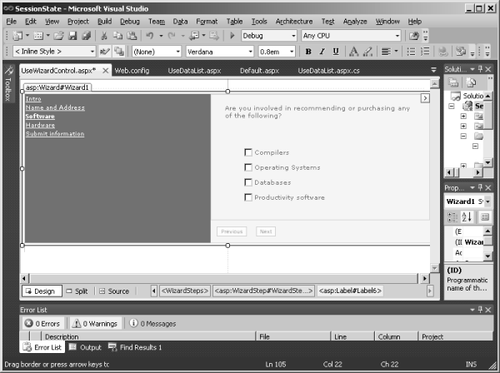
Select the Software step and modify it. The Software step should include several check boxes listing common software types. Add a CheckBoxList with the ID CheckBoxListSoftware and fill it with the values you see here:
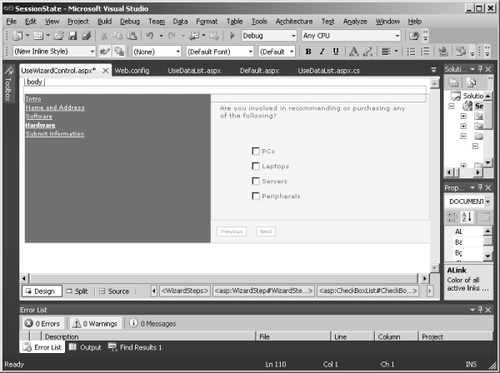
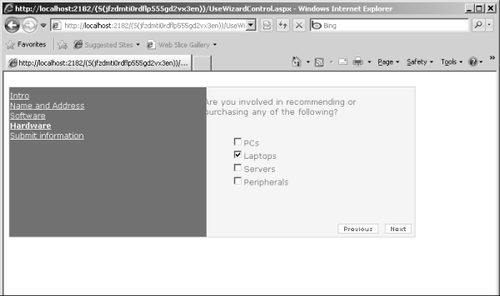
The Hardware step should include several check boxes listing common hardware types. Add a CheckBoxList with the ID CheckBoxListHardware and fill it with the values you see here:
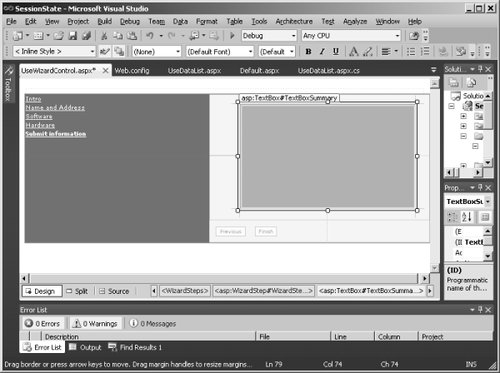
The Submit Information step (which you can use to show information before submitting) should include a multiline TextBox that summarizes the information collected. Give the TextBox the ID TextBoxSummary so that you can use it to display the summary:
Finally, edit the Page_Load method as shown in the following snippet to collect the information from each of the controls in the Wizard.
The controls are actually available as member variables on the page.
This information is loaded every time the page is loaded. However, it is
hidden from view until the user selects the step. Double-click the Wizard control to add a handler for the Finish button that you can use to harvest the information gathered by the wizard. protected void Page_Load(object sender, EventArgs e)
{
StringBuilder sb = new StringBuilder();
sb.Append("You are about to submit. \n");
sb.Append(" Personal: \n");
sb.AppendFormat(" {0}\n", this.TextBoxName.Text);
sb.AppendFormat(" {0}\n", this.TextBoxAddress.Text);
sb.AppendFormat(" {0}\n", this.TextBoxCity.Text);
sb.AppendFormat(" {0}\n", this.TextBoxState.Text);
sb.AppendFormat(" {0}\n", this.TextBoxPostalCode.Text);
sb.Append("\n Software: \n");
foreach (ListItem listItem in CheckBoxListSoftware.Items)
{
if (listItem.Selected)
{
sb.AppendFormat(" {0}\n", listItem.Text);
}
}
sb.Append("\n Hardware: \n");
foreach (ListItem listItem in CheckBoxListHardware.Items)
{
if (listItem.Selected)
{
sb.AppendFormat(" {0}\n", listItem.Text);
}
}
this.TextBoxSummary.Text = sb.ToString();
}
protected void Wizard1_FinishButtonClick(object sender,
WizardNavigationEventArgs e)
{
// Do something with the data here
}
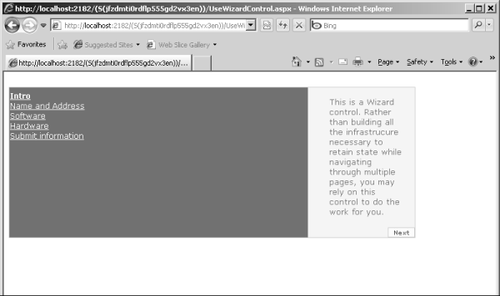
Now
run the page and go through the steps. You should see each step along
the way and then finally a summary of the information collected. If the
wizard on your page doesn't start with the first step (Intro), it's probably because you're running the page in the debugger and a wizard step other than Intro
is selected in the Designer. Simply select Intro in the Designer and
rerun the page. The following graphic shows the intro step in the
Designer:
Here's the name and address step.
Here's the software step:

Here's the hardware step.
Here's the final step.

|
