Maintaining Your Privacy While Reading Email
You wouldn’t think that
the simple act of reading an email message would have privacy
implications, but you’d be surprised. There are actually two scenarios
that compromise your privacy: read receipts and web bugs.
Blocking Read Receipts
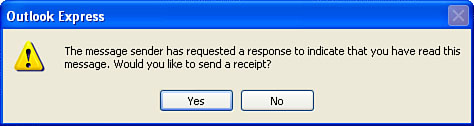
A read receipt
is an email notification that tells the sender that you’ve opened the
message that was sent to you. If the sender requests a read receipt and
you either select the message (so that the message text appears in the
preview pane) or double-click the message to open it, Outlook Express displays the dialog box shown in Figure 1. Click Yes to send the receipt, or click No to skip it.
Many people like
asking for read receipts because they offer proof of delivery. It has
been my experience, however, that getting a read receipt back starts a
kind of internal clock that the sender uses to measure how long it takes
you to respond after reading the message. Because of this annoyance,
and because I feel it’s nobody’s business to know when I read a message,
I always click No when asked to send a read receipt. (Spammers, too,
sometimes request read receipts as a way of validating email addresses.)
In fact, you can go one better and tell Outlook Express to never send a
read receipt:
1. | Select Tools, Options to display the Options dialog box.
|
2. | Display the Receipts tab.
|
3. | In the Returning Read Receipts group, activate the Never Send a Read Receipt option.
|
4. | Click OK.
|
Squashing Web Bugs
A web bug
is an image that resides on a remote server and that is added to an
HTML-formatted email message by referencing a URL on the remote server.
When you open the message, Outlook Express uses the URL to download the
image for display within the message. That sounds harmless enough, but
if the message is junk email, it’s likely that the URL will also contain
either your email address or a code that points to your email address.
When the remote server gets a request for this URL, it knows not only
that you’ve opened the message, but also that your email address is
legitimate.
You have three ways to combat web bugs:
Don’t open a
message that you suspect to be spam, and don’t preview the message in
the Outlook Express preview pane. In fact, before you can delete the
message, you’ll need to turn off the preview pane temporarily.
Install
the Internet Explorer 6 Service Pack 1 or the Windows XP Service Pack 2
(or a later service pack, if one is available by the time you read
this). This service pack also updates Outlook Express. In particular, it
gives you an easy way to thwart web bugs (although it also thwarts
other message formatting, as well). In Outlook Express,
select Tools, Options, choose the Read tab, and then activate the Read
All Messages in Plain Text check box. This prevents Outlook Express from
downloading any web bugs because it displays all messages in plain
text.
Install
the Windows XP Service Pack 2 (or a later service pack, if one is
available). This update includes an option that is specifically designed
to squash web bugs. In Outlook Express, select Tools, Options, choose
the Security tab, and then activate the Block Images and Other External
Content in HTML E-mail check box. This prevents Outlook Express from
downloading web bugs and any other items that would otherwise come from
some remote server.
Sending and Receiving Secure Email
When you connect to a website, your browser sets up a direct connection—called a channel—between
your machine and the web server. Because the channel is a direct link,
it’s relatively easy to implement security because all you have to do is
secure the channel.
However, email
security is entirely different and much more difficult to set up. The
problem is that email messages don’t have a direct link to a Simple Mail
Transfer Protocol (SMTP) server. Instead, they must usually hop from
server to server until the final destination is reached. Combine this
with the open and well-documented email standards used on the Internet,
and you end up with three email security issues:
The privacy issue—
Because messages often pass through other systems and can even end up
on a remote system’s hard disk, it isn’t that hard for someone with the
requisite know-how and access to the remote system to read a message.
The tampering issue—
Because a user can read a message passing through a remote server, it
comes as no surprise that he can also change the message text.
The authenticity issue— With the Internet email standards an open book, it isn’t difficult for a savvy user to forge or spoof an email address.
To solve these issues, the Internet’s gurus came up with the idea of encryption.
When you encrypt a message, a complex mathematical formula scrambles
the message content to make it unreadable. In particular, a key value
is incorporated into the encryption formula. To unscramble the message,
the recipient feeds the key into the decryption formula.
This single-key encryption works, but its major drawback is that the sender and the recipient must both have the same key. Public-key encryption overcomes that limitation by using two related keys: a public key and a private key.
The public key is available to everyone, either by sending it to them
directly or by offering it in an online key database. The private key is
secret and is stored on the user’s computer.
Here’s how public-key cryptography solves the issues discussed earlier:
Solving the privacy issue—
When you send a message, you obtain the recipient’s public key and use
it to encrypt the message. The encrypted message can now only be
decrypted using the recipient’s private key, thus assuring privacy.
Solving the tampering issue— An
encrypted message can still be tampered with, but only randomly because
the content of the message can’t be seen. This thwarts the most
important skill used by tamperers: making the tampered message look
legitimate.
Solving the authenticity issue—
When you send a message, you use your private key to digitally sign the
message. The recipient can then use your public key to examine the
digital signature to ensure the message came from you.
If there’s a problem with
public-key encryption, it is that the recipient of a message must
obtain the sender’s public key from an online database. (The sender
can’t just send the public key because the recipient would have no way
to prove that the key came from the sender.) Therefore, to make all this
more convenient, a digital ID
is used. This is a digital certificate that states the sender’s public
key has been authenticated by a trusted certifying authority. The sender
can then include his or her public key in his or her outgoing messages.
Setting Up an Email Account with a Digital ID
To send secure messages using Outlook Express, you first have to obtain a digital ID. Here are the steps to follow:
1. | In Outlook Express, select Tools, Options and then display the Security tab.
|
2. | Click Get Digital ID. Internet Explorer loads and takes you to the Outlook Express digital ID page on the Web.
|
3. | Click a link to the certifying authority (such as VeriSign) you want to use.
|
4. | Follow
the authority’s instructions for obtaining a digital ID. (Note that
digital IDs are not free; they typically cost about $15 U.S. per year.)
|
With your digital ID installed, the next step is to assign it to an email account:
1. | In Outlook Express, select Tools, Accounts to open the Internet Accounts dialog box.
|
2. | Use the Mail tab to select the account you want to work with and then click Properties. The account’s property sheet appears.
|
3. | Display the Security tab.
|
4. | In the Signing Certificate group, click Select. Outlook Express displays the Select Default Account Digital ID dialog box.
|
5. | Make
sure that the certificate you installed is selected and then click OK.
Your name appears in the Security tab’s first Certificate box.
|
6. | Click OK to return to the Internet Accounts dialog box.
|
7. | Click Close.
|
Tip
To
make a backup copy of your digital ID, open Internet Explorer and
select Tools, Internet Options. Display the Content tab and click
Certificates to see a list of your installed certificates (be sure to
use the Personal tab). Click your digital ID and then click Export.
