Adding the Custom Animation to Your Game
Now that the processor is done, add a reference to the CustomAvatarAnimationPipelineExtension project to the content project. Expand the AvatarCustomAnimationSampleContent project. Right-click the References list and select Add Reference. Select the Projects tab and select the CustomAvatarAnimationPipelineExtension project. Next, add the animation you built to the content project. Right-click the AvatarCustomAnimationSampleConent
project and select Add -> Existing Item. Locate the animation fbx
file that you created in your 3D content creation package and click the
Add button.
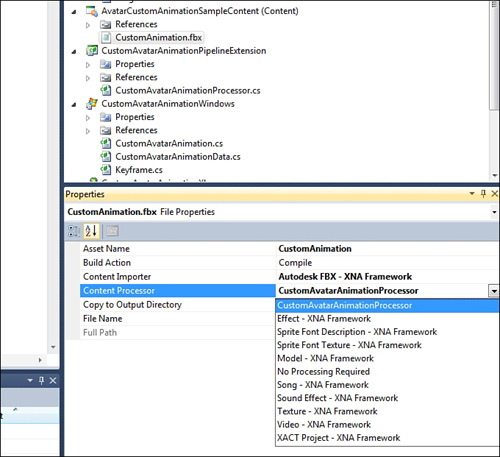
With the new content
item added to the content project, we n change the processor to use when
building the content item. Click the animation fbx file in the content
project and locate the properties panel. Under the properties panel, in
Content Processor, click the drop-down and select CustomAvatarAnimationProcessor as shown in Figure 7.
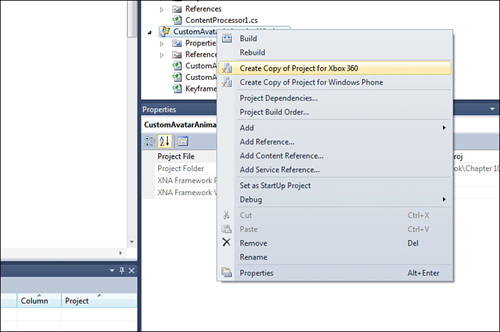
The sample project, AvatarCustomAnimationSample, is an Xbox 360 project, but it should use the types you created previously in the CustomAvatarAnimationWindows
project. To use these types, build them as a library for the Xbox 360.
Fortunately, this is a common scenario and an easy way to create the
Xbox 360 version of the library. Right-click the CustomAvatarAnimationWindows project and select the Create Copy of Project for Xbox 360 menu option as shown in Figure 8.
After the new project is created, rename the project CustomAvatarAnimationXbox. Your AvatarCustomAnimationSample project now needs a reference to the new project, so expand the AvatarCustomAnimationSample project and right-click the Reference list. Select the Add Reference menu item. Click the Projects tab and select the CustomAvatarAnimationXbox project.
Updating Your Game to Use the Custom Animation
You
need to make only a few minor updates to use the new custom animation
type.
First, add the namespace you used for the custom animation types by adding the following line to your game class file:
using CustomAvatarAnimation;
Next, you need a member variable to store the custom animation. Add the following member variable to your Game class:
AvatarCustomAnimation customAvatarAnimation;
To load the AvatarCustomAnimation, add the following lines to your LoadContent method:
// Load the custom animation
CustomAvatarAnimationData animationData =
Content.Load<CustomAvatarAnimationData>("CustomAnimation");
customAvatarAnimation = new AvatarCustomAnimation(animationData);
The fbx file is converted into a CustomAvatarAnimationData using the custom content pipeline processor. Then, use the ContentManager to load the file. You can then create a AvatarCustomAnimation instance using the CustomAvatarAnimationData.
Now, you can use the AvatarCustomAnimation just like you use an AvatarAnimation. In the game’s Update method, call the animations Update method. Add the following to your game’s Update method:
customAvatarAnimation.Update(gameTime.ElapsedGameTime, true);
The final step is to use the animation with the AvatarRenderer Draw method. Add the following to your game’s Draw method.
avatarRenderer.Draw(customAvatarAnimation);
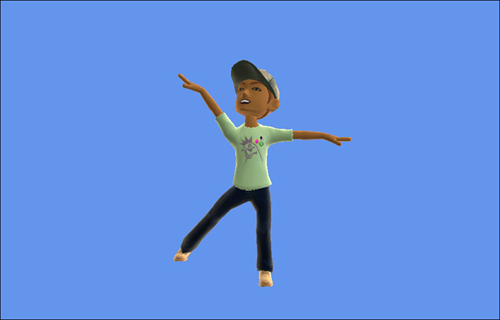
Running the sample now shows a random avatar playing back your custom animation. Figure 9 shows the avatar playing the custom animation created for this sample.