In the 1890s, American
puzzle-make Sam
Loyd popularized a puzzle that was invented a couple decades earlier and
has since come to be known as the 15 Puzzle, or the 14-15 Puzzle, or
(in France) Jeu de Taquin, the “teasing game.” In its classic form, the
puzzle consists of 15 tiles labeled 1 through 15 arranged randomly in a
4x4 grid, leaving one blank tile. The goal is to shift the tiles around
so the numbers are sequential.
In computer form, this puzzle
was one of the first game programs created for the Apple Macintosh,
where it was called PUZZLE. A Windows version appeared in early versions
of the Microsoft Windows Software Development Kit (SDK) under the name
MUZZLE, where it was the only sample program in the SDK coded in
Microsoft Pascal rather than C.
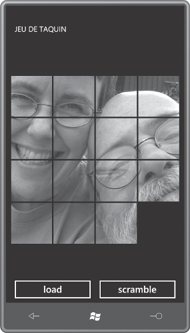
The version I’m going to show
you does not use numbered tiles. Instead it lets you access a photo from
the phone’s picture library and chops that up into tiles. (The game
becomes rather more difficult as a result.) As a bonus, the program
shows you how to save images when an application is tombstoned.
The program’s content area consists of a Grid named playGrid
(used for holding the tiles) and two buttons:
Example 1. Silverlight
Project: JeuDeTaquin File: MainPage.xaml (excerpt)
<Grid x:Name="ContentPanel" Grid.Row="1" Margin="12,0,12,0">
    <Grid.RowDefinitions>
        <RowDefinition Height="*" />
        <RowDefinition Height="Auto" />
    </Grid.RowDefinitions>

    <Grid.ColumnDefinitions>
        <ColumnDefinition Width="*" />
        <ColumnDefinition Width="*" />
    </Grid.ColumnDefinitions>

    <Grid Name="playGrid"
          Grid.Row="0" Grid.Column="0" Grid.ColumnSpan="2"
          HorizontalAlignment="Center"
          VerticalAlignment="Center" />

    <Button Content="load"
            Grid.Row="1" Grid.Column="0"
            Click="OnLoadClick" />

    <Button Name="scrambleButton"
            Content="scramble"
            Grid.Row="2" Grid.Column="1"
            IsEnabled="False"
            Click="OnScrambleClick" />
</Grid>
|
Seemingly redundantly, the XAML
file also includes two buttons in the ApplicationBar
also labeled “load” and “scramble”:
Example 2. Silverlight
Project: JeuDeTaquin File: MainPage.xaml (excerpt)
<phone:PhoneApplicationPage.ApplicationBar>
    <shell:ApplicationBar IsVisible="False">
        <shell:ApplicationBarIconButton x:Name="appbarLoadButton"
                                        IconUri="/Images/appbar.folder.rest.png"
                                        Text="load"
                                        Click="OnLoadClick" />

        <shell:ApplicationBarIconButton x:Name="appbarScrambleButton"
                                        IconUri="/Images/appbar.refresh.rest.png"
                                        Text="scramble"
                                        IsEnabled="False"
                                        Click="OnScrambleClick" />
    </shell:ApplicationBar>
</phone:PhoneApplicationPage.ApplicationBar>
|
I couldn’t get the
randomizing feature to work when it was initiated from the ApplicationBar, but I
left in the markup (and the code) and set IsVisible
to false. Maybe someday the ApplicationBar will behave better.
The MainPage class in the code-behind file begins with some
constants. The program is set up for 4 tiles horizontally and vertically
but you can change those. (Obviously in Portrait mode, the program
works best if VERT_TILES is greater than HORZ_TILES.) Other fields
involve storing state information in the PhoneApplicationService object for tombstoning, and using the PhotoChooserTask for picking a photo.
The tileImages array is extremely important. This array stores all the Image elements
for the tiles. At any time, one of the members of this array will be null, representing
the empty space. That empty space is also indicated by the emptyRow and emptyCol
indices.
Example 3. Silverlight
Project: JeuDeTaquin File: MainPage.xaml.cs (excerpt)
public partial class MainPage : PhoneApplicationPage
{
    const int HORZ_TILES = 4;
    const int VERT_TILES = 4;
    const int MARGIN = 2;

    PhoneApplicationService appService = PhoneApplicationService.Current;
    PhotoChooserTask photoChooser = new PhotoChooserTask();
    Random rand = new Random();

    Image[,] tileImages = new Image[VERT_TILES, HORZ_TILES];
    bool haveValidTileImages;
    int emptyRow, emptyCol;
    int scrambleCountdown;

    public MainPage()
    {
        InitializeComponent();

        for (int col = 0; col < HORZ_TILES; col++)
        {
            ColumnDefinition coldef = new ColumnDefinition();
            coldef.Width = new GridLength(1, GridUnitType.Star);
            playGrid.ColumnDefinitions.Add(coldef);
        }

        for (int row = 0; row < VERT_TILES; row++)
        {
            RowDefinition rowdef = new RowDefinition();
            rowdef.Height = new GridLength(1, GridUnitType.Star);
            playGrid.RowDefinitions.Add(rowdef);
        }

        appbarScrambleButton = this.ApplicationBar.Buttons[1] as
ApplicationBarIconButton;

        photoChooser.Completed += OnPhotoChooserCompleted;
    }
    . . .
}
|
In the constructor,
the program initializes the ColumnDefinition
and RowDefinition collections of the Grid that holds the
tiles, and (as usual) sets a handler for the Completed
event of the PhotoChooserTask.
When the user clicks the
button labeled “load”, the program determines how large each tile should
be based on the width and height of the content area, the number of
tiles, and the margin. This value is set to the PixelWidth and PixelHeight
properties of the PhotoChooserTask:
Example 4. Silverlight
Project: JeuDeTaquin File: MainPage.xaml.cs (excerpt)
void OnLoadClick(object sender, EventArgs args)
{
    int tileSize = (int)Math.Min(ContentPanel.ActualWidth / HORZ_TILES,
                                 ContentPanel.ActualHeight / VERT_TILES)
                   - 2 * MARGIN;

    photoChooser.PixelWidth = tileSize * HORZ_TILES;
    photoChooser.PixelHeight = tileSize * VERT_TILES;
    photoChooser.Show();
}
|
On return from the PhotoChooserTask, the event handler divides the bitmap into
small square tiles and creates an Image element for each square. The SubdivideBitmap
program earlier in this article showed how to chop up a bitmap into
squares using the Render method of WriteableBitmap. This
program instead does it by creating WriteableBitmap objects of the tile size, and then copying pixels into their individual Pixels arrays from the full-size returned
bitmap:
Example 5. Silverlight
Project: JeuDeTaquin File: MainPage.xaml.cs (excerpt)
void OnPhotoChooserCompleted(object sender, PhotoResult args)
{
    if (args.Error == null && args.ChosenPhoto != null)
    {
        BitmapImage bitmapImage = new BitmapImage();
        bitmapImage.SetSource(args.ChosenPhoto);
        WriteableBitmap writeableBitmap = new WriteableBitmap(bitmapImage);
        int tileSize = writeableBitmap.PixelWidth / HORZ_TILES;

        emptyCol = HORZ_TILES - 1;
        emptyRow = VERT_TILES - 1;

        for (int row = 0; row < VERT_TILES; row++)
            for (int col = 0; col < HORZ_TILES; col++)
                if (row != emptyRow || col != emptyCol)
                {
                    WriteableBitmap tile = new WriteableBitmap(tileSize, tileSize);

                    for (int y = 0; y < tileSize; y++)
                        for (int x = 0; x < tileSize; x++)
                        {
                            int yBit = row * tileSize + y;
                            int xBit = col * tileSize + x;

                            tile.Pixels[y * tileSize + x] =
                                writeableBitmap.Pixels[yBit *
                                            writeableBitmap.PixelWidth + xBit];
                        }
                    GenerateImageTile(tile, row, col);
                }

        haveValidTileImages = true;
        scrambleButton.IsEnabled = true;
        appbarScrambleButton.IsEnabled = true;
    }
}

void GenerateImageTile(BitmapSource tile, int row, int col)
{
    Image img = new Image();
    img.Stretch = Stretch.None;
    img.Source = tile;
    img.Margin = new Thickness(MARGIN);
    tileImages[row, col] = img;

    Grid.SetRow(img, row);
    Grid.SetColumn(img, col);
    playGrid.Children.Add(img);
}
|
Actually creating the Image
elements and adding them to the Grid
is the responsibility of the GenerateImageTile,
which also stores the Image elements
in the tileImages array.
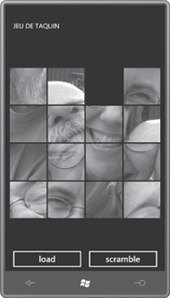
At this point, the tiles are
not in a random order, but it’s still possible to move them around. As
you begin thinking about how tiles move, you’ll discover that it’s
algorithmically much simpler than you might have initially guessed.
Think about it in terms of the empty square. What tiles can be moved into that square?
Only the tiles on the left, top, right, and bottom of that square, and
those tiles can move in only one direction. This means that the user
interface need only take account of taps and not bother with any type of
tile sliding.
If you think about the game
further, you’ll see that you can move multiple tiles at once by tapping
any tile in the same row or the same column as the empty square. There’s
absolutely no ambiguity.
Here’s the entire manipulation
logic:
Example 6. Silverlight
Project: JeuDeTaquin File: MainPage.xaml.cs (excerpt)
protected override void OnManipulationStarted(ManipulationStartedEventArgs args)
{
    if (args.OriginalSource is Image)
    {
        Image img = args.OriginalSource as Image;
        MoveTile(img);
        args.Complete();
        args.Handled = true;
    }
    base.OnManipulationStarted(args);
}

void MoveTile(Image img)
{
    int touchedRow = -1, touchedCol = -1;

    for (int y = 0; y < VERT_TILES; y++)
        for (int x = 0; x < HORZ_TILES; x++)
            if (tileImages[y, x] == img)
            {
                touchedRow = y;
                touchedCol = x;
            }

    if (touchedRow == emptyRow)
    {
        int sign = Math.Sign(touchedCol - emptyCol);

        for (int x = emptyCol; x != touchedCol; x += sign)
        {
            tileImages[touchedRow, x] = tileImages[touchedRow, x + sign];
            Grid.SetColumn(tileImages[touchedRow, x], x);
        }
        tileImages[touchedRow, touchedCol] = null;
        emptyCol = touchedCol;
    }
    else if (touchedCol == emptyCol)
    {
        int sign = Math.Sign(touchedRow - emptyRow);

        for (int y = emptyRow; y != touchedRow; y += sign)
        {
            tileImages[y, touchedCol] = tileImages[y + sign, touchedCol];
            Grid.SetRow(tileImages[y, touchedCol], y);
        }
        tileImages[touchedRow, touchedCol] = null;
        emptyRow = touchedRow;
    }
}
|
The MoveTile method first determines the row and column of the
tile that the user touched. For anything to happen, this row must be the
row or the column with the empty square. (It can’t be both.) Rather
generalized for
loops move multiple tiles up, down, left, or right.
The randomizing logic
piggy-backs on this manipulation
logic. When the “scramble” button is clicked, the program attaches a
handler for the CompositionTarget.Rendering
event:
Example 7. Silverlight
Project: JeuDeTaquin File: MainPage.xaml.cs (excerpt)
void OnScrambleClick(object sender, EventArgs args)
{
    scrambleCountdown = 10 * VERT_TILES * HORZ_TILES;
    scrambleButton.IsEnabled = false;
    appbarScrambleButton.IsEnabled = false;
    CompositionTarget.Rendering += OnCompositionTargetRendering;
}

void OnCompositionTargetRendering(object sender, EventArgs args)
{
    MoveTile(tileImages[emptyRow, rand.Next(HORZ_TILES)]);
    MoveTile(tileImages[rand.Next(VERT_TILES), emptyCol]);

    if (--scrambleCountdown == 0)
    {
        CompositionTarget.Rendering -= OnCompositionTargetRendering;
        scrambleButton.IsEnabled = true;
        appbarScrambleButton.IsEnabled = true;
    }
}
|
The event handler calls MoveTile twice, once to move a tile from the same row as the
empty square, and secondly to move a tile from the same column as the
empty square.
This program also handles tombstoning, which means that it saves the entire game state when the
user navigates away from the page, and restores that game state when the
game is re-activated.
I managed to restrict game state
to just a few fields: The haveValidTileImages field is true if
the tileImages array contains valid Image elements;
otherwise there’s really nothing going on. The emptyRow
and emptyCol
fields are also crucial. Most important, of course, are the actual
bitmaps that make up the tiles. Rather than save the entire Pixels array of each WriteableBitmap, I
decided to save space by saving these images in a compressed JPEG format:
Example 8. Silverlight
Project: JeuDeTaquin File: MainPage.xaml.cs (excerpt)
protected override void OnNavigatedFrom(NavigationEventArgs args)
{
    appService.State["haveValidTileImages"] = haveValidTileImages;

    if (haveValidTileImages)
    {
        appService.State["emptyRow"] = emptyRow;
        appService.State["emptyCol"] = emptyCol;

        for (int row = 0; row < VERT_TILES; row++)
            for (int col = 0; col < HORZ_TILES; col++)
                if (col != emptyCol || row != emptyRow)
                {
                    WriteableBitmap tile = tileImages[row, col].Source as
WriteableBitmap;
                    MemoryStream stream = new MemoryStream();
                    tile.SaveJpeg(stream, tile.PixelWidth, tile.PixelHeight, 0, 75);
                    appService.State[TileKey(row, col)] = stream.GetBuffer();
                }
    }
    base.OnNavigatedFrom(args);
}

. . .

string TileKey(int row, int col)
{
    return String.Format("tile {0} {1}", row, col);
}
|
For each Image
element in the tileImages array, the program obtains the corresponding WriteableBitmap and creates a new MemoryStream. The extension method SaveJpeg allows saving the WriteableBitmap in JPEG format into the
stream. The GetBuffer method of MemoryStream obtains a byte array
that is simply saved with the other state information.
When the program returns
from its tombstoned state,
the process goes in reverse:
Example 9. Silverlight
Project: JeuDeTaquin File: MainPage.xaml.cs (excerpt)
protected override void OnNavigatedTo(NavigationEventArgs args)
{
    object objHaveValidTileImages;

    if (appService.State.TryGetValue("haveValidTileImages", out objHaveValidTileImages)
&&
        (bool)objHaveValidTileImages)
    {
        emptyRow = (int)appService.State["emptyRow"];
        emptyCol = (int)appService.State["emptyCol"];

        for (int row = 0; row < VERT_TILES; row++)
            for (int col = 0; col < HORZ_TILES; col++)
                if (col != emptyCol || row != emptyRow)
                {
                    byte[] buffer = (byte[])appService.State[TileKey(row, col)];
                    MemoryStream stream = new MemoryStream(buffer);
                    BitmapImage bitmapImage = new BitmapImage();
                    bitmapImage.SetSource(stream);
                    WriteableBitmap tile = new WriteableBitmap(bitmapImage);
                    GenerateImageTile(tile, row, col);
                }

        haveValidTileImages = true;
        appbarScrambleButton.IsEnabled = true;
    }

    base.OnNavigatedTo(args);
}
|
The method reads the byte buffer and converts into a MemoryStream,
from which a BitmapImage and then a WriteableBitmap is created. The method then
uses the earlier GenerateTileImage
method to create each Image element and
add it to the Grid.
It’s important to keep in mind that this byte array used to
save and restore the bitmap is very different from the int array
available from the Pixels property of WriteableBitmap. The Pixels array has a
value for every pixel in the bitmap, but the byte array is the compressed bitmap in JPEG
format, with all the JPEG file information and headers and such.
