By generating the document
from an XML Web service, InfoPath allows us to create a functional user
interface in a matter of minutes as opposed to hours or days in other
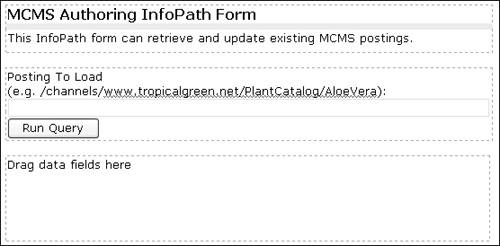
environments. To allow the user to enter the path of a posting and query
the Web service, follow these steps:
1. | In the task pane, select the Data Source category.
|
2. | Expand myFields, queryFields, and s0:GetPosting.
|
3. | Drag the strPath element into the area on the form labeled Drag query fields here.
|
4. | Change the label strPath to Posting To Load (e.g. /Channels/www.TropicalGreen.net/PlantCatalog/AloeVera).
|
5. | Drag the Run Query button into the space below the strPath textbox, and remove the extra line breaks where the Run Query button previously was.
|
6. | Select the bottom border of the layout table and drag it up to reduce the height of the table.
 |
Our form now allows a user
to enter the path of a posting, which is passed to the ASP.NET Web
service, which returns a serialized LightweightPosting object.
Let’s create the user interface that displays the posting’s properties and allows them to be edited.
1. | In the Data Source pane, expand dataFields and s0:GetPostingResponse.
|
2. | Drag the GetPostingResult node on top of the Drag data fields here label.
|
3. | A
context menu will appear listing actions that can be performed. For
this node, we will create the section with controls, so click Section with Controls.

|
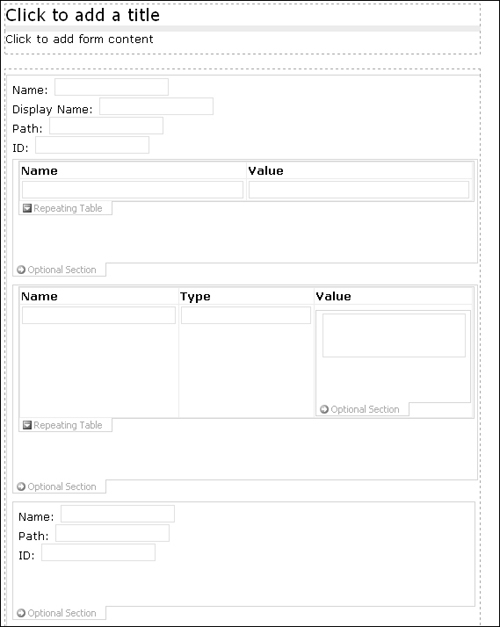
4. | The
following form has now been generated. Don’t worry about the layout for
now, we’ll make it friendlier to use in the next section.
 |