Troubleshooting Windows
Vista Remote Access Connections
Windows Vista remote
access connections all have the capability to draw on Microsoft’s
Network Diagnostic Framework. This is the same troubleshooting utility
used on LAN and WLAN connections. If a connection error occurs on a VPN
connection attempt, run the diagnostic utility to determine the cause
and possibly render a solution.
Managing Remote Client
Access Connections
Microsoft includes a
utility for managing the setup of remote client access connections on
client computers. The Connection Manager Administration Kit (CMAK)
allows for the creation of remote access connections and their
distribution to client computers. You can access the CMAK tool by
installing the administration tools using the Adminpak.msi file. This file can be found in the C:\Windows\System32 folder of a Windows Server 2003 computer.
Tip
When installing Adminpak.msi, be sure to use elevated permissions
and ensure the account used to run the installation is a member of the
local Administrators group. If not, you will experience problems as
noted in the support article number 930056 titled “You experience
installation errors and compatibility problems when you install Windows
Server 2003 management tools on a Windows Vista-based computer.”
Also be sure to run the CMAK
utility with elevated permissions by right-clicking the utility from the
menu and selecting Run As from the
menu.
After installing the
administration tools, you can run CMAK and begin to create service
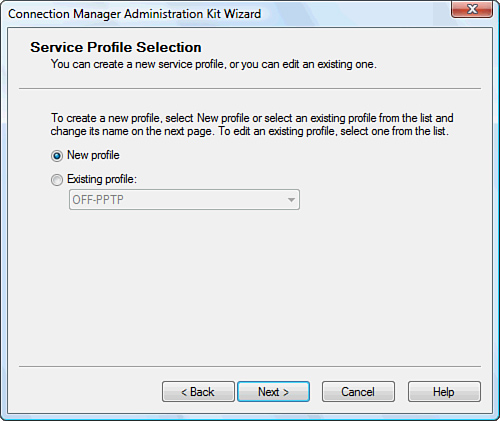
profiles that contain connection settings. Figure 1 shows the initial screen after the Welcome screen.

After selecting to use an
existing profile or create a new profile, you are asked to create a
service name and filename for storing the profile. The wizard then asks
additional information regarding the connection, such as whether a user
requires the use of a domain name for a connection and whether you want
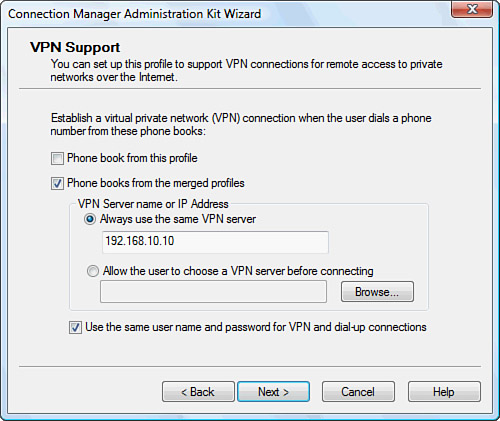
to merge some profiles. If this connection is a VPN connection, you are
given another dialog box to configure the VPN connection properties, as
shown in Figure 2.

After completing the rest of
the CMAK wizard and adding in any requested or needed customizations,
you can roll out the new service profile as it is
now called. To roll out this profile, you can use a GPO, use a logon
script, or have users initiate its installation by installing from a
share. The CMAK profile can be integrated into your desktop image for a
new installation.
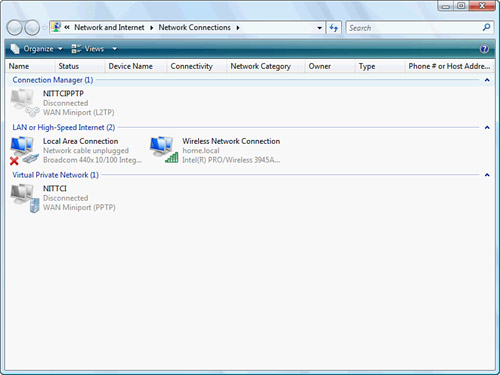
After it is installed, the
service profile is accessible as an available connection. You access it
by selecting Manage Network Connections through Network and Sharing Center, as shown in Figure 3.

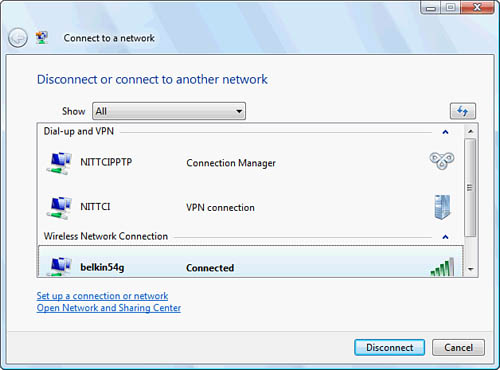
Alternatively,
you can find any created connection by clicking through the following
path off the Start menu by clicking Start
> Connect To. Figure 4 shows the resulting dialog box from following this path to
accessing your connections.
