After successfully acquiring the necessary images and
user state for the upgrade or migration process and deploying the
images, you need to tidy up the deployed computers.
Restoring User State Data
If the computers have been
upgraded with profiles contained locally, all that is necessary for you
to complete the installation is to check for any issues with the
profiles and ensure their operability. For the computers that have been
upgraded that utilize roaming profiles or the computers that were
migrated, you need USMT’s LoadState utility to complete the process
because the profile structure in Windows Vista is different from other
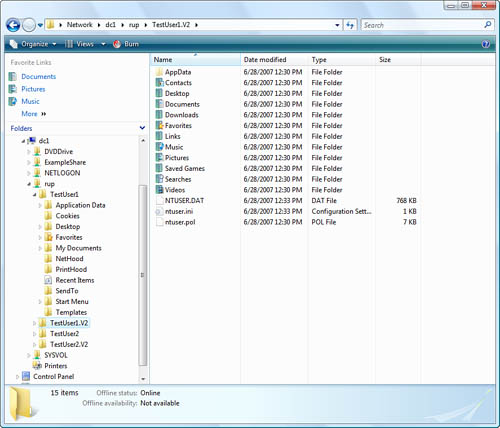
legacy Window computers. The profile in Figure 1 shows a vastly reconstructed directory structure for a user’s profile.
LoadState restores user
state data stored in a central location to a system migrated to Windows
Vista. LoadState can even restore EFS files that are accessible to the
original user as long as the certificates were originally captured
during the previous ScanState process. LoadState has several options;
the common ones are listed in Table 1.
Table 1. USMT’s LoadState Utility’s Commonly Used Options
| Option | Description |
|---|
| /decrypt /key: | Decrypts the data store with the specified key. |
| /q | Allows LoadState to run without administrative credentials and migrate only the settings and account of the logged-on user. |
| /c | Allows
LoadState to continue even if errors are encountered. The errors
encountered must be nonfatal. Without this option, LoadState exits upon
encountering the first error. |
| /i: | Specifies the .XML file that contains the rules that define what is migrated. Rules to migrate applications are contained in MigApp.xml, rules to migrate user settings are in MigUser.xml, and rules to migrate system files are contained in MigSys.xml
(this file is unnecessary if the source or destination is running
Windows Vista because the manifests files located in Windows Vista
contain this information. A Config.xml file is needed to customize migrated system settings.) |
| /config: | Specifies the Config.xml to use to customize migrated system settings. |
| /all | Allows LoadState to migrate all users with this option. Only an administrator of the computer can use this option. |
| /md: | Moves a computer from a workgroup or another domain into the new domain. |
| /lac: | Specifies
for LoadState to create the account if the user account is to be a
local (nondomain) account on the destination computer. |
| /lae: | Enables the accounts created with /lac. The /lac option must be specified with this option. |
| /v: | Specifies verbosity level for logging. |
Ensuring Driver Availability
Hardware
devices for Windows Vista are constantly increasing in numbers. In
addition, the existing drivers available within the Windows Vista source
image files offered by Microsoft may already be obsolete. To
accommodate the need to add new drivers to a Windows PE image or a
Windows Vista image, Microsoft has once again created several tools to
aid in this process.
Adding Drivers to Windows PE Images
Windows PE 2.0 comes with preset drivers to boot on most hardware. Device drivers
for particular sound cards, video cards, or other specialty devices may
not be present in the default image. You have two ways to add drivers
to a Windows PE 2.0 image. You can use the PEimg
utility to package the driver with the Windows PE image to ensure its
availability while Windows PE is booting the system. The second way is
to use the Drvload
utility. This utility allows you to dynamically load drivers after
Windows PE has already booted the computer. This allows you to add a
driver on the fly that you did not count on or if the prestaged driver
for the device that was in or added to the Windows PE image is
insufficient or incorrect.
If you package the drivers using the PEimg utility, you then use the Oscdimg utility to create an .ISO file out of your Windows PE image. You can then burn this WinPE.iso image file to a DVD.
Adding Drivers to Windows Vista Images
After testing an image
deployed to a base system, you discover, for example, that additional or
updated drivers are required for proper deployment. You again have one
of two methods to add drivers to your Windows Vista image file.
Using the Package Manager (Pkgmgr or Pkgmgr.exe) utility, which is found within the %WinDir%\system32 folder of a Windows Vista installation, you can add an answer file that was created with Windows SIM to an offline .WIM file. The answer file has the added drivers. To mount a .WIM file for offline use, you use ImageX. After you have added the additional answer files and drivers to the .WIM file, you then unmount the .WIM file and commit the changes. When you use this method, the drivers are added to the driver store.
Using this method for device
driver deployment allows for devices to be detected during the setup or
boot critical phase in addition to having drivers available for Plug
and Play after the image has been deployed. In other words, after the
image has been deployed, you can add a device to the computer,
hot-plugged like a USB or FireWire. Plug and Play takes effect at the
prescribed time, and the driver is pulled from the local device driver
store. The legacy driver.cab file has been replaced with the driver store in Windows Vista.
If a particular driver is
required or desired to be available during the WindowsPE or
offlineServicing configuration phase of a Windows Vista boot process,
you have another way to go. Once again, you need to assemble another
answer file using Windows SIM. This time the driver information is added
to the Microsoft-Windows-PnPCustimizationsWinPE node as opposed to the
Microsoft-Windows-PnPCustimizationsNonWinPE node used in the prior
answer file to stage the use of the driver. Using this component from
the answer file allows the driver to be called from the answer file but
stored within the driver store of the .WIM
file. Instead, a path value is required with the use of this component
to specify a location where the driver files will be called upon when
requested by the Windows boot process. The answer file created here is
not packaged with the .WIM file but instead is called upon by the Setup process during installation.
