1. Integrating with HTML
Silverlight offers two paths for integrating with traditional Web content (that is, HTML). First, Silverlight components can access the Document Object Model (DOM). Second, JavaScript within a Web page can access Silverlight components.
To access HTML elements from within Silverlight, use the System.Windows.Browser.HtmlDocument class. The HtmlDocument class is loaded with the HTML Document Object Model of the currently loaded Web page. It's available through the static Document member of System.Windows.Browser.HtmlPage. You can find elements identified in the HTML document using HtmlDocument.GetElementByName or HtmlDocument.GetElementById.
From there, you can access the data within the tags and use the data
programmatically. In addition, you can attach managed events to the HTML
elements (for example, to input buttons) and handle the events from
managed code rather than from JavaScript.
For example, take a look at the following code, which shows some HTML with the tags identified through the ID attribute:
<input id="input" type="text" />
<input id="submit" type="button" value="Submit" />
<div   id="output" />
Accessing the DOM is straightforward. In the Silverlight component code, declare separate HtmlElements for each tag you want to access within the DOM. You find the HtmlElement definition in the System.Windows.Browser namespace. The HtmlDocument class (available through the HtmlPage class) gives you access to the tags. The most useful methods of the HtmlElement class are GetProperty, SetProperty, and AttachEvent. The following code illustrates how to access the identified tags through the HtmlDocument
class. It also shows how to get and set properties within the tag and
how to attach events (for example, how to attach a click handler to the
button tag). The HTML DOM helper classes are in the System.Windows.Browser namespace.
namespace UseDOM
{
    public partial class MainPage : UserControl
    {
        HtmlElement _input;
        HtmlElement _output;
        HtmlElement _submit;

        public MainPage()
        {
            InitializeComponent();

            HtmlDocument document = HtmlPage.Document;
            _input = document.GetElementById("input");
            _output = document.GetElementById("output");
            _submit = document.GetElementById("submit");

            _submit.AttachEvent("onclick", OnSubmit);
        }

        void OnSubmit(object sender, HtmlEventArgs ea)
        {
            string input = (string)_input.GetProperty("value");
            string output = "you typed: " + input;
            _output.SetProperty("innerHTML", output);
        }
    }
}
So that you can access managed code from within JavaScript, Silverlight includes the [ScriptableType] attribute that you use to mark entire types as scriptable and the [ScriptableMember] attribute that you use to mark individual type members as scriptable. The System.Windows.HtmlPage class includes two methods for registering managed types to make them available to script: RegisterCreatableType allows fresh instances of the type to be created from within script, and RegisterScriptableObject allows access to already-existing instances of the type. From there, use the Silverlight
plug-in's content member to create the type or look up the existing
instance. Then, you can use the type from within script code and treat
it as though it was a normal JavaScript object.
2. Animations
One of the most compelling
features of Silverlight is how it gives you the ability to incorporate
animations in the content space. Silverlight provides a uniform and
consistent means of animating UI elements within a visual tree.
To understand how Silverlight animation works, you need to understand a bit about Silverlight dependency properties. Many Silverlight classes expose their properties as dependency properties, which work this way. As a concrete example, think about the Button control. Instead of storing properties such as Height and Width as actual data members within the Button class, Silverlight stores the actual data for these properties in a backing store managed by Silverlight. Backing store is simply a term that means that the underlying class or infrastructure provides the memory for the property data storage.
Each class gets its own storage
for data members, and the values are keyed to the class instance
identities. This might seem like an odd way to approach storing data
members, but it provides the developer two important features. First,
storing data this way can save a lot of instance data, which helps
performance (for example, by reducing garbage collections). Another main
feature is that when the values change (for any reason), Silverlight
can trigger events—for example, telling the scene to rearrange (and
redraw) itself. This eliminates the need to write all those painting
event handlers when any (from a possible multitude) of values change.
Animations best illustrate the value of dependency properties. All Silverlight animations generally work the same way:
Choose the property you wish to animate (only dependency properties can be animated).
Choose
from a number of animation drivers (there's one for most data types,
including double, integer values, Boolean values, colors, and so on).
Connect the animation driver to the property.
Create a storyboard to hold the animation and add the animation.
When the storyboard starts, it
uses the animation drivers to modify the target properties. Because the
target properties are dependency properties, changes become immediately
apparent. For example, if you animate the Width property of a button, you literally see the width of the button change.
Silverlight animations are configurable in many ways. For example, you can configure the following factors:
The duration of an animation
Whether an animation reverses automatically
The acceleration curve of an animation
How many times or how long an animation repeats
Finally, Silverlight offers
more complex animations, as well. For example, Silverlight offers key
frame animations and spline animations for nonlinear animation effects.
Following is an
exercise that shows how Silverlight animations work. This example shows
how you can animate a set of images so that they grow in height and
width, become more opaque, and then reset to their original state. The
example illustrates several concepts, including how to work with
animations within the code beside, transform UI elements visually and
animate the transform, and how binary resources are packed in the
Silverlight XAP container.
Animating the RenderTransform and Opacity properties of an image
Create a new Silverlight application named SilverlightAnimations. Have Visual Studio create an ASP.NET Web Project.
Add 5 ColumnDefinitions and 10 RowDefinitions to the Grid that is the LayoutRoot. This is all the XAML code you add in this example. The rest of the code lives in the code beside.
<UserControl x:Class="SilverlightAnimation.MainPage"
 xmlns="http://schemas.microsoft.com/winfx/2006/xaml/presentation"
 xmlns:x="http://schemas.microsoft.com/winfx/2006/xaml"
 xmlns:d="http://schemas.microsoft.com/expression/blend/2008"
 xmlns:mc="http://schemas.openxmlformats.org/markup-compatibility/2006"
 mc:Ignorable="d"

 DesignWidth="600" DesignHeight="300">
    <Grid x:Name="LayoutRoot"
          Background="White">
        <Grid.RowDefinitions>
            <RowDefinition></RowDefinition>
            <RowDefinition></RowDefinition>
            <RowDefinition></RowDefinition>
            <RowDefinition></RowDefinition>
            <RowDefinition></RowDefinition>
            <RowDefinition></RowDefinition>
            <RowDefinition></RowDefinition>
            <RowDefinition></RowDefinition>
            <RowDefinition></RowDefinition>
            <RowDefinition></RowDefinition>
        </Grid.RowDefinitions>
        <Grid.ColumnDefinitions>
            <ColumnDefinition></ColumnDefinition>
            <ColumnDefinition></ColumnDefinition>
            <ColumnDefinition></ColumnDefinition>
            <ColumnDefinition></ColumnDefinition>
            <ColumnDefinition></ColumnDefinition>
        </Grid.ColumnDefinitions>
    </Grid>
</UserControl>
Add
some images of the state flags so that there's something to animate. Go
to the final solution
and borrow the JPGs of the 50 state flags. From Solution Explorer,
right-click the SilverlightAnimation project and click Add, Folder. Name
the Folder Images. Right-click the Images folder and click Add, Existing Items. These images are JPEG
images of all 50 state flags. Including them as part of the project
makes them available to be loaded as images. The normal build action for
these images is to include them as resources. They will be transported
to the client computer.
Add
a class to manage all the state flags. Notice that the names of the
flag images follow the pattern <state abbreviation>.jpg. This new
class simply contains a list of all the state abbreviations. Right-click
the SilverlightAnimation project and click Add, New Item, and then
select Class (so that Visual Studio generates the code for a new class).
Name the class States. Visual Studio opens the code in the editor for you.
Derive the State class from the generic List class, and provide string
as the type argument. Then, add the abbreviations for all the states.
(If you'd like, you can borrow this code from the solution rather than
typing in all the state abbreviations.)
class States : List<string>
{
 public States()
 {
   Add("AL");
   Add("AK");
   Add("AZ");
   Add("AR");
   Add("CA");
   Add("CO");
   // more states...
   Add("WA");
   Add("WV");
   Add("WI");
   Add("WY");
 }
}
Open the file MainPage.xaml.cs, add code to MainPage constructor to load the images, and mark each cell with a TextBlock naming the state. Create an instance of the States class so that you can look up the state abbreviations. Iterate through all the columns and rows within the LayoutRoot. For each cell within the grid, create a TextBlock to show the state abbreviation. Get the state abbreviation from the instance of the States class and set the Text property to the state abbreviation. You can set various properties such as the FontSize and FontFamily to dress up the TextBlock. Add the TextBlock to the children collection of LayoutRoot. Use the TextBlock.SetRow and SetColumn static methods to position the TextBlock in the grid.
Next, create an instance of the Image class. Add a ScaleTransform to the Image.
You animate that a bit later. Use the current state abbreviation to
create a URI indicating the image containing the state flag (it is in
the Images folder). Finally, set the Opacity of the Image to a little less than half, add the Image to the LayoutRoot, and position it in the current row and column.
public MainPage()
{
 InitializeComponent();

 States states = new States();
 int stateNumber = 0;

 for (int column = 0; column < 5; column++)
 {
  for (int row = 0; row < 10; row++)
  {
     // get the state abbrev
     string stateAbbrev = states[stateNumber];

     TextBlock theTextBlock = new TextBlock();
     theTextBlock.FontSize = 22;
     theTextBlock.Text = stateAbbrev;
     theTextBlock.TextAlignment = TextAlignment.Center;
     theTextBlock.VerticalAlignment = VerticalAlignment.Center;
     LayoutRoot.Children.Add(theTextBlock);
     Grid.SetRow(theTextBlock, row);
     Grid.SetColumn(theTextBlock, column);

     // Add an image control to the grid
     Image theImage = new Image();
     ScaleTransform st = new ScaleTransform();
     st.ScaleX = 1; st.ScaleY = 1;
     theImage.RenderTransform = st;
     Uri uri =
     new Uri("Images/" +
      stateAbbrev + ".jpg", UriKind.Relative);

     theImage.Source = new BitmapImage(uri);
      theImage.Margin = new Thickness(10);
      theImage.Opacity = .4;
     LayoutRoot.Children.Add(theImage);

     // then position it
     Grid.SetRow(theImage, row);
     Grid.SetColumn(theImage, column);

     stateNumber++;
  }
 }
}
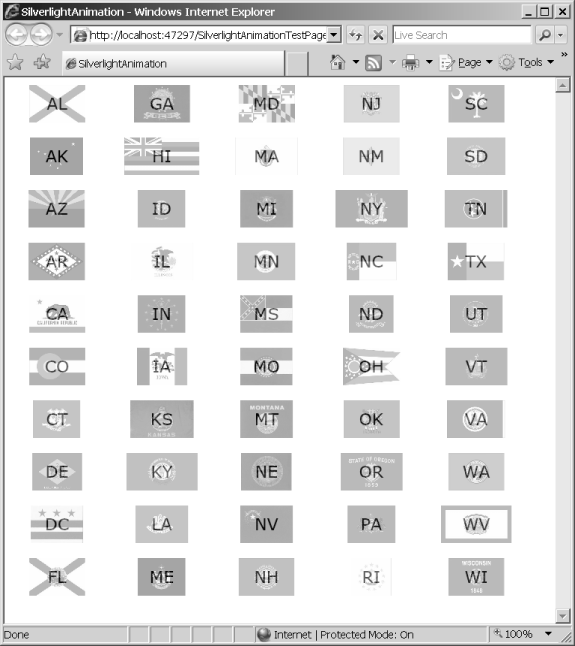
Run the application. It should look something like this:
Write a method to animate the flags by scaling it. Create DoubleAnimations for the ScaleTransform ScaleX and ScaleY properties, and another for the Image Opacity property. Set the From properties of the ScaleTransform animations to 1, and the To properties to 5. Set the From property of the Opacity animation to .4 and the To property to 1. Set the AutoReverse properties of the three DoubleAnimations to true so that they roll back after they are finished. Create a Storyboard to hold the animations.
Associate the animations with their targets within the Storyboard by using the StoryBoard SetTarget and SetTargetProperty methods. Finally, add the animations to the Storyboard.
Putting this all within a try/catch block can help you debug any errors when this executes.
public partial class MainPage : UserControl
{
 void AnimateImage(Image image)
 {
  try
  {
   DoubleAnimation scaleXAnimation = new DoubleAnimation();
   scaleXAnimation.AutoReverse = true;
   DoubleAnimation scaleYAnimation = new DoubleAnimation();
   scaleYAnimation.AutoReverse = true;
   DoubleAnimation opacityAnimation = new DoubleAnimation();
   opacityAnimation.AutoReverse = true;

   scaleXAnimation.From = 1;
   scaleXAnimation.To = 5;
   scaleYAnimation.From = 1;
   scaleYAnimation.To = 5;
   opacityAnimation.From = .4;
   opacityAnimation.To = 1;

   Storyboard sb = new Storyboard();
   Storyboard.SetTarget(scaleXAnimation, image.RenderTransform);
   Storyboard.SetTargetProperty(scaleXAnimation,
     new PropertyPath("ScaleX"));

   Storyboard.SetTarget(scaleYAnimation, image.RenderTransform);
   Storyboard.SetTargetProperty(scaleYAnimation,
     new PropertyPath("ScaleY"));

   Storyboard.SetTarget(opacityAnimation, image);
   Storyboard.SetTargetProperty(opacityAnimation,
     new PropertyPath("Opacity"));

   sb.Children.Add(scaleXAnimation);
   sb.Children.Add(scaleYAnimation);
   sb.Children.Add(opacityAnimation);
   sb.Begin();
  }
  catch (Exception ex)
  {
    System.Diagnostics.Debug.WriteLine(ex.Message);
  }
 }
}
Add a handler for the OnMouseLeftButtonDown event to the MainPage
class that animates the image. This will be hooked up to the images
directly, so the sender is the image. Just cast the sender as an Image and call the Animate method, passing in the image:
public partial class MainPage : UserControl
{
 void OnMouseLeftButtonDown(object sender, MouseButtonEventArgs ea)
 {
   Image image = sender as Image;
   AnimateImage(image);
 }
}
Finally, connect the MouseLeftButtonDown event of each Image to the handler:
public MainPage()
{
  // other initialization code
  for (int column = 0; column < 5; column++)
  {
   for (int row = 0; row < 10; row++)
    {
     // other code...
     Image theImage = new Image();

     theImage.MouseLeftButtonDown += OnMouseLeftButtonDown;

     // other code.
   }
  }

}
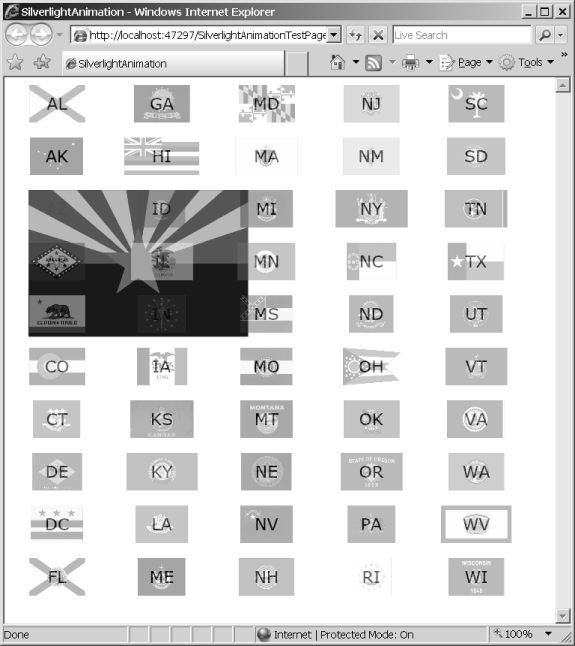
Click
one of the flags. It should animate. You should see it grow by five
times its original height and width, become more opaque, and then recede
back to its original state.