5. Adding a Soundtrack to Your Live Video
You can associate a multiple audio files with your live
video. The audio files then become the sound track for the video. After
adding a soundtrack, you can adjust the duration of your movie to match
the soundtrack. You also can set the mix volume for included videos and
the soundtrack. To manage a video’s soundtrack, complete the following
steps:
In Windows Live Movie Maker, use the Timeline slider or click
an item to set the starting point for the audio you want to
add.
Click Home on the toolbar and then click “Add music at current
point.”
Use the Add Music dialog box to select the audio file that you
want to use and then click Open.
To automatically fit the movie to the soundtrack, click
Fit to Music. Clicking Fit adjusts the length of time
that pictures are displayed. By default, pictures are displayed for
3 seconds.
By default, the audio levels are set to mix the audio
from video clips and the audio/music you’ve added at equal levels of
volume. You can control whether the audio from video clips or the
audio/music you’ve added should have precedence by clicking Audio
Mix. Move the Volume Mixer slider to the left to increase the
playback volume of videos relative to the volume of the soundtrack.
Move the Volume Mixer slider to the right to increase the playback
volume for the soundtrack relative to the volume of videos.
NOTE
To play your audio/music without hearing the audio from video
clips, move the slider all the way to the right. To mix the audio from
the video clips back in, move the slider to the left. The more you
move the slider to the left, the more prevalent the audio from the
video will be.
6. Adding Text Overlays to Your Live Video
Each item in your video can have a text overlay. The text
overlay is display for as long as the item is displayed. You can use
text overlays to add titles, credits and other text to your
video.
You can add a title frame to the beginning of your video by
completing these steps:
In Windows Live Movie Maker, click Home on the toolbar and
then click Title.
Enter your title text. The default font is 36-point Arial
Black.
If you want to change the font used for the title, click the
Font list and select the font you want to use. You can change the
font size, or add bold or italic. To change the font color, click
the Font Color button (it shows the letter A) and then choose a
color in the Color dialog box.
By default, the text is opaque. To set the transparency level,
click the Transparency button and then use the slider provided to
set the desired transparency level.
By default, the background is black. To set a different
background color, click the Background Color button and then select
a desired color.
You can add a credits frame to the end of your video by completing
these steps:
In Windows Live Movie Maker, click Home on the toolbar and
then click Credits.
Enter your credit. The default font is 20-point Arial.
Edit the text and the frame background as you would with a
title frame.
You can add text overlays to your video by completing these
steps:
In Windows Live Movie Maker, select the item to which you want
to add a text overlay.
Click Home on the toolbar and then click Caption.
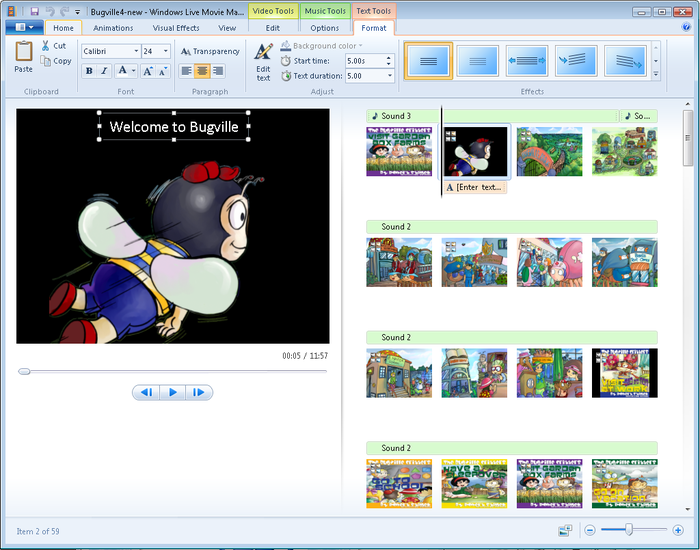
As shown in Figure 11, a text box is added to
the selected item and the Format pane is displayed. Enter your
caption. The default font is 24-point Calibri. Format the text as
appropriate using the options provided.
Use the Start Time box to specify at what time in the movie
the caption should be displayed.
Use the Text Duration box to specify the length of time the
text should be displayed.
With any type of overlay text, you can:
View the finished frame with the overlay by deselecting the
text box (do this by clicking a different part of the frame).
Edit the text by clicking the text box in the Preview
pane.
Move the text box by clicking and dragging it to a desired
location.
Click a text effect to apply it to the text. The Preview pane
shows how the effect is applied. To remove an effect, use the up
button to scroll all the way up through the list and then select the
None option.
Delete the text by selecting the border of the text box and
pressing the Delete key.
7. Previewing and Finishing Your Live Video Project
Once you’ve fine-tuned your live video, you’ll want to
preview it to ensure that the movie is exactly as you want it to be. You
can preview the movie at full-screen size by clicking the Play button.
When you are ready to continue, you can save your video as a Windows
Live Movie Maker Project. Project files are saved with the file
extension .wlmp. Although Windows
Live Movie Maker Project files can be up to multiple megabytes in size,
they are still considerably smaller than your final movie file.
You can save as a project file by completing the following
steps:
Click Movie Maker button and then select Save Project
As.
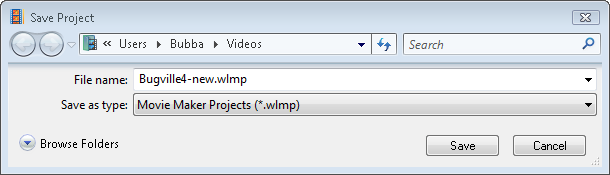
In the Save Project dialog box, shown in Figure 12, select a save
location.
Type a descriptive name for your video and then click
Save.
After you save your project, you can publish your movie. Publishing your movie creates the
finished video file. In most cases, you’ll want to publish the movie to
your computer or to a DVD. If you publish the movie to your computer,
you’ll have the encoding options shown in Table 2. Plug-ins are
available for uploading your videos to Facebook, YouTube, and other
online services.
Table 2. Movie encoding settings for Windows Live Movie Maker
| File
type | File
extension | Aspect
ratio | Bit
rate | Display
size | Frames per second |
|---|
| High Definition
(1080p) | .wmv | 16:9 | 7.98 Mbps | 1,920 ×
1,080 | 30 |
| High Definition
(720p) | .wmv | 16:9 | 6.03 Mbps | 1,280 ×
720 | 30 |
| Widescreen
(480p) | .wmv | 16:9 | 2.99 Mbps | 720 × 480 | 30 |
| Standard
Definition | .wmv | 4:3 | 2.99 Mbps | 640 × 480 | 30 |
| Portable Device or Mobile
Phone | .wmv | 4:3 | 1.69 Mbps | 320 × 240 | 15 |
| E-mail or Instant
Messaging | .wmv | 4:3 | 291.02
Kbps | 320 × 240 | 15 |
To publish your movie to a video file on your computer, complete
the following steps:
Click the Movie Maker button and then select Save
Movie.
Click the desired output option, such as Widescreen (480p) or
For E-mail or Instant Messaging.
In the Save Movie dialog box, the last folder location you
used for saving project files is opened by default. If this isn’t
the folder you want to use, browse to the folder you want to
use.
Type a descriptive name for your video and then click
Save.
You can track the progress of the publish process by percent
complete. The bit rate of the movie setting you choose will largely
determine how long it takes to publish the movie.
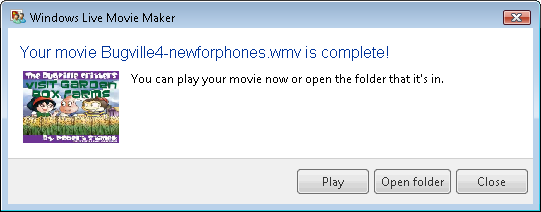
When Windows Live Movie Maker finishes publishing the movie,
click Play to view the movie or Open Folder to open the file
location, as shown in Figure 13.
8. Opening and Producing Saved Projects
You can open saved projects using the Search box on the
Start menu. Click Start and then type movie into the Search box to see a list of all
movies and related movie project files. Double-click the .wlmp project file you want to open. Windows
7 will then start Windows Live Movie Maker and open the selected project
file for editing.
Alternatively, in Windows Live Movie Maker, you can open saved
projects by completing the following steps:
Click the Movie Maker button and then click Open Project. This
displays the Open Project dialog box.
In the Open Project dialog box, the last folder location you
used for saving project files is opened by default. If this isn’t
the folder you want to use, browse to the folder containing the
saved project file.
Click the project file and click Open. Windows Live Movie
Maker will then read the project file and open it.
When Windows Live Movie Maker finishes opening, review the
movie.
After you make any necessary changes, click Save Movie on the
Movie Maker menu and then click an output option to produce your
movie.
Windows Live Movie Maker tracks the location of resources you use
in your projects. If you move resources to a new location, you’ll see
grayed-out frames in your project. You’ll need to
double-click each grayed-out frame in turn to locate each missing
resource. Each time when you are prompted, select Find and then use the
“Browse for . . .” dialog box to locate the resource.
