5. Adding Effects to Your Video
Your videos can have effects that are used when a media
item is first displayed. You can add the same effect to multiple items,
and a single item can have multiple effects as well. In the lower-left
corner of the item’s storyboard is an Effects button. The appearance of
this button tells you whether an item has effects associated with
it.
An item with no effects has an Effects button as shown in Figure 11.

An item with one associated effect has an Effects button as shown
in Figure 12.

An item with multiple associated effects
has an Effects button as shown in Figure 13.

You can add effects to media items by completing the following
steps:
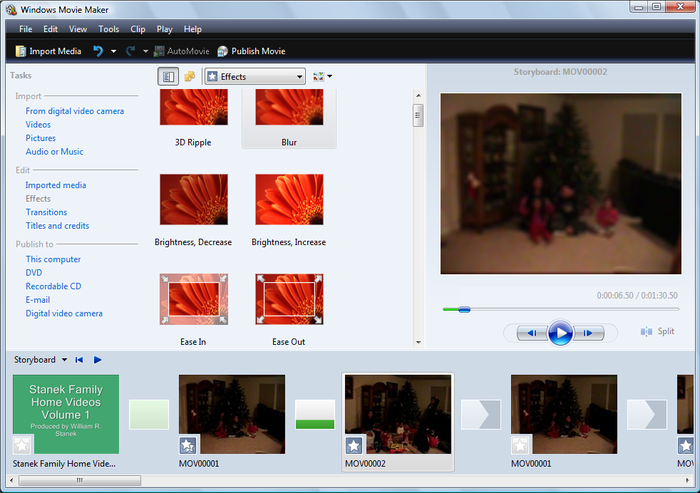
In Windows Movie Maker, click Effects in the Tasks pane to
display the available effects in the Collections pane, as shown in
Figure 14.
To see how an effect works, click it and press the Play button
in the Preview pane.
To use an effect, click it and then drag it to the item to
which the effect should be added. Alternatively, click the effect,
press Ctrl-C, click the item to which the effect should be added,
and then press Ctrl-V.
Repeat this process to add multiple effects to the same
item.
Another way to manage multiple effects
applied to the same item is to follow these steps:
Right-click the item’s Effects button in the storyboard and
then select Effects.
Use the Add or Remove Effects dialog box, shown in Figure 15, to manage the effects
associated with the selected item:
To add an effect, select it in the “Available effects”
list and then click Add.
To remove an effect, select it in the “Displayed effects”
list and then click Remove.
To change the order of displayed effects, click an effect
and then use the Move Up or Move Down button to position
it.

To add the same effect to multiple items, follow these
steps:
On the storyboard, select all the items that you want to use
the same effect.
Right-click the effect to apply and then select Add to
Storyboard.
Repeat this process to add multiple effects to multiple
items.
To remove all effects from a media item, right-click the Effects
button and then select Remove Effects.
6. Adding Transitions to Your Video
Your videos can have transitions that are used when moving
between media items. You can use only one transition between media
items. For example, you can transition by slowly revealing the new media
item or by sweeping in, but not by using both techniques.
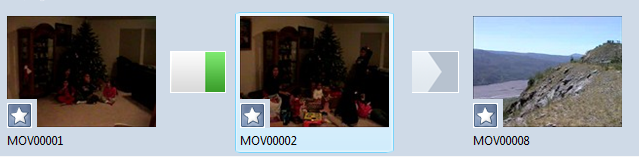
As shown in Figure 16, you’ll find a
transition board to the right of each media item. If a current
transition is applied, the transition board will show a summary graphic.
If no current transition is applied, the transition board will be
dimmed.
You can add transitions to media items by completing the following
steps:
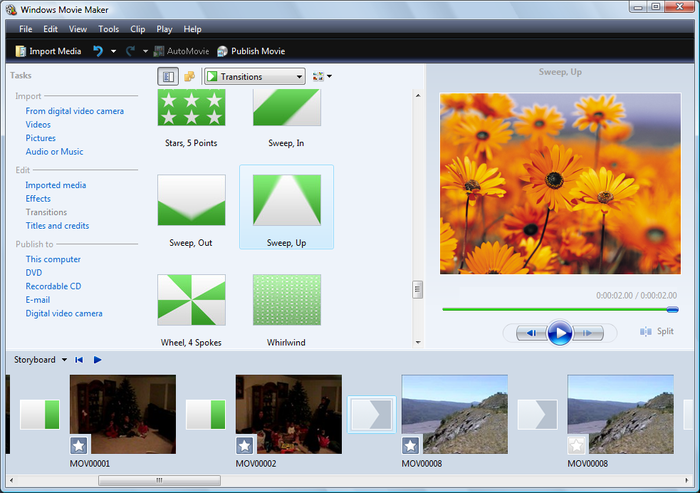
In Windows Movie Maker, click Transitions in the Tasks pane to
display the available transitions in the Collections pane, as shown
in Figure 17.
To see how a transition works, click it and then press Play in
the Preview pane.
To use a transition, click it and then drag it to the item to
which the transition should be added. Alternatively, click the
transition, press Ctrl-C, click the item to which the transition
should be added, and then press Ctrl-V.
To add the same transition to multiple transition boards, follow
these steps:
On the storyboard, select all the transition boards that you
want to use the same transition.
Right-click the transition to apply and then select Add to
Storyboard.
To remove a transition from a transition board, right-click the
transition board and then select Remove.
