10. Setting Animation Event Triggers
Animation event triggers
tell PowerPoint when to execute an animation. By default, an animation
occurs as part of the normal animation sequence, using whatever settings
you have assigned to it, such as On Click, With Previous, or After
Previous.
When you set an animation to On Click, the click being referred to is any
click. The mouse does not need to be pointing at anything in
particular. In fact, pressing a key on the keyboard can serve the same
purpose.
If you want an animation
effect to occur only when you click something in particular, you can use
a trigger to specify this condition. For example, you may have three
bullet points on a list, and three photos. If you want each bullet point
to appear when you click its corresponding photo, you can animate each
bullet point with the graphic object as its trigger.
NOTE
There is a small complication in the preceding example: You can have only one trigger for each object, and in this case, object
means the entire text placeholder. Therefore, if you want to animate
bullet points separately with separate triggers, then you need to place
each of them in a separate text box.
To set up a trigger, do the following:
On the Animation pane, click the effect whose timing you want to set.
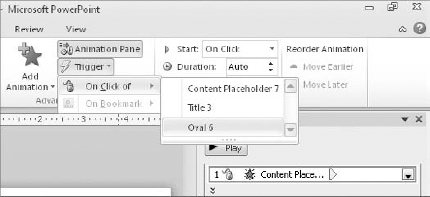
Choose Animations => Trigger => On Click Of and then click the object that should be used as the trigger for that event. See Figure 8.
Here's an alternative method:
On the Animation pane, right-click the effect whose timing you want to set and choose Timing. The Timing tab appears.
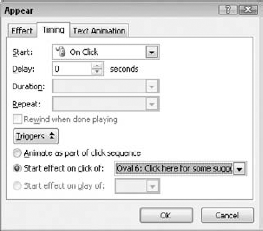
Click the Triggers button. The controls for setting up a trigger appear on the Timing tab, as shown in Figure 9.
Select
the Start Effect on Click Of option, and then open the drop-down list
and select an object. All of the objects on the slide appear in this
list.
NOTE
Do not trigger the entrance of an object on Click Of itself, or there will be no way to make it appear.
11. Associating Sounds with Animations
Associating
a sound with an animation effect is different because the sound plays
when the animation occurs, not necessarily when the object appears or is
clicked. By default, animation effects do not have sounds assigned, but
you can assign a sound by doing the following:
In
the Animation pane, select the animation effect to which you want to
assign a sound. Then open the drop-down list for the effect, and choose
Effect Options.
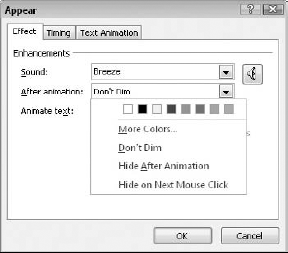
On the Effect tab (see Figure 10),
open the Sound drop-down list and choose a sound. You can choose any of
the sounds in the list, or you can choose Other Sound to select a sound
file from another location. (Only WAV files can be used for this.)
OR
To make a previously playing sound stop when this animation occurs, choose Stop Previous Sound from the Sound drop-down list.
12. Making an Object Appear Differently after Animation
After an object has been
animated, you might want to have it appear differently on the slide. For
example, after some text animates, you might want it to be dimmed. To
set this up, follow these steps:
In the Animation pane, select the animation effect. Then open the drop-down list for the effect, and choose Effect Options.
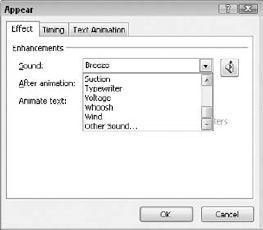
Open the After Animation drop-down list and choose one of the following options, as shown in Figure 11:
A scheme color: You can choose one of the colored squares, which represent each of the current scheme colors.
More Colors:
Click here to choose a specific color, just as you would for any
object. For example, you can set text to gray to make it appear dimmed.
Don't Dim: This is the default setting; it specifies that PowerPoint should do nothing to the object after animation.
Hide After Animation: This setting makes the object disappear immediately after the animation finishes.
Hide on Next Mouse Click:
This setting makes the object disappear when you click the mouse after
the animation has completed. For example, this is useful for showing and
then hiding individual bullet points.