In
this exercise, you will explore and change the attributes of the data
fields in one of the process shapes in the Human Resources Recruiting
Process map.Click on the Advertise open job shape to view its shape data. Spend a moment looking at the names of the data fields for this shape.
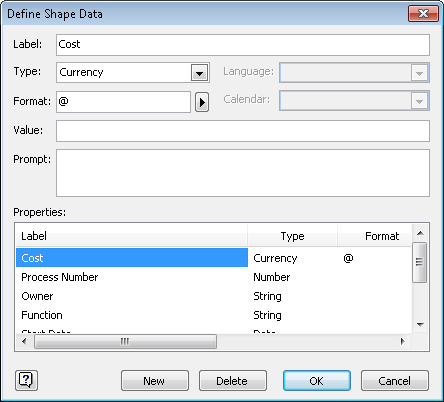
Right-click in the Shape Data window, and then click Define Shape Data.
Visio displays the attributes of the first data field, Cost. Notice that the Label field displays Cost, which is the label that appears in the Shape Data window. Notice, also, that the Type field is set to Currency.
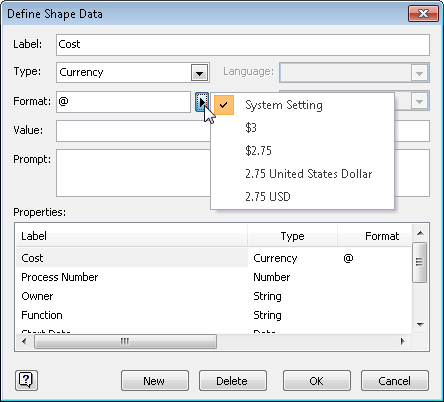
Click the right-facing arrow next to the Format field.
Visio
provides a list of alternate formats in which the currency value can be
displayed. (The list you see depends on the Region and Language
settings for your copy of Windows.) It usually makes sense to leave the
format set to System Setting, especially if your diagram will be opened in countries that use other currencies than the one you use.
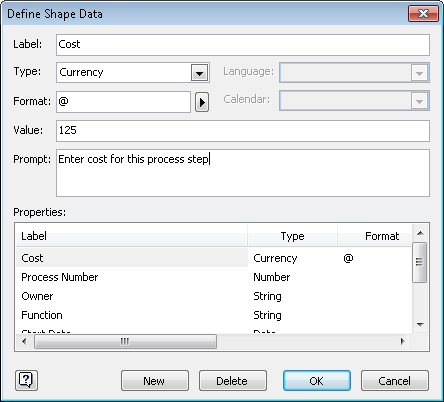
Click in the Value field and then type 125.
This value will appear as the default value for the Cost field the next
time you open the Shape Data window for this shape. You can still
change the value via the Shape Data window, but this provides a way for
you to specify default values.
Type Enter cost for this process step into the Prompt field. These words will appear as a tooltip for this field later in this exercise.
In the Properties section of the dialog box, click Process Number. Visio displays the attributes of this field in the upper half of the dialog box.
Note that this is a Number-type field.
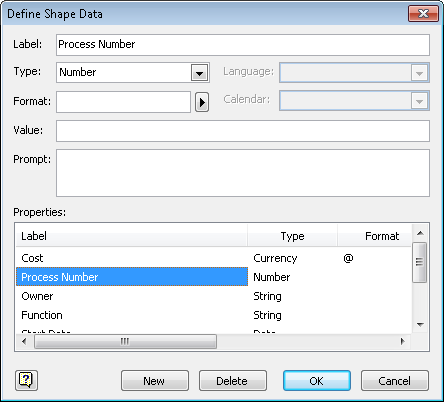
Click the arrow next to the Format field to explore the various formatting options Visio provides for numeric data.
Click Owner in the Properties
section of the dialog box. Note that the Language field is now enabled,
allowing you to specify the preferred language for this text field.
Click the arrow next to the Format field to explore the various formatting options Visio provides for text data.
Click Start Date in the Properties
section of the dialog box. Note that this field has a Date type and
that the Language and Calendar attributes are now enabled. These two
settings allow you to change properties that affect the presentation of
the date.

Click the arrow next to the Format field to explore the various formatting options Visio provides for date fields.
Click Status in the Properties section of the dialog box. Note that Status is a Variable List-type field.
The
Format field is used quite differently for Variable and Fixed List
fields than for the other field types you’ve explored thus far. For list
fields, Format holds a semicolon-separated list of values that will
appear in the drop-down list in the Shape Data window.
In the case of the Status field, the Format field holds the following string of characters:
;Not Started;In Progress;Completed;Deferred;Waiting on Input
Warning:
Important
The semicolon at the very
beginning of the list causes a null (blank) entry to appear at the top
of the list. If you do not include a null entry, the user will not be
able to leave the field blank after he or she has clicked something in
the list. Both options may be appropriate in different situations: in
some cases, a blank entry is not acceptable, so you want to force the
user to select an entry from the list; in other cases, a blank entry is
fine.
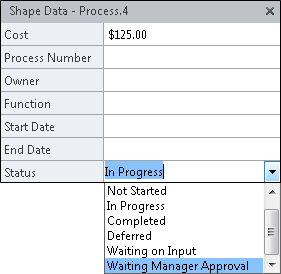
Type ;Waiting Manager Approval at the end of the character string in the Format field.
Warning:
Important
List entries are delimited by semicolons (“;”). Be sure to type the semicolon before Waiting Manager Approval so that the new text becomes a separate entry in the list.
Type In Progress in the Value field.
Tip:
If you want a value from the
list to appear as the default for this field whenever the Shape Data
window is opened, type it in the Value field. Be sure that the entry you
type is the same as one of the entries in the list in the Format field.
Click OK.
The
Shape Data window reflects the changes you made to the fields: there is
a default dollar amount in the Cost field and the Status is preset to In Progress.

Point to the label for the Cost field. Enter cost for this process step appears as tooltip text because you typed it in the Prompt field in Step 5 of this procedure.
Click in the Status field and then click its arrow to display the list. Note that Waiting Manager Approval appears at the end of the list.
Note:
Save your changes to the HR Process Map drawing, but leave it open if you are continuing with the next exercise.
