1. Identifying 1-D Shapes and Types of Glue
In the preceding sections,
you’ve seen several types of 1-D shapes and two forms of glue. This
section summarizes the behavior of 1-D shapes and identifies the visual
cues Visio provides to differentiate glue types:
A 1-D shape drawn with
any of the line tools (Line, Freeform, Arc, or Pencil) retains its
original form when the shapes at the ends are moved.
A 1-D shape created with the Connector Tool adds or removes bends in the line to accommodate shape movements.
A
line or dynamic connector attached to a connection point forms static
glue; the 1-D shape remains attached at that fixed point on the 2-D
shape no matter how the 2-D shape is moved.
A 1-D shape connected with static glue shows these red handles.

A dynamic connector
attached to a shape but not to a connection point forms dynamic glue; as
the 2-D shape moves, the point at which the dynamic connector attaches
to the shape moves.
A dynamic connector connected with dynamic glue shows these red handles.

When the ends of a 1-D
shape are not glued to another shape, the handles at the ends of the
line are light blue and look like these.

Note:
Users of previous versions of
Visio will recognize that line handles look different in Visio 2010. For
a description of the historical differences plus a discussion of line
directionality, go to www.visguy.com/2010/03/22/1d-shape-handles-through-the-years/.
2. Positioning Shapes with Rulers and Guides
In some of the preceding
exercises, you have aligned shapes by using the Dynamic Grid feature of
Visio 2010. However, the Dynamic Grid doesn’t always do what you need.
For example, if there are other shapes between the two you are trying to
align, the Dynamic Grid doesn’t help. Similarly, you may want to align
shapes in ways that the Dynamic Grid doesn’t provide.
In this exercise, you will align shapes by using other Visio features.
Note:
Click the File tab, and then click New. In the Template Categories
section, click General, and then double-click the Basic Diagram
thumbnail. Save the drawing as Shape Alignment.
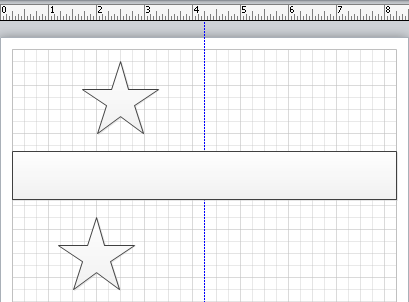
Drag a Rectangle
shape onto the page and position it about one fourth of the way down
the page. Drop it so the left end is at the left margin of the page.
Then use the resize handle on the right to stretch the right edge to the
right margin.
Tip:
As you drag a shape near the edge of the page and it becomes aligned with the page margin, an orange Dynamic Grid line appears.
Drag a Star 5 shape above the left half of the rectangle.

In the next step, you will try to align a second star with the one you just placed.
Drag a Star 5
shape onto the page below the rectangle and observe that the Dynamic
Grid does not help you align the two stars because of the intervening
rectangle. Drop the star onto the page.
To align the two stars, you can use the grid lines on the page; however a guide will make the task much easier.
Position
the cursor over the vertical ruler on the left side of the page and
observe that the cursor changes to a double-headed arrow. Click the
ruler and drag into the middle of the drawing page.
The guide appears as a vertical blue line on the page, but guides do not print.
Drag the top star toward and over the guide and observe that you can glue the edges and center of the star shape to the guide.
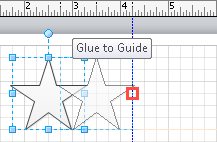
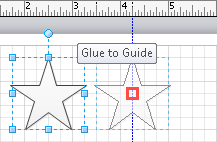
Glue the center of the star to the guide.
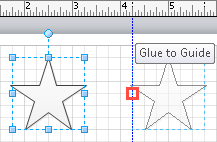
Drag the bottom star and glue its center to the guide.
Tip:
Remember that if you hold the
Shift key while dragging a shape, you restrict it to moving only
horizontally or vertically but not both.
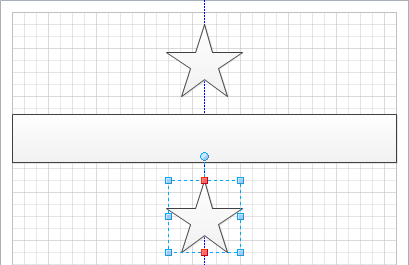
The two stars are now precisely aligned, despite the intervening shape.
Realize
that the stars are actually glued to the guide just as lines were glued
to shapes in previous exercises. If you move the guide, the stars will
move also. If you don’t need to move the aligned shapes as a unit, you
can delete the guide as you would any other shape: just click to select
it, and then press the Delete key.
Tip:
You can create more than one
guide by dragging the ruler onto the page again. You can also create
horizontal guides by dragging the ruler at the top of the page down.
The rulers provide another means for aligning shapes, as you will see in the next two steps.
Use the Zoom slider at the bottom of the drawing page to set the zoom level to 100%. Then position the drawing page so you can see the upper-left corner.
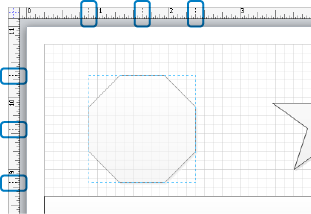
Drag an Octagon
shape into the upper-left corner of the page; before releasing the
mouse button, observe that there are dashed lines in both the horizontal
and vertical rulers (the lines are highlighted in the following
graphic).
The lines on the
top ruler mark the left, center, and right of the octagon; the lines on
the side ruler denote the top, middle, and bottom of the shape.
Note:
Save your changes to the Shape Alignment drawing, and then close it.
