HomeGroup is a new feature of Windows 7 that makes it easy to share resources
among your computers at home. These "resources" can include printers as
well as files from your documents, pictures, music, and video libraries.
Gone are the days when, to print a document, you copied it to a USB
flash drive and then carried it to the computer to which your printer is
attached. And you no longer need to remember on which computer you
stored a batch of pictures; with HomeGroup you can search a particular
library or machine, or you can search across all computers in a
homegroup. Files on other computers are as easily accessible as if they
were on your own computer.
(Oh, and if you're confused
by the capitalization of the term, you're not alone. According to
Microsoft, the correct spelling is HomeGroup when describing the feature
and the associated Control Panel option where you configure it; the
collection of Windows 7 computers joined together this way is called a homegroup, with no
capitalization. In Windows Explorer, in dialog boxes and menus, and in
this book, the term might be capitalized to indicate that it is part of
the name of an option.)
Note:
The HomeGroup feature
works only with computers running Windows 7. To share files with
computers running earlier versions of Windows, or for users of those
computers to access files on your Windows 7 computer, you must use
network sharing methods compatible with those older versions.
1. Creating a
Homegroup
Windows 7 offers to
create a homegroup when you install Windows and when you connect to a
network that you identify as a home network. (That is, you select Home
Network as the network location.) If you decided to forego those
opportunities, you can set up Home-Group at any later time; in the Start
menu or Control Panel search box, type homegroup
and click HomeGroup.
If no homegroup exists
on your network, a dialog box opens to inform you of that fact. Click
Create A Homegroup to open the wizard shown in Figure
1.
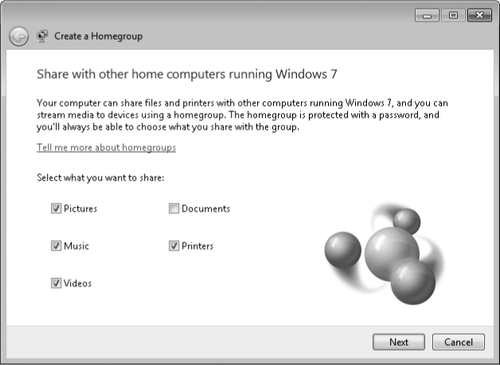
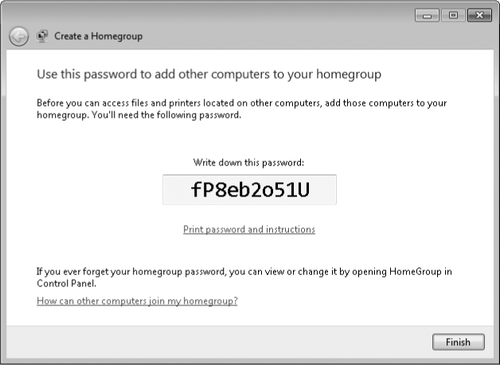
Click Next, and the
wizard generates a password for your homegroup, as shown in Figure 2. (Behind the scenes, the wizard also
sets up the requisite user accounts and security groups, services,
firewall rules, and shares.) Click Finish, and you're done.
Note:
A computer running
Windows 7 Starter edition cannot create a homegroup. It can, however,
join a homegroup created by a computer running Windows Home Premium or
above.
2. Joining a
Homegroup
After a homegroup has
been created, other computers on the network can join it, using a
similarly brief process. When you connect your computer to the home
network, the wizard opens automatically, displaying a screen similar to
the one shown earlier in Figure 1. (The text at the top is slightly
different, informing you that a homegroup already exists.) If you missed
that chance to join the homegroup, open HomeGroup in Control Panel and
click Join Now to reach this same wizard screen.
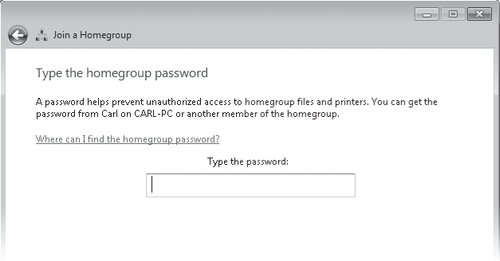
Click Next, and the
wizard asks you to enter the homegroup password. (If you don't have the
password, return to a computer that has already joined the homegroup. On
that computer, open HomeGroup and click View Or Print The Homegroup
Password. Alternatively, on that computer, open Windows Explorer,
right-click Homegroup, and choose View The HomeGroup Password.)
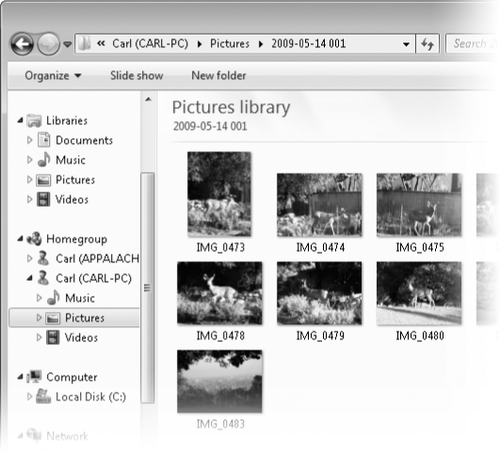
Enter the password and
click Next, and you're ready to view resources from other computers in
the homegroup. To do that, open Windows Explorer. In the left pane,
expand Home-group to see a subfolder for each user account on each
computer in the homegroup, as shown in Figure 3.
By default, you have
read access to the personal folders in each library (for example, My
Pictures) and read-write access to the public folders in each library
(for example, Public Pictures.)
