To take advantage of the Windows
Live web services, visit home.live.com
and sign in with your Windows Live ID. (Alternatively, click the Windows
Live button at the left edge of the Windows Live toolbar.) With Windows
Live on the web you can do the following (among other things):
Upload and
share photo albums.
Access your Windows Live Mail calendar from any computer,
share your calendar with family members or colleagues, and subscribe to
public calendars stored in the .ics format.
Store and share documents
and favorites, and synchronize your favorites to make them available on
any computer where you use Windows Live.
Create a blog (and post to it with Windows Live
Writer).
Manage
the contacts list shared by Windows Live Messenger and Windows Live
Mail.
Plan events, create guest lists, and issue
invitations.
Create a shared meeting space for
your team, club, or business organization.
Transmit a calendar, e-mail, news,
and other alerts from Windows Live to your mobile phone.
Set up a Microsoft Office Live workspace, where you can
collaborate on documents created in Microsoft Office.
Enjoy social networking with selected peers, and receive periodic
updates about what members of your network are doing.
The list of services is large and growing. You can find a current
overview at home.live.com/
allservices.aspx.
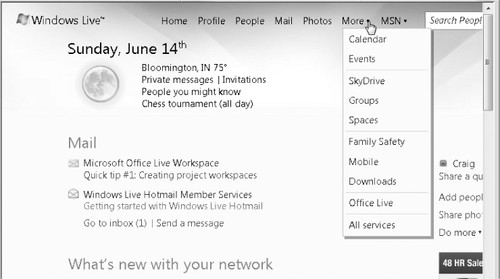
Figure 1 shows a portion of a Windows Live home page.
The page reports the current date and weather conditions, items of
immediate interest in your calendar, the state of your e-mail inbox, and
the latest news about members of your network. The menu across the top
of the window makes a right turn when you click the drop-down arrow
beside More.
1. Adding
People to Your Network
Whether or not you
intend to use Windows Live as a general-purpose social networking site, you are likely to want to
share pictures, documents, and perhaps a calendar or a set of favorites
with selected friends and colleagues. The easiest way to set up sharing
parameters is to add those friends and colleagues to your network. To do
that, click People on the Windows Live menu. Windows Live responds by
displaying the list of contacts that it shares with Windows Live
Messenger and Windows Live Mail. You can add, delete, and edit contacts
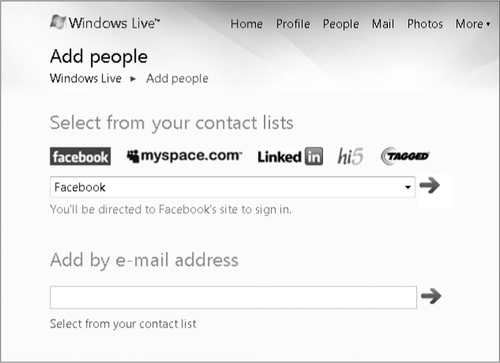
using the menu at the top of the contacts list. To add people to your
network, click Add People in the left pane (or click the same link on
the right side of the Windows Live home page). The Add People page that
appears includes the option to add contacts from Face-book and other
popular networking sites, add contacts by specifying e-mail addresses,
and select people who are already in your contact list, as shown next.
Those whom you
choose to add will receive invitations via e-mail and must accept
before they become members of your network.
2. Storing and
Sharing with SkyDrive
SkyDrive is a free online storage repository, with a current limit of 25 GB.
To get there, choose More, SkyDrive on the main Windows Live menu. SkyDrive starts you
off with four folders:
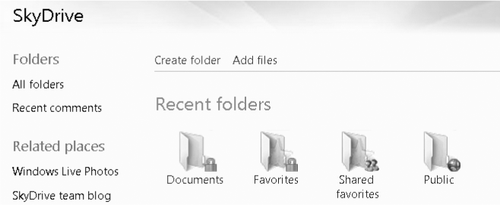
Documents and
Favorites, the folders with padlocked icons, are initially private.
Shared Favorites is set by default to be accessible to those in your
network. Public is, as the name implies, open to all.
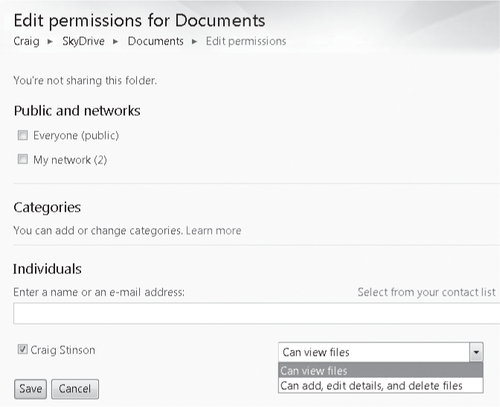
Use the Create Folder and Add Files commands to
perform those essential tasks. To edit the permissions for any folder
other than Public or Shared Favorites (whose permissions are fixed),
click to open the folder. Then, on the new menu that appears, choose
More, Edit Permissions. As Figure 2 shows, you can select check boxes to
share with everyone or members of your network, or you can enter e-mail
addresses or make selections from your contact list. If you specify a
particular person in the Individuals section of the page, that person's
name appears explicitly, along with a check box. You can clear the check
box at any time to withdraw permission. Permissions are read-only by
default, but you can use the drop-down list to allow full control.
SkyDrive
offers to notify by e-mail anyone with whom you share a folder.
3. Uploading
and Sharing Photos
To create and share
photo albums, start by clicking Photos on the main Windows Live menu.
Storing photos is essentially the same process as storing documents on
SkyDrive, except that new photo albums have public permissions by
default. As with document folders, you can offer read-only or
full-control permissions to particular contacts, your network, or the
entire world.
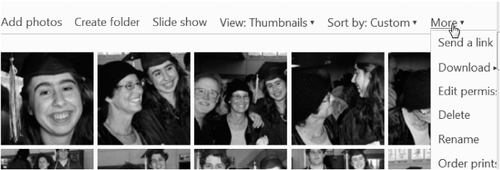
Photos are displayed
initially as thumbnails. You can use the View menu to switch to either
details view or icons. The Sort menu includes a handy option to
rearrange the contents of an album in a manner that pleases you, and the
Slide Show command offers a tasteful presentation, with background
colors tailored to the content of each slide. Those with whom you share
your albums can download particular pictures by clicking More, Download:
4. Managing,
Sharing, and Subscribing to Calendars
The Windows Live Calendar
service (choose More, Calendar on the main Windows Live menu to get
there) provides web access to the calendars you create in Windows Live
Mail. It also adds a few features not available in Windows Live Mail. In
the web service, you can click To-Do List in the array of view options
(alongside Day, Week, Month, and Agenda) to enter and view tasks:

And you can click
Subscribe to subscribe to a public calendar or import a calendar stored
in .ics format. If you subscribe to a publicly published calendar, the
calendar is updated in your Windows Live calendar whenever the publisher
makes a change to it. If you import an .ics file, the resulting
calendar is static; you can import it again if you think the calendar
has changed.
To share a calendar,
click Share and then choose from the drop-down list the calendar that
you want to share. The screens that follow walk you through the
selection of people with whom to share and the assignment of read-only
or full-control permissions.
