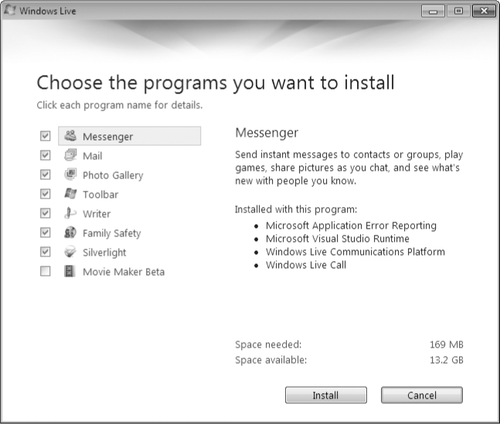
To download any or all of the Windows Live Essentials suite, visit download.live.com. After you click the Download button, the
Windows Live Installer will display the dialog box shown in Figure 1 and ask you to specify which programs
you want to install; before downloading, you can select each in turn and read a description
on the right side of the dialog box.
1. Obtaining a
Windows Live ID
At the end of the download
and install process, the Windows Live installer will ask if you have a
Windows Live ID:
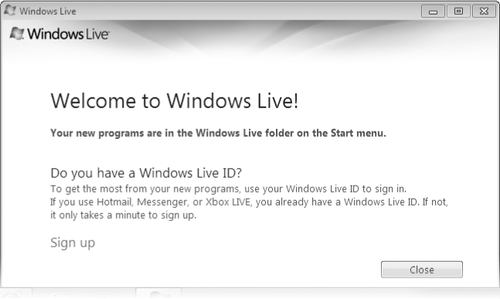
If you happen already to
have a Windows
Live Hotmail account, you already have a Windows Live ID—it's your Hotmail e-mail address.
If you don't already have a Windows Live ID, you'll need one to take
full advantage of the Windows Live programs and services. (You can use
Windows Live Mail and Windows Live Photo Gallery, with reduced
functionality, without a Windows Live ID, but the programs will annoy
you with repeated signup entreaties.) If you need a Windows Live ID,
click Sign Up. Otherwise, click Close.
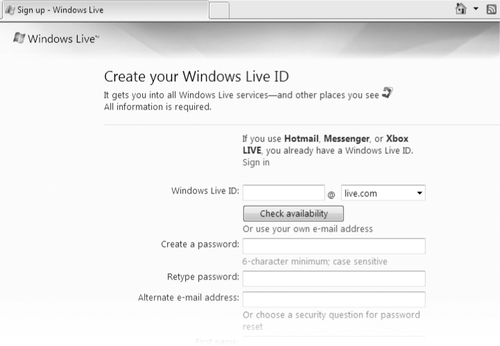
Figure 2 shows part of the form you'll see if you
click Sign Up. Note that you can use any valid e-mail address as your
Windows Live ID. Alternatively, you can use an available name with
either the hotmail.com or live.com domain; by doing that, you'll be
acquiring a Hotmail e-mail address as well as a Windows Live ID. The
rest of the signup form will ask demographic questions. Some of the
information you supply will be used to tailor the Windows Live home page
(it will show the current temperature in your Zip code, for example),
but if you're concerned about the potential for less benign uses, you
can click the link to read Microsoft's privacy
policy.
2. Using
Windows Live Messenger
With Windows Live
Messenger, you can do a lot more than send instant messages. You can use
it to transmit SMS text messages to mobile devices, transfer flies to
or play games with contacts,
send e-mail, and, with the help of a companion program called Windows
Live Call, initiate Voice-over-Internet-Protocol (VoIP) telephone calls.
Its primary purpose,
however, is to facilitate real-time chats. If you have a webcam, you can
also transmit video to your messaging contacts.
Like Internet
Explorer, Windows Live Messenger does not use a horizontal menu bar by default.
A menu button, located near the upper right corner of the window, opens
a set of fly-out submenus:
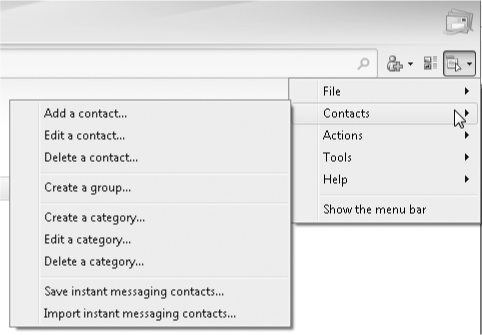
If you prefer
horizontal menus, choose Show The Menu Bar at the bottom of the main
menu.
2.1. Adding,
Categorizing, and Blocking Contacts
Before you can send
messages, you have to have contacts. To add a contact, open the menu,
choose Contacts, and then choose Add A Contact. In the ensuing dialog
box, you can enter the contact's instant messaging address (if the
person has one) or e-mail address:
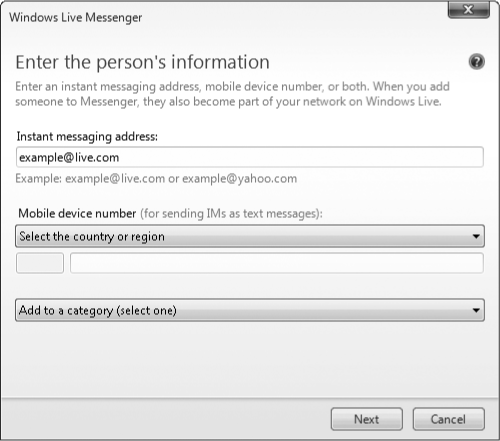
Either way, your contact will receive an invitation and will have
the opportunity to accept or decline.
Alternatively, if you
only want to send text to a contact's mobile device, select a country in
the drop-down list under Mobile Device Number and then enter your
contact's full mobile number.
As your contact list
grows, you might want to organize it into categories. Choose Contacts, Create A
Category, and then type a category name in the Create A New Category
dialog box. In the same dialog box, you can select existing contacts to
become members of the new category. You can also drag a contact into a
category later. (To remove a contact from a category, right-click it and
choose Remove Contact From Category.) Categories are different from
groups. Groups (choose Contacts, Create A Group) let you communicate
with multiple contacts at once.
When you receive an
invitation to be someone else's contact, Windows Live Messenger offers
you the option to accept or decline. If you accept, you can also place
the new contact into an existing category. If you decline, an additional
check box appears that gives you the opportunity to block subsequent invitations from this
person. And if you block, you also get the opportunity to report the
inviting party as a spammer. If you change your mind and want to unblock
a spurned contact, choose Tools, Options and then click the Privacy
tab. In the Privacy dialog box, you can move people between your Block
List and Allow List.
2.2. Sending
Messages
To begin an
instant messaging conversation with a contact who is online, right-click
the contact's name and choose Send An Instant Message. A new window
will appear. Type your part of the conversation in the bottom line of
the window:
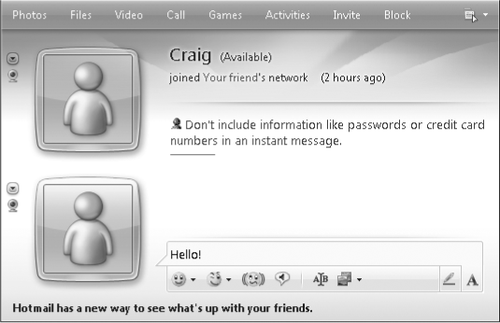
Note that this
chat window includes its own menu. Clicking Photos or Files here allows
you to share pictures with or transfer documents to your contact.
Clicking Video activates your webcam and invites your contact to receive
video during the conversation (the contact will have the opportunity to
accept or decline). Clicking Invite lets you bring other parties into
the conversation. The Games and Activities menus offer additional modes
of interaction.
If your contact is not
online or not available when you want to communicate, you can send an
oxymoronically named offline instant message. Your recipient will see
your message when he or she logs back in. Alternatively, you can
right-click the person's name and choose Send E-Mail. Or you can right-click the name, choose
Enter A Mobile Number, supply the number, and transmit a text message.
