1. Mixing OpenGL ES and UIKit
Sprites are often used for rendering
interactive widgets in a HUD.
Handling mouse interaction can be a chore when you don’t have a UI
framework to stand upon. If you’re developing a 3D application and find
yourself yearning for UIKit, don’t dismiss it right away. It’s true that
mixing UIKit and OpenGL ES is generally ill-advised for performance
reasons, but in many situations, it’s the right way to go. This is
especially true with 3D applications that aren’t as graphically demanding
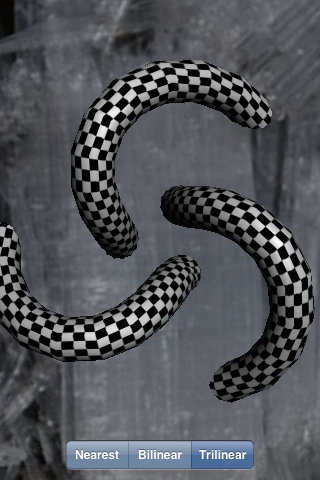
as huge, professionally produced games. Figure 1
depicts an application that overlays a UISegmentedControl widget with a 3D
scene.
Note:
The performance of “mixed” rendering has been
improving as Apple rolls out new devices and new revisions to the iPhone
OS. By the time you read this, using nonanimated UIKit controls in
conjunction with OpenGL might be a perfectly acceptable practice.

First we need to add a field to the
GLView class declaration for the new control. See the
bold line in Example 1.
Example 1. Adding a UIKit control to GLView.h
#import "Interfaces.hpp"
#import <UIKit/UIKit.h>
#import <QuartzCore/QuartzCore.h>

@interface GLView : UIView {
@private
    IRenderingEngine* m_renderingEngine;
    IResourceManager* m_resourceManager;
    EAGLContext* m_context;
    float m_timestamp;
    UISegmentedControl* m_filterChooser;
}

- (void) drawView: (CADisplayLink*) displayLink;

@end
|
Next, we need to instance the control and
create a method for event handling; see Example 2.
Example 2. Adding a UIKit control to GLView.mm
...

- (id) initWithFrame: (CGRect) frame
{
    if (self = [super initWithFrame:frame])
    {
        CAEAGLLayer* eaglLayer = (CAEAGLLayer*) self.layer;
        eaglLayer.opaque = YES;

        EAGLRenderingAPI api = kEAGLRenderingAPIOpenGLES1;
        m_context = [[EAGLContext alloc] initWithAPI:api];

        ...

        // Create and configure the UIKit control:

        NSArray* labels = [NSArray arrayWithObjects:@"Nearest",
                                                    @"Bilinear",
                                                    @"Trilinear", nil];

        m_filterChooser =
          [[[UISegmentedControl alloc] initWithItems:labels] autorelease];
        m_filterChooser.segmentedControlStyle = UISegmentedControlStyleBar;
        m_filterChooser.selectedSegmentIndex = 0;

        [m_filterChooser addTarget:self
                         action:@selector(changeFilter:)
                         forControlEvents:UIControlEventValueChanged];

        // Add the control to GLView's children:

        [self addSubview:m_filterChooser];

        // Position the UIKit control:

        const int ScreenWidth = CGRectGetWidth(frame);
        const int ScreenHeight = CGRectGetHeight(frame);
        const int Margin = 10;

        CGRect controlFrame = m_filterChooser.frame;
        controlFrame.origin.x = ScreenWidth / 2 - controlFrame.size.width / 2;
        controlFrame.origin.y = ScreenHeight - controlFrame.size.height - Margin;
        m_filterChooser.frame = controlFrame;
    }
    return self;
}

- (void) changeFilter: (id) sender
{
    TextureFilter filter = (TextureFilter) [sender selectedSegmentIndex];
    m_renderingEngine->SetFilter(filter);
}

...
|
Example 2 includes
some UIKit and Objective-C mechanisms that we haven’t seen before (such as
@selector), but it will be familiar to iPhone
developers.
Note that you can also use UIKit to render
“look-alike” controls, rather than using the actual UIKit controls. For
example, you can render some buttons into a CGImage at
launch time and then create an OpenGL texture from that . This would give your buttons
the look and feel of the iPhone’s native UI, plus it wouldn’t suffer from
the potential performance issues inherent in mixing the actual UIKit
control with OpenGL. The downside is that you’d need to implement the
interactivity by hand.
2. Rendering Confetti, Fireworks, and More: Point Sprites
You may find yourself wanting to render a
system of particles that need a bit more pizzazz than mere single-pixel
points of light. The first thing that might come to mind is rendering a
small alpha-blended quad for each particle. This is a perfectly reasonable
approach, but it requires you to come up with the coordinates for two
textured triangles at each point.
It turns out the iPhone supports an extension
to make this much easier by enabling point sprites.
Point sprites are small screen-aligned quads that get drawn at each vertex
in a vertex array or VBO. For simplicity, a point sprite uses an entire
texture; there’s no need to provide texture coordinates. This makes it a
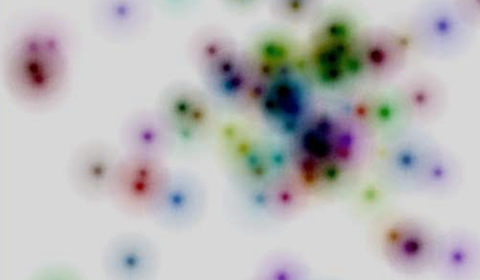
breeze to render particle systems such as the one depicted in Figure 2.

For OpenGL ES 1.1, the name of the extension is
GL_OES_point_sprite, and it allows you to make the
following function calls:
glEnable(GL_POINT_SPRITE_OES);
glDisable(GL_POINT_SPRITE_OES);
glTexEnvi(GL_POINT_SPRITE_OES, GL_COORD_REPLACE_OES, GL_TRUE);
glTexEnvi(GL_POINT_SPRITE_OES, GL_COORD_REPLACE_OES, GL_FALSE);
With OpenGL ES 2.0, point sprites are supported
in the core specification rather than an extension. There’s no need to
call any of these functions because point sprite functionality is
implicit. You’ll see how to use point sprites in both ES 1.1 and ES 2.0 in
the upcoming SpringyStars sample.