If you used previous versions of XNA Game Studio,
this next section should be familiar. It is the updated version of the
storage API that shipped for the last few releases. Although it is more
complicated than the version you just saw, it also has more features.
First, emulate what you did originally in your Windows Phone 7 project
by allowing the user to draw x marks on the screen, save, and reload
them. Create a new Xbox 360 Game project.
Recreating the Project on Xbox
Because you need to use the
storage api, as well as various IO functions, update the using
statements at the beginning of your new game1.cs code file:
using System.IO;
using Microsoft.Xna.Framework.Storage;
You need the sprite font
again to render the data, so add a new sprite font to your content
project named Font. Include the variables for your list of points and
the following font:
List<Vector2> points;
SpriteFont font;
Add the initialization of the list in the Initialize overload:
points = new List<Vector2>();
Also, include the creation of the sprite font in your LoadContent overload:
font = Content.Load<SpriteFont>("font");
To render your points, add the following code before the base.Draw call in your Draw overload:
spriteBatch.Begin();
foreach (Vector2 position in points)
{
    spriteBatch.DrawString(font, "x", position, Color.White);
}
spriteBatch.End();
The code that you used to add
new points to the screen in the Windows Phone project unfortunately does
not work here. There is no touch screen for your Xbox 360! So instead,
let users input points with the controller by allowing them to move a
cursor around the screen and then pressing the A button to add points.
To implement this simple feature, add a couple new variables to your
project:
Vector2 currentPos;
GamePadState lastState;
The first variable is the
current position of the onscreen cursor, and the second is the last
frame’s state of the controller. Initialize the current position
variable in your initialization method as well:
currentPos = Vector2.Zero;
Note
Yes, it is true that you don’t
need to do this initialization (because the variable is by default
initialized to zero), but it’s a good habit to initialize everything in
your initialization methods to ensure that objects have the correct
values.
To draw the cursor on the
screen so users can see where they will place points, add the following
line to your project before the End call on spriteBatch:
spriteBatch.DrawString(font, "*", currentPos, Color.Red);
To allow the user to update its position, add the following code to the Update method:
GamePadState state = GamePad.GetState(PlayerIndex.One);
if (state.IsButtonUp(Buttons.A) && (lastState.IsButtonDown(Buttons.A)))
{
    // Add a new point here
    points.Add(currentPos);
}
// Move the current cursor
currentPos.X += (state.ThumbSticks.Left.X * 10);
currentPos.Y -= (state.ThumbSticks.Left.Y * 10);
// Don't let it go beyond the screen
if (currentPos.X < 0)
    currentPos.X = 0;
if (currentPos.Y < 0)
    currentPos.Y = 0;
if (currentPos.X > GraphicsDevice.Viewport.Width)
    currentPos.X = GraphicsDevice.Viewport.Width;
if (currentPos.Y > GraphicsDevice.Viewport.Height)
    currentPos.Y = GraphicsDevice.Viewport.Height;
lastState = state;
Note
This code assumes you have a controller plugged in and registered as player one. A real game handles this more appropriately.
The
code here is pretty self-explanatory; it adds a new point to the list
(at the current position) if the A button was pressed in the last frame
and released in this frame. It increments the X member of the current
position by how much you press the left thumbstick (multiplying by 10
makes the cursor move faster). It does the same thing with the Y member,
except it decrements instead because the Y axis on the stick goes from 1
to –1. It then does some basic bounds to ensure that the cursor stays
within the viewport, and stores the last state of the gamepad.
With that portion of the code done, save the data when you exit and restore it when you launch.
Devices and Containers
Let’s take a few moments to discuss the StorageDevice,
because it is one of the sources of the most common mistakes when
dealing with storage on the Xbox. The Xbox 360 provides a number of
places to store data. You might have a hard drive, you might have one or
more memory units, and now you can even have USB memory sticks
attached. Each one of these is considered a device and can be used to
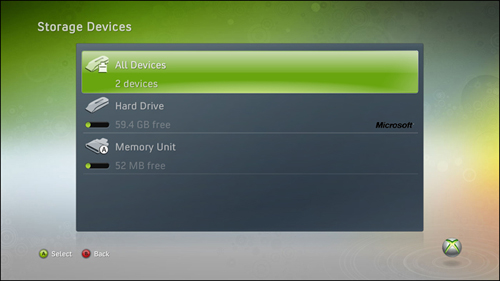
store data for your games. Notice an example of a list of devices in
which to choose in Figure 1.

Each device can have a wide
variety of containers in it, and much like on the phone, each game has
all of its data segregated from all other games. When navigating to the
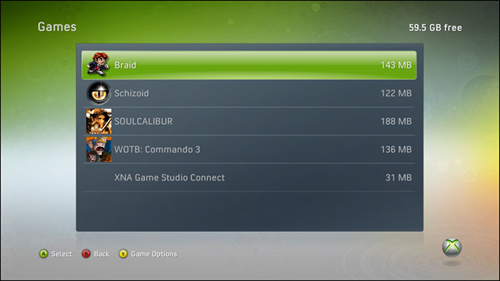
system memory blade in the Xbox 360 dashboard, you can see how much data
each game is storing, such as in Figure 2.

StorageContainer objects are the equivalent of the IsolatedStorageFile
object you used previously. The big difference is that a game can have
multiple containers, where each game is limited to a single isolated
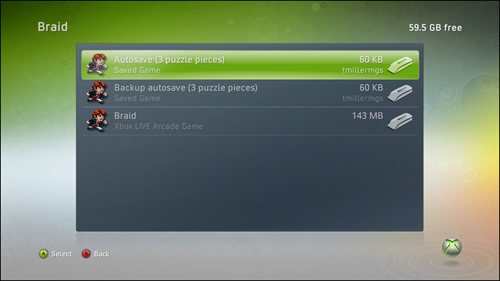
storage store. As you can see in Figure 3, this single game has three distinct storage containers in it.

When
you view this screen on the dashboard, it shows the containers that
were created for the game, not the files themselves.