In the majority of games that are made these days, it
is rare that the entirety of the game can be completed in a single
sitting of a reasonable length. Some games can last beyond 40 hours, and
although sitting around playing games nonstop for that amount of time
sounds fun, everyone needs a break sometime! The majority of games now
have a concept of saving state for you to continue where you left off.
What Is Storage?
XNA Game Studio 4.0 comes with
two separate storage solutions: one for the Reach profile that runs on
the platforms XNA runs on and another for the HiDef profile that runs
only on Xbox and Windows and gives you extra control for your Xbox
storage needs.
Isolated Storage
The first type of storage you
learn about here has actually been around for a while, and it is called
Isolated Storage. As the name implies, things stored here are isolated
from other things—in this case, other applications. You are safe in the
knowledge that anything you write in your store, no other applications
can read or write. Let’s start off by creating a new Windows Phone Game
project to show some of the features that this storage API has.
Before you can store
anything, though, you need something interesting to save. You can
imagine that this could be some state of a level such as where the
player is, the amount of health they have, and fun stuff like that;
however, for this example, you need something simple to show the
concepts.
First, add a SpriteFont object called Font
to your project because you use this to render the data you will save.
Next, you need to add a new using statement to the top of your game1.cs
code file because the default template that is used for creating new
projects doesn’t actually have the namespace that the isolated storage
constructs live in. Add this to the top of your code file:
using System.IO;
using System.IO.IsolatedStorage;
What this example does is to
allow a user to plot points for the game, and then save those points for
later. You need a few variables for this, so go ahead and add these to
your game now:
SpriteFont font;
List<Vector2> points;
As you see, the points are
just their positions stored in a vector. You need an easy way for the
user to add new points, though, so in your Initialize method, add the following to tell the system that you will listen for a Tap gesture from the touch panel (which is simulated with the mouse on the emulator):
// Support tap gestures to map points
TouchPanel.EnabledGestures = GestureType.Tap;
points = new List<Vector2>();
Also notice that you initialize the points list. Because you need to render these points somehow, you also need to create your SpriteFont object in the LoadContent method:
font = Content.Load<SpriteFont>("font");
Of course, you need to draw
these points. You can use a simple x character to show the position of
the points, so add the following code to your Draw overload before the call to base.Draw:
spriteBatch.Begin();
foreach (Vector2 position in points)
{
    spriteBatch.DrawString(font, "x", position, Color.White);
}
spriteBatch.End();
You don’t need anything
super fancy here; you simply draw a white x at every position in the
points list. All that is left now is to add points to the list, luckily
that’s quite easy! Just add this code to your Update overload:
while (TouchPanel.IsGestureAvailable)
{
    GestureSample gesture = TouchPanel.ReadGesture();
    points.Add(gesture.Position);
}
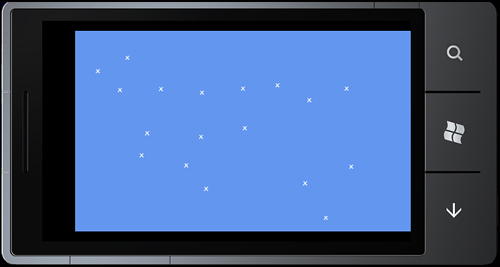
This
is extremely simple stuff here. Simply read all gestures while any are
available and add the position of that tap to your list. Running the
game now lets you tap on the screen to get a bunch of white X’s drawn
everywhere, much like you’d see in Figure 1.
As you’d probably guess, if
you stop and restart the application, all of your wonderful x marks get
lost. What if you designed a great work of art using small x marks? This
situation needs to be rectified.
Saving and Loading Data
First, you need a good spot in
your game to save the data. In a real game, this would probably be at
the end of a level or at a defined save point in the game. Because this
is just an example, though, you can instead pick an arbitrary point, in
this case, when the game exits. Add the following override to your game:
protected override void OnExiting(object sender, EventArgs args)
{
    // Save our data
    using (IsolatedStorageFile file = IsolatedStorageFile.GetUserStoreForApplication())
    {
        using (BinaryWriter writer = new BinaryWriter(file.CreateFile("pointData")))
        {
            foreach (Vector2 v in points)
            {
                writer.Write(v.X);
                writer.Write(v.Y);
            }
        }
    }
    base.OnExiting(sender, args);
}
The first thing to notice is the creation of an IsolatedStorageFile object via the GetUserStoreForApplication
method. You can think of this object as the root of any storage
facilities you need. It can contain files, directories, and all kinds of
things you see in a few moments. Next, you want to use the CreateFile
method to create a new file in your isolated store. The name of this
file can be any valid filename you would like; for this example, choose pointData.
Because the CreateFile method returns a stream, you can use the BinaryWriter
helper object to allow you to easily write data into your store. You
simply enumerate over each of the points in your list and write out the X and Y components to the stream. These statements are wrapped in the using keyword, so the objects are disposed (and closed) immediately when you’re done with them.
Running the game now lets you
continue to add new x marks and save the current state of the marks when
you exit; however, you never read them back in, so you need to fix
that. Add this override to your code (this happens when your game first
starts up).
protected override void OnActivated(object sender, EventArgs args)
{
    // Load the data
    using (IsolatedStorageFile file = IsolatedStorageFile.GetUserStoreForApplication())
    {
        using (BinaryReader reader = new BinaryReader(file.OpenFile("pointData",
            FileMode.OpenOrCreate)))
        {
            for(int i = 0; i < reader.BaseStream.Length / 8; i++)
            {
                points.Add(new Vector2(reader.ReadSingle(), reader.ReadSingle()));
            }
        }
    }
    base.OnActivated(sender, args);
}
In this call, you essentially reverse what you did when you saved the data. You once again create your IsolatedStorageFile
object, but instead of creating a new file, you open an existing file.
Naturally, you use the same name you used earlier when you saved the
data. If you notice, in this example, you use the FileMode.OpenOrCreate
option when opening the file. This opens the file if it exists or
creates a new one if it does not, and you do this so you don’t have to
worry about an exception trying to open a file that doesn’t exist. If
you use the FileMode.Open option instead, the method throws an exception if that file does not exist.
Instead of using the BinaryWriter helper class you used during the save operation, you can instead use the BinaryReader
helper class to get that data out. Because you know that you are
writing pairs of floats from your vectors, you can calculate how many
points are in this file by taking the total length (in bytes) and
dividing by eight (two floats that are four bytes each). You then add
each new point into your point list.
With that, when you start up
the application, all of the points you had drawn on the screen before
you exited appear back where you left them!
The IsolatedStorageFile Object
At a basic level, this small
example actually covers everything you need to do in a game to save
state. However, it doesn’t give a great in-depth discussion of the
features of the IsolatedStorageFile object.
You’ve seen the OpenFile method and the CreateFile method, although the CreateFile method is simply a helper method that calls OpenFile with the FileMode.CreateNew option passed in. These methods each return a Stream object that you can use however you want. Well, that’s not entirely true. One of the overloads of OpenFile enables you to pass in a FileAccess enumeration that enables you to specify whether you want the file to be opened for Read, Write, or ReadWrite. If you’ve passed in FileAccess.Read to your OpenFile method, you cannot write to the stream that is returned, for example.
There are other things you
can get from this object. If you need to know the amount of available
space remaining for your files, you can use the AvailableFreeSpace property. If you want to completely delete everything in the store for your game, use the Remove method. That’s a dangerous operation, though, so make sure you want to delete everything!
If you want to delete a single file rather than your entire store, use the DeleteFile method. For example, if you want to delete the file you created during the previous example, call file.DeleteFile("pointsData").
You might notice that this store looks much like a file system. There are methods such as CreateDirectory and CreateFile.
Having the isolated store mirror a file system enables you to store
your data in a hierarchy if you have the need to do so. For example, if
you store a high-score list for every level in your game, you might
envision a list of directories for each level with each directory
containing a file called highscore.txt that contains the high scores for that level. There’s nothing stopping you from creating a bunch of files called level1highscore.txt, level2highscore.txt,
and so on, but the option to have directories is there if you want to
use it. With the ability to create a directory, the ability to remove it
via the DeleteDirectory also exists.
If you imagine a scenario
where you save the data for a particular character in your game and that
character can be named by the player, you might be tempted to store the
data in a file of that user-defined name. Because you don’t know what
that name is, you need a way to enumerate files (and directories) within
your store, and luckily you can do that with the GetDirectoryNames and GetFileNames methods.
Although the isolated storage
functionality exists on all the platforms that XNA runs on (and is part
of the Reach profile), it lacks some of the features users have come to
expect when running on some platforms, such as Xbox 360. Next, you’ll
learn how to access those features!
