While you are playing a song,
you can get visualization data. This data is an array of frequencies and
samples based on the current audio played. Although a common usage of
this data is to render visualizers (and is what this code does), you can
also use this data to drive your game. Frequencies are normalized
between 0.0f and 1.0f, and each value represents a frequency band
between 20Hz and 20KHz and can be perceived as pitch. The samples are
from –1.0f to 1.0f and approximate the wave form of the sound. They can
be perceived as volume.
Rendering Visualization Data
For this example though, you
simply modify a texture every frame and render that to help visualize
the audio played. Create a new Windows Game project, and add the
samplemusic.mp3 file from the downloadable examples to your content
project. Then add the following variables to your game:
Song song;
Texture2D texture;
VisualizationData data;
Color[] colorData;
Obviously, the song is the
music that you play, and the texture is what you render to the screen.
The visualization data is used to store the frequency and sample data,
and the array of colors is used to update the texture with data from the
audio. Modify your LoadContent method to instantiate these values:
song = Content.Load<Song>("SampleMusic");
data = new VisualizationData();
MediaPlayer.IsVisualizationEnabled = true;
texture = new Texture2D(GraphicsDevice,
    data.Frequencies.Count, data.Samples.Count);
colorData = new Color[texture.Width * texture.Height];
Loading the song should be familiar. Create the VisualizationData
object because it creates two arrays for the data to be returned, and
this is not something you want to do every frame. The color data is the
same way. You also need to create the texture (and do so using the same
size of data from the visualization data) and turn on the visualization
data.
To update the color data every frame to see how it changes, add the following code to your Update method:
if (GamePad.GetState(PlayerIndex.One).Buttons.A == ButtonState.Pressed)
{
    MediaPlayer.Stop();
    MediaPlayer.Play(song);
}
if (MediaPlayer.State == MediaState.Playing)
{
    MediaPlayer.GetVisualizationData(data);
}
for (int x = 0; x < data.Frequencies.Count; x++)
{
    for (int y = 0; y < data.Samples.Count; y++)
    {
        colorData[(x * data.Frequencies.Count) + y] =
            new Color(data.Frequencies[x],
                (float)Math.Asin(data.Samples[y]),
                data.Frequencies[x] + (float)Math.Asin(data.Samples[y]));
    }
}
texture.SetData<Color>(colorData);
You don’t start playing the
music until you press the A button (feel free to modify this to some
other input mechanism). This gives you the chance to restart it at any
time. Then, check the state of the current media, and if it is playing
you get the visualization data. If the state is stopped, or if
visualization data is unsupported or unavailable on this platform, the
data returned is all zeros. Next, loop through all of the available
data, and set each pixel in the color array to a particular color based
on the sample and frequency. Finally, update the texture, and now all
you need to do is render this on the screen. Replace your Draw method with the following:
protected override void Draw(GameTime gameTime)
{
    GraphicsDevice.Clear(Color.CornflowerBlue);
    spriteBatch.Begin();
    spriteBatch.Draw(texture, GraphicsDevice.Viewport.Bounds, Color.White);
    spriteBatch.End();
    GraphicsDevice.Textures[0] = null;
    base.Draw(gameTime);
}
The only thing new you might
notice is resetting the texture back to null after the sprite batch is
finished. This is done because you cannot modify a texture that is set
on a device, and using it in the sprite batch sets it to the device.
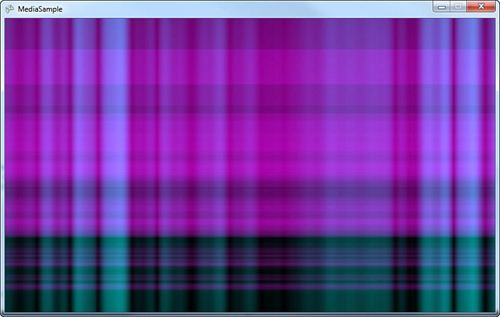
Running your project now shows a colorful pattern on the screen when
music is playing (by pressing the A button on your controller, or
whatever input mechanism you specified) as seen in Figure 1.
