The tools that you have available to you out of the
box, the targets that are of interest, and the major considerations
related to backup planning have all been discussed. It is time to
integrate each of these topics and actually carry out some backup
operations.
Full Server Backup
This section takes you
through the process of establishing a daily full server backup schedule
that targets a remote shared folder. This backup scenario is a
relatively common one, and it addresses many of the basic requirements
that exist for disaster recovery scenarios involving server recovery
from a catastrophic event.
Before attempting the following series of steps, you must address the following prerequisites:
Ensure that Windows Server Backup Features are enabled.
Make
sure your account is a member of either the Administrators group or
Backup Operators group on the local server being backed up.
Create
a service account that is used when executing the backup jobs that are
created. This account should also be a member of either the
Administrators group or the Backup Operators group on the local server.
Have
a remote shared folder that is online, possesses sufficient free space
for your backup data, and is accessible via UNC path for reading and
writing by both your account and the service account created in step 3.
Ensure
that clustered shared volumes (distributed-access file system volumes
that are new to failover clustering in Windows Server 2008 R2) are
neither the source nor the destination for backup data.
If you have addressed these concerns, you are ready to proceed.
Log on to the server that is to be backed up using your account credentials.
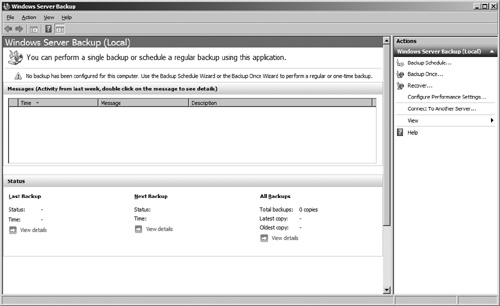
Click
the Start button and navigate to Administrative Tools, Windows Server
Backup. Doing so brings up the Windows Server Backup MMC snap-in, as
shown in Figure 1.
Click
the Backup Schedule link under the Actions menu on the right side of
the menu to launch the Backup Schedule Wizard. After a few moments with a
progress bar, the Getting Started page of the Backup Schedule Wizard
appears with some basic information about the wizard. Click the Next
button to continue.
The Select Backup Configuration page appears. As shown in Figure 2, you should select the Full Server (Recommended) option to capture all data on the server within the backup.
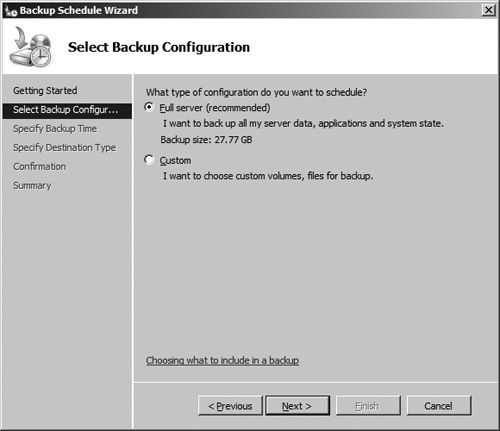
Selecting
the Full Server (Recommended) option affords you a great deal of
flexibility in the event of a disaster. With a full server backup, you
could choose to recover the entire server, only certain volumes on the
server, system state information, or any combination of these items and
more. Click the Next button to continue to the next wizard page.
On
the Specify Backup Time page, you select the time or times at which you
want Windows Server Backup to launch a backup operation. Figure 3 demonstrates configuring a single daily backup that is executed at 2 a.m. each day.
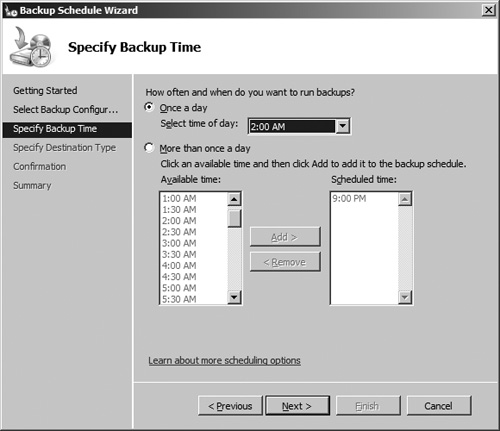
If Windows
Server Backup represents the primary mechanism through which server data
protection is achieved, RPO targets that have been established for the
server environment should directly drive the frequency with which you
perform backups. You can typically use a single daily backup to meet a
24-hour RPO target for server data, two evenly spaced daily backups to
meet a 12-hour RPO target, three evenly spaced daily backups to meet an
8-hour RPO target, and so on.
Of
course, you must balance the frequency with which you take backups
against the impact of running such backups. Conducting backups during
normal business hours can adversely impact server availability and
network utilization, so many organizations choose to run backups during
nonbusiness hours.
In
addition, backups do not complete instantaneously; they may take hours
to run. You must consider this backup run time when determining the
frequency with which to perform backups to avoid overlap between
adjacent backups.
Click the Next button to continue once you have specified your backup frequency and execution time(s).
The
Specify Destination Type page appears and prompts you to select the
storage location type used to store your backups. Because this
walk-through places backups on a shared network folder, the Back Up to a
Shared Network Folder option is selected, as shown in Figure 4.
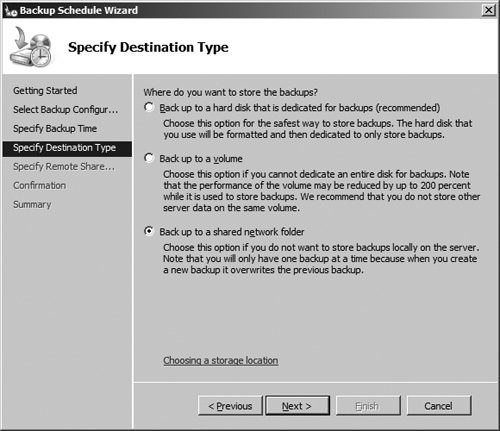
Note
As shown in Figure 4,
the wizard recommends that a dedicated hard disk, either internal or
external, be utilized as a storage location for backups. Dedicating a
disk permits multiple backup versions and removes the dependency of a
functioning network, but it does not offer a built-in mechanism for
offloading or migrating backup data in the event of a catastrophic
server failure. If you elect to take the dedicated disk route, your
implementation should also include a custom script or migration strategy
to transfer backups to a safe location in accordance with your disaster
recovery strategy and larger business continuity plan (BCP).
Once
you have specified the destination type, click the Next button to
continue. A message box appears to warn you that each backup to a remote
shared folder erases any that were previously present. Click the OK
button to continue.
The
Specify Remote Shared Folder page appears and prompts you for the UNC
path of the remote shared folder to create backups. It is here that you
supply the predetermined file share location, as shown in Figure 5.
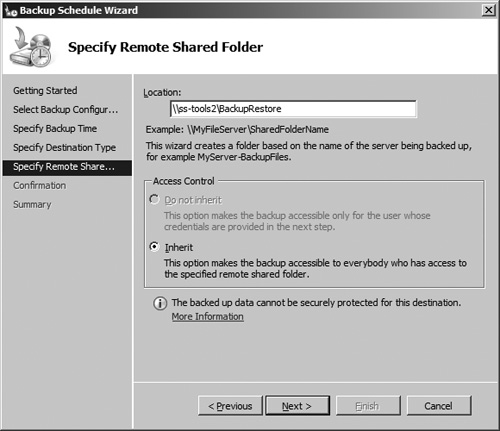
Tip
Because the backup is
performed to a remote share, the only Access Control option is Inherit.
This means that anyone with access to the file share where the backup
data is written can see the data, work with it, and even delete it.
Therefore, it is strongly recommended that the backup destination
location be locked down to just a select group of administrators and the
service account under which the backup jobs are executed.
Once
you have specified the backup location, click the Next button. The
Register Backup Schedule dialog box appears to prompt you for the
credentials under which the backup jobs should be run. It is here that
the service account credentials, which were created in prerequisite step
3, are supplied.
Once you have supplied the backup service account credentials, click the OK button to continue.
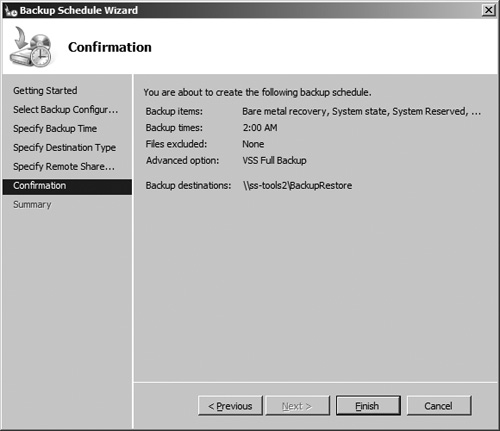
The Confirmation page of the wizard appears, as seen in Figure 6. Confirm that the details are correct, and click the Finish button.
The
Summary page appears, and the wizard establishes and schedules a
recurring backup job according to the parameters supplied. When it has
finished its actions, click the Close button to close the wizard.
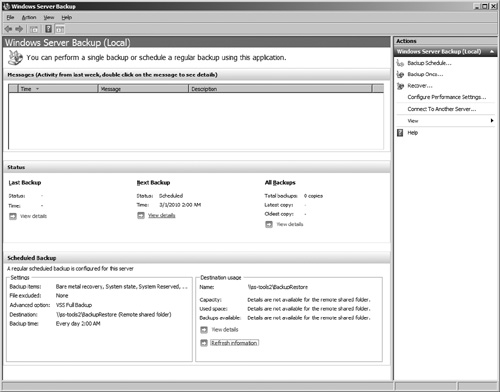
Once
you have closed the wizard, the Windows Server Backup snap-in updates
to reflect that a backup schedule has been created, as shown in Figure 7.
Note the addition of the Scheduled Backup pane at the bottom of the
main window, as well as the change in status under the Next Backup area
in the middle of the window.
The completion of step 12
means that your server has been set up to run daily backups on the
schedule specified. An actual backup has not yet been run, though.
Ideally, you should validate that a backup can be run given all the
configuration data that was just supplied to create the scheduled task.
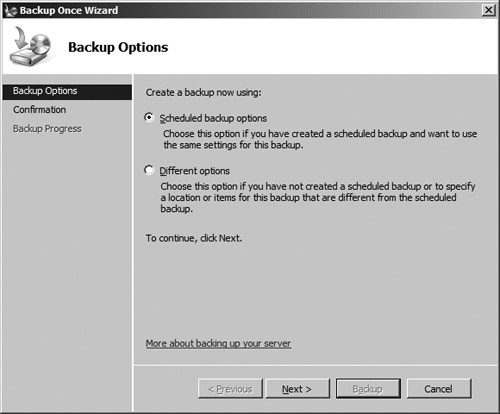
With a scheduled backup, it
is a simple matter to go through the Backup Once Wizard within the
Windows Server Backup snap-in, indicate that you want to run a single
backup using the parameters you just supplied through the Backup
Schedule Wizard (as shown if Figure 8), and execute a one-time backup task to perform validation by clicking the Backup button.
After
you have started the one-time backup, the display of the Backup Once
Wizard changes to provide a detailed status for monitoring the backup
operation, as shown in Figure 9.
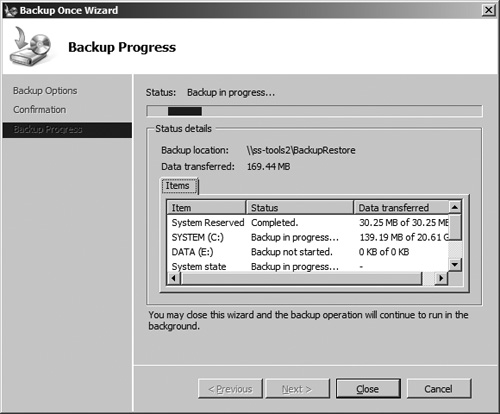
You can close the Backup
Once Wizard after the backup is complete or at any point prior to
completion. If you close the wizard prior to backup completion, the
backup simply continues to run in the background until it is complete.
Independently of the Backup
Once Wizard, the Messages window within the Windows Server Backup
snap-in updates to reflect both the backup job’s progress and its
ultimate success or failure. The Status displays below the Messages
window also change to incorporate the status of the most recently
attempted backup operation.
Assuming the backup job
completes successfully, you have the data needed to fully recover the
server in the event of a catastrophic failure.
