1. Creating Mailboxes
You can create new mailboxes in two ways. You can use the New Mailbox Wizard from Exchange Management Console (EMC) or use the New-Mailbox cmdlet from Exchange Management Shell (EMS). To run the New-Mailbox Wizard, perform the following general steps:
Open the EMC and navigate to the Mailbox node, which is located under the Recipients node.
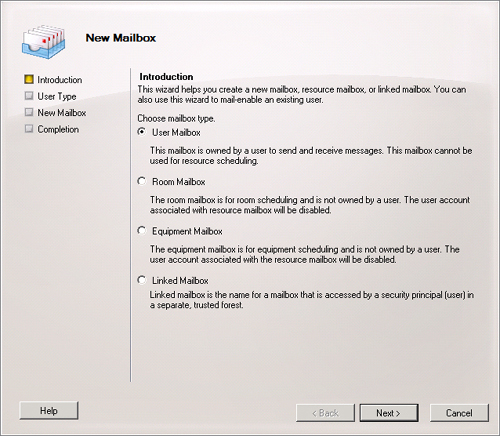
In the Actions pane, click on the New Mailbox item. This will bring up the first page of the New Mailbox Wizard, shown in Figure 1. Choose the User Mailbox option and then click Next.
On
the next page, you choose between creating a new user account and
assigning that account a mailbox or creating a mailbox and assigning
that mailbox to an existing user. If you choose to create a mailbox for
an existing user, a query will be performed to locate user accounts that
are not currently connected to mailboxes. You can select multiple
Active Directory users using this dialog box as long as those users do
not have Exchange mailboxes.
If
you have chosen to create new Exchange mailboxes for existing Active
Directory accounts, the next page allows you to have Exchange
automatically select a mailbox database to host the mailbox, a managed
folder mailbox policy, and an ActiveSync mailbox policy. It is also
possible to specify these options should the automatically selected
options not be appropriate. In general, you should place a user mailbox
in a mailbox database hosted on a mailbox server in the site that the
user most commonly accesses Exchange.
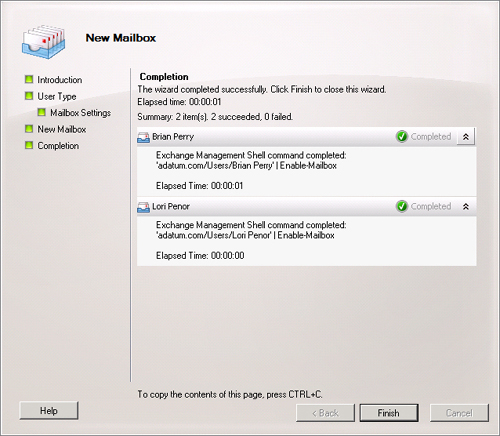
Once
you have either accepted the default mailbox database and policies or
specified alternates, the next page of the New Mailbox Wizard allows you
to click New, which creates the mailbox. Once this step has completed,
you can click Finish to close the wizard, as shown in Figure 2.
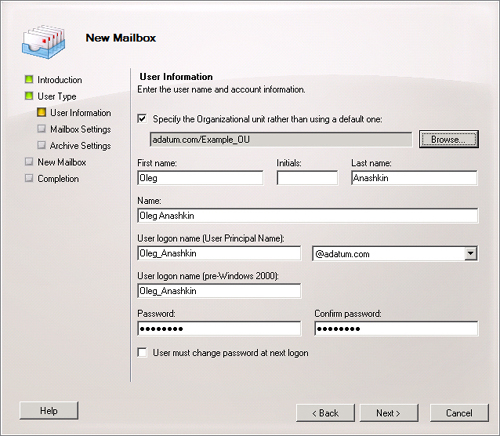
If you choose to create a new
user account during mailbox creation, the wizard will prompt you for
information similar to that required when you create a user account
using the Active Directory Users and Computers console, including the
ability to force users to change passwords when they initially log on
with this newly created account. As Figure 3
shows, you can choose which OU to place the account in or have the
account placed in the default Users container. Once this information has
been provided, the New Mailbox Wizard functions similar to the way it
functions when you are creating a mailbox for an existing user account.
To create a new mailbox and user account from the EMS, use the New-Mailbox cmdlet. For example, to create a new user account and mailbox for a user named Erik Andersen, issue the following command:
New-Mailbox -Name 'Erik Andersen' -Alias 'Erik_
Andersen' -UserPrincipalName '[email protected]' -SamAccountName 'Erik_Andersen' -FirstName 'Erik' -LastName
'Andersen'
When you run this command, you will be prompted to enter a password for the user account.
Note:
CREATING NEW MAILBOXES AND USERS
For more information on creating new user mailboxes using the EMC or EMS, consult the following article on TechNet: http://technet.microsoft.com/en-us/library/bb123809.aspx.
To add an Exchange mailbox to an existing user account from EMS, use the Enable-Mailbox
cmdlet. For example, to add a new Exchange mailbox to a user named Toni
Poe whose existing user account resides in the Users container of the
adatum.com domain, issue the following command:
Enable-Mailbox 'Adatum.com/Users/Toni Poe'
Note:
CREATE MAILBOXES FOR EXISTING USERS
For more information on creating Exchange mailboxes for existing users, consult the following article on TechNet: http://technet.microsoft.com/en-us/library/aa998319.aspx.
Note:
RECIPIENT PROVISIONING PERMISSIONS
To learn more about the
permissions required to perform specific recipient management tasks,
consult the Recipient Provisioning Permissions section of the following
TechNet website: http://technet.microsoft.com/en-us/library/dd638132.aspx.
