Adding Attachments
Many users need to be able to attach files to
their messages. This function is supported when sending messages via
OWA. When you send attachments, an upload of the file or attachment is
required and can be affected when doing so over a slow link. In
addition, if attachment size limits are enabled at the server, this
prevents you from sending very large attachments from OWA. To add an
attachment, the email being composed must be open:
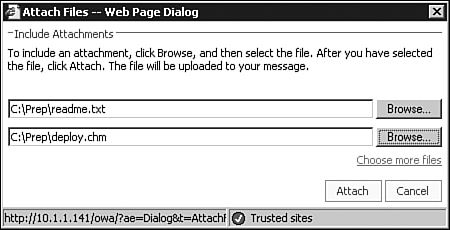
1. | Click the paper clip icon on the toolbar at the top of the message. The Attachment dialog box opens.
|
2. | Browse to the file to be attached, highlight it, and then click Open.
|
3. | To add more attachments, click the Choose More Files option. This creates additional entries, as shown in Figure 2.
|
4. | When all attachments have been selected, click Attach.
|
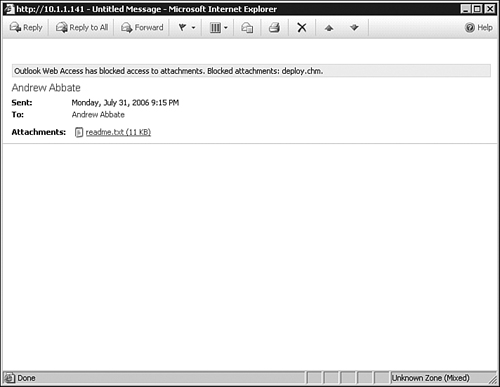
As shown in Figure 3, notice that all the attachments are listed below the Subject line, and the word Attachments is shown as an icon next to the attachment name.
Sending an Email
After the information, attachments, and
recipients have been entered in to the message, you can send the email
by clicking the Send button with the envelope on it. At this time, if
there are any issues with the names in the To, CC, or BCC boxes, OWA
presents a dialog box highlighting the irresolvable address names. At
this time, you can either delete this recipient from the list or choose a
different user from a list by clicking Change To. If neither option is
helpful, click Cancel and remove the address manually by using the
method previously outlined for removing a user address from the To, CC,
or BCC field list in the message.
After all changes are made to addresses, click OK and the message is immediately sent.
Reading an Email
When
an Inbox receives a new email message, a notification box appears in
two places. A message window appears in the lower-right of the screen,
and a message box appears in the shortcut bar. Both notify the user that
a new message has arrived.
You can also force OWA to look for new email; to
do this, click the Send/Receive Email button in the Infobar. This
initiates a check with Exchange and updates OWA that a message has
arrived. A refresh of the browser screen also updates the UI with any
new messages. The Inbox folder in the folder tree includes the number of
unread messages in parentheses. This value updates when a new message
arrives.
If the new message that arrives was classified
as junk and was placed into the Junk E-Mail folder, the new message
pop-up window would not be triggered.
To read an email, double-click the message in
the message list. This opens the email message in its own window,
enabling you to view the contents and access any attachments.
Alternatively, you can just highlight the message and view the contents
in the reading pane.
Reading Attachments
If a message arrives with an attachment, it is indicated in the message list pane as a paper clip icon.
In
the reading pane or in an opened email, an attachment can be identified
to the left of the message list or listed below the Subject line and
below the word “Attachment.” To read the attachment, three options are
available:
The first option is to right-click on
the underlined attachment name and choose Open. If allowed, the
attachment will open in a new window.
The
second option is to right-click on the underlined attachment and choose
Save Target As. This method downloads the attachment to the client
accessing Exchange and allows the user to choose a location to save the
file. After the file has been saved, the user can browse to that
location on the local client system and open the attachment there.
The
third option is to double-click on the underlined attachment, and if
allowed, the attachment opens in a new window. Certain attachment types
will not support this behavior depending on how their viewers are
spawned.
Some attachments that are at a high risk of
containing viruses (such as executables) must be saved to a hard disk
first, and cannot be opened directly from OWA. This is an intended
security feature built in to OWA and keeps users from inadvertently
opening a spamming virus that would exploit the user’s computer. Forcing
the file to be saved to disk provides another level of virus protection
because generally, saving a file to a hard disk brings the machine’s
antivirus software into play, providing yet another assurance that the
attachment isn’t infected with a true virus. When an attachment is
considered high risk, OWA notifies the user that the attachment cannot
be opened directly. The user then is forced to choose the Save Target As
option. Saving the file locally to the disk can be helpful for users
who use OWA as their primary Outlook client as they would have access to
the attached files while offline.
Replying or Forwarding an Email
Just as in the full Outlook 2007 client, OWA
provides many options for emails to be replied to or forwarded. Three
methods are available when choosing to reply or forward an email.
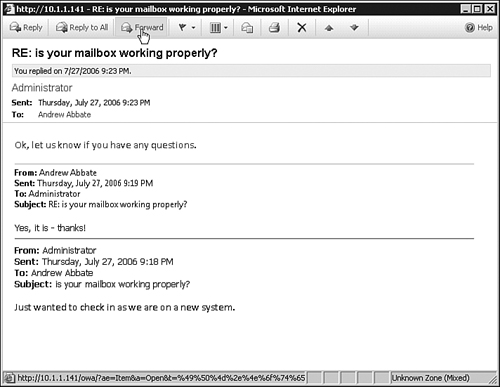
When a message is open, three buttons are
available on the message dialog box toolbar. To reply to just the
sender, click Reply, type your reply, and click Send. To reply to all
the recipients in the list, use Reply to All instead. Note that when the
Reply to All option is used, it does not reply to any recipients listed
in the BCC field. To forward the message to a different user not in the
current recipient list, click Forward, as shown in Figure 4,
and then enter the new recipient’s address in the To field, using one
of the addressing methods listed previously for addressing an email.
When the message is properly addressed and any comments added, click
Send.
Another option is to right-click a message in
the message list and choose Reply, Reply to All, or Forward from the
shortcut menu.
The
final method is to click a message once in the message list to
highlight it and click one of the three envelope icons in the Infobar.
Doing this allows a message to be replied to without actually opening
the message. The left button is the Reply option, the middle is the
Reply to All button, and the right button is the Forward button.
This is yet another example of how Microsoft
provides several ways of performing the same task so that a user can
adopt the methods with which they find most comfortable.
