4. Email Address Policies
Email address policies generate the primary and secondary email addresses for
recipients in an Exchange organization based on a combination of first name,
last name, middle initial, and accepted domain. The default email address policy
for an organization involves the user’s alias, the “at” sign
(@), and the default accepted domain, which is the forest root domain’s
fully qualified domain name.
To create an email address policy, perform the following general steps:
Navigate to the Organization\Hub Transport node in the EMC and click
on New E-Mail Address Policy in the Actions pane.
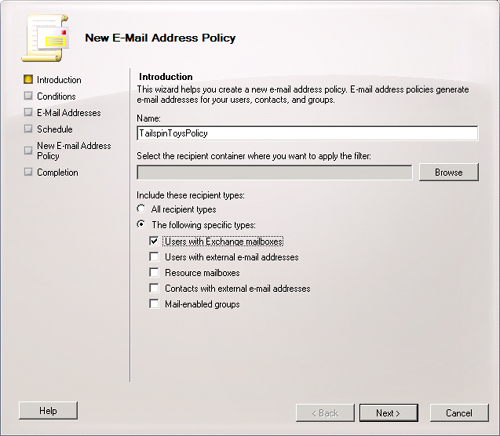
Enter a name for the policy and specify which recipient types to which
the policy applies. As Figure 4 shows,
policies can apply to all recipient types or a selection of mailboxes,
external email addresses, resource mailboxes, contacts, and mail-enabled
groups. On this screen, you can also select the recipient container,
such as a specific organizational unit, to which the policy will
apply.
Specify the
conditions under which the policy applies. This could mean that the
user’s state or province, department, or company attribute matches
a certain value.
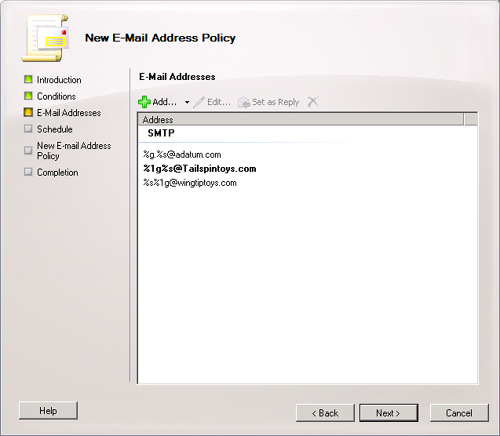
Specify the format of the email address and the accepted domain to
which the email address applies. You can add multiple email address
formats at this point and set the default reply to address of addresses,
as shown in Figure 5.
Specify whether the policy will apply immediately or at a specific
time in the future or whether the policy does not apply.
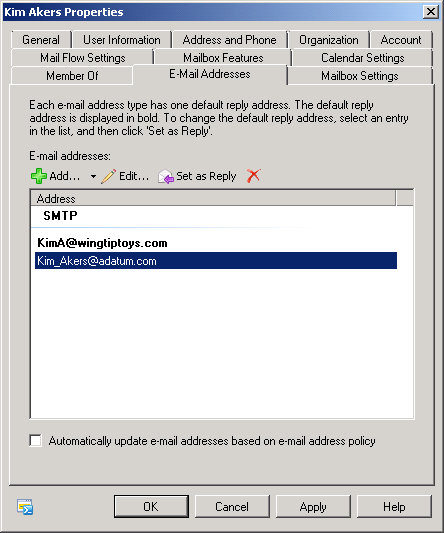
Each recipient can have multiple email addresses applied either through a
single policy or through the application of multiple policies. The reply-to
address set in the policy with the highest priority becomes the user’s
default reply-to address. You can manually configure the default reply address
for a single user by selecting an address on the E-Mail Addresses tab of a
recipient’s properties, disabling the Automatically Update E-Mail
Addressed Based On E-Mail Address Policy, and then clicking Set-As-Reply, as
shown in Figure 6.
To configure email address policy priority, use the
Set-EmailAddressPolicy cmdlet with the Priority
parameter. The policy that has priority 1 overrides other policies. When you set
a policy to priority 1, all other policies increment their priority so that no
conflicts occur. For example, the existing policy that was priority 1 becomes
priority 2 and so on. You can also select a policy in the Organization\Hub
Transport node of the EMC and then click on Change Priority.
You can use the following EMS cmdlets to
manage email address policies:
New-EmailAddressPolicy
This cmdlet allows you to create a new policy.
Get-EmailAddressPolicy
This cmdlet allows you to view the properties of an existing
policy or list existing policies and their priorities.
Set-EmailAddressPolicy
This cmdlet allows you to modify the properties of an existing
policy, including setting the policy priority.
Update-EmailAddressPolicy
This cmdlet updates the email address policy to apply any changes
made by the Set-EmailAdressPolicy cmdlet to all
recipients within the scope of the policy.
Remove-EmailAddressPolicy
This cmdlet removes an existing policy but does not remove email
addresses that have been applied to users through that
policy.
5. Transport Settings and Transport Dumpster
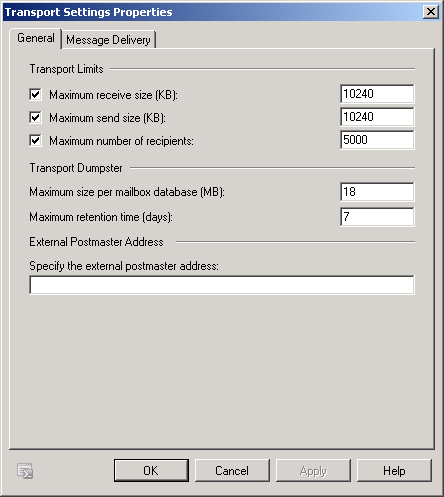
Transport settings properties allow you to configure the maximum receive size,
send size, and maximum number of recipients that transport servers will allow
for messages that they route in your Exchange organization.
By editing
the properties of transport settings, you can also configure the properties of
the transport dumpster. The transport dumpster holds copies of messages that are
replicating to other mailbox databases in a database availability group. In the
event that a mailbox database fails before replication has occurred, messages
will be kept safely in the transport dumpster up until the specified limits.
You can access transport settings properties by selecting the Organization
Configuration\Hub Transport node and clicking on the Global Settings tab,
selecting Transport Settings, and clicking on Properties in the actions pane.
Figure 7 shows this properties dialog box.
You can configure transport settings at the organizational level by using the
Set-TransportConfig cmdlet. Use the
Set-TransportConfig cmdlet with the MaxReceiveSize,
MaxRecipientEnvelopeLimit, and MaxSendSize parameters to configure maximum
receive size, send size, and number of recipients for the organization. Use the
Set-TransportConfig cmdlet with the
MaxDumpsterSizePerDatabase and MaxDumpsterTime parameters to configure transport
dumpster properties.
Note:
Understand the difference between an accepted domain and a remote
domain.
