Install the Reporting Server on a Standalone Server
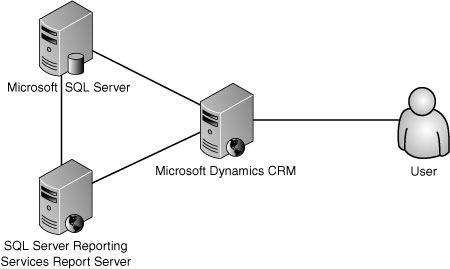
Figure 16 shows a deployment with Reporting Services on a standalone server.
Pro
The reporting server is on a standalone server, not impacting load on any other server.
You can use a service account or Kerberos authentication to get user-specific data.
Con
The installation steps are as follows:
1. | Log in to the CRM front-end web server.
|
2. | Navigate to the Microsoft SQL installation setup.
|
3. | Launch setup.
|
4. | Click Next to install the prerequisites.
|
5. | Click Next on the Welcome screen.
|
6. | Click Next on the Prerequisite Check.
|
7. | If
IIS and ASP.NET are not installed/configured on the server, cancel the
setup and configure IIS and ASP.NET using the application server role,
and then restart the setup.
|
8. | Enter the product key and click Next.
|
9. | On the Components to Install screen, select the following components:
Workstation components, Books Online, and development tools (recommended)
|
10. | Click Advanced.
|
11. | On
the Documentation, Samples, and Sample Databases screen, deselect
Sample Databases and Sample Code and Applications (recommended).
|
12. | Click Next.
|
13. | On
the Instance Name screen, you can specify an instance name for
Reporting Services and database engine. If you want to install it on the
default instance instead, select Default Instance (MSSQLSERVER).
|
14. | On the Service Account screen, do the following:
Specify a domain user account.
|
15. | Click Next.
|
16. | Select the appropriate collation. If unsure, use default values.
|
17. | Click Next.
|
18. | On the Report Server Installation Options screen, select Install the Default Configuration.
|
19. | Click Next to begin installation.
|
The following configuration steps are required only if you did not configure at the time of installation:
1. | Click Start.
|
2. | Click Microsoft SQL Server 2005.
|
3. | Click Configuration Tools.
|
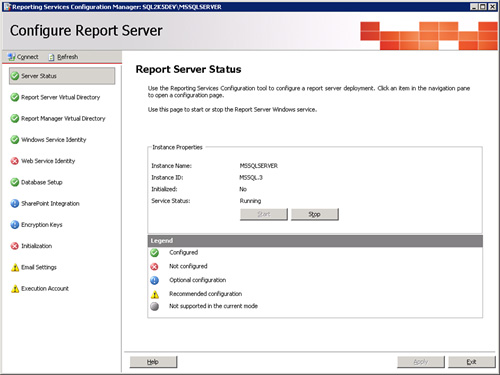
4. | Click Reporting Services Configuration (Figure 17).
|
5. | Start Reporting Services (if not started already).
|
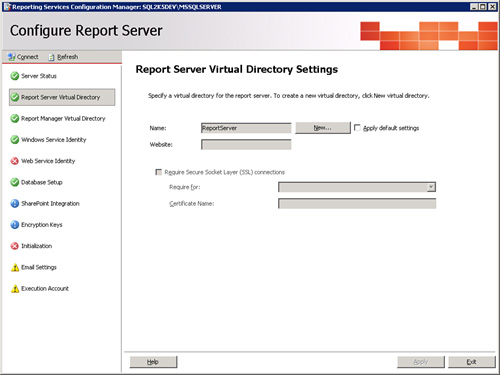
6. | Create a virtual directory (by default, ReportServer), as shown in Figure 18.
|
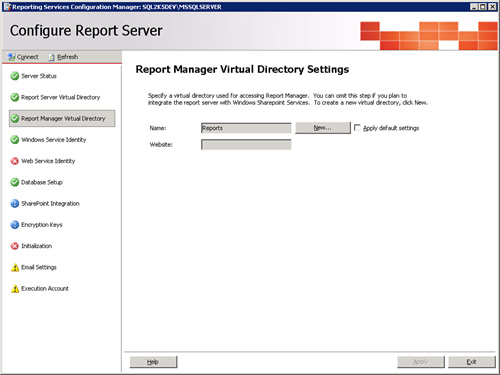
7. | Create a virtual directory (by default, Reports), as shown in Figure 19.
|
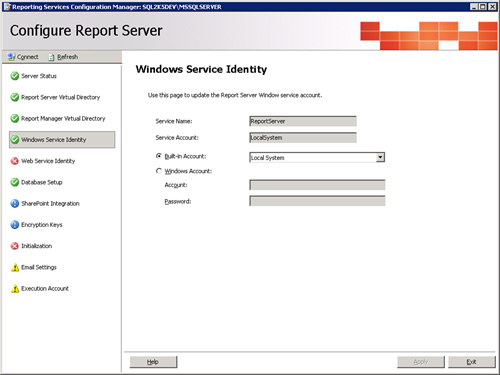
8. | Select the appropriate identity (as chosen in the earlier steps), see Figure 20.
|
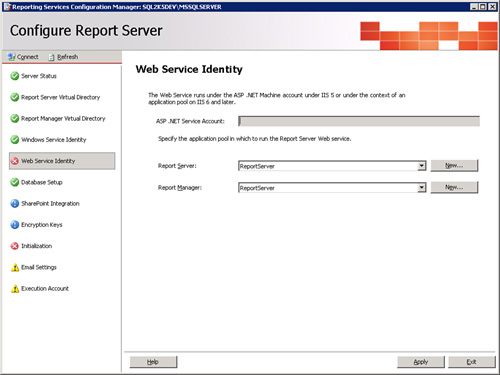
9. | Confirm the web service identity and the service accounts running the application (Figure 21). This needs to have either a service account accessing the data source or Kerberos needs to be enabled.
|
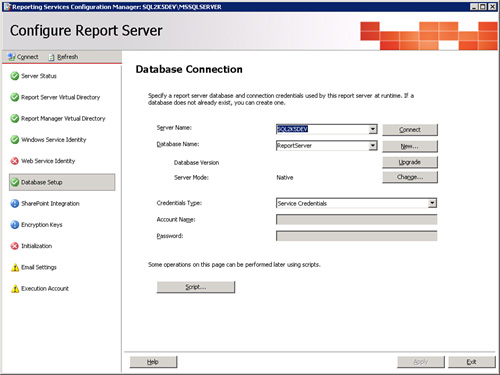
10. | Select the database location of the report server (Figure 22). This is a required configuration for running the service in a load-balanced environment.
|
11. | On the Initialization screen, select Initialize the Reporting Server.
|
The verification steps are as follows:
1. | Before beginning the configuration, verify whether the following services are running:
|
2. | Navigate
to http://localhost/reports or https://localhost/reports (if you
enabled SSL on your server). You should see the Report Manager home
page. |
