Using HotCopy backup
The HotCopy backup utility
can be used to take a backup of the Microsoft Dynamics NAV database from
the server location onto the hard drives.
We can use the following command prompt parameters to run HotCopy
from the command prompt. Alternatively, we can also put these
command-line parameters in a source file and provide that as a single
parameter:
|
Parameter
|
Description
|
Example
|
|---|
|
Source
| Specify the path of the database, name of the database, and name of the database file (if the file is in the same folder as HotCopy.exe). We can specify multiple files as the source if we need to back up multiple databases.
|
HotCopy source = c:\program files\Microsoft Dynamics NAV\..database.fdb.
HotCopy source=database.fdb.
(This will use the database.fdb from the HotCopy folder).
|
|
Destination
|
Specify the path of the directory where the database file needs to be
copied. If there is already a backup in the directory, it will be
overwritten by HotCopy.
|
HotCopy source = c:\.. Destination = \\Backupserver\NAVBackups\.
|
|
Dbtest
|
This is the option to run the database test on the NAV Classic database before it is backed up. This corresponds to the File | Database | Test option. The three options are minimum, maximum, and normal.
|
HotCopy source = c:\..Destination = \\Backupserver\NAVBackups\ dbtest = maximum.
|
|
CC
|
This parameter is used to specify if a consistency check needs to be
performed on the backup. This check performs a bit-by-bit comparison of
the original database with the backup taken.
|
HotCopy source = c:\.. Destination = \\Backupserver\NAVBackups\ dbtest = maximum CC= yes.
|
|
Description
|
Use this parameter to give a description of the backup.
|
HotCopy source = c:\..Destination = \\Backupserver\NAVBackups\dbtest=maximum CC= yes.
|
|
Servername
|
This is the name of the Dynamics NAV Classic database server. The default is local host.
|
HotCopy source = c:\..Destination = \\Backupserver\NAVBackups\dbtest=normal CC= yes servername = NAV2009
|
|
Osauthentication
|
We can use this parameter if we intend to use Windows Authentication.
The only option is either "yes" or specify the username and password as
defined in the subsequent parameters.
|
Hotcopy source = c:\..Destination = \\Backupserver\NAVBackups\dbtest=normal CC= yesServername = NAV2009 Osauthentication = yes
|
|
User
|
Enter the username for the user creating the backup, if Windows authentication is not used.
| |
|
Password
|
Enter the password for the user creating the backup, if Windows authentication is not used.
| |
|
Nettype
|
Specify the network type used between database server and clients. The options are netb for NetBIOS, tcps for TCPS, and tcp for tcp/ip.
| |
HotCopy creates an exact
snapshot of the database files in the specified destination folder. To
restore the database backup created using HotCopy, copy the backed up
files (.fdb) to the database folder and restart the database server.
Testing the database
Running periodic tests
on the Dynamics NAV database must essentially be a part of the
organization's periodic database management plan.
The backup process in Dynamics NAV has a built-in basic database test, which runs during the backup process.
To run a database test on the Dynamics NAV database, go to File | Database | Test.
Starting the test
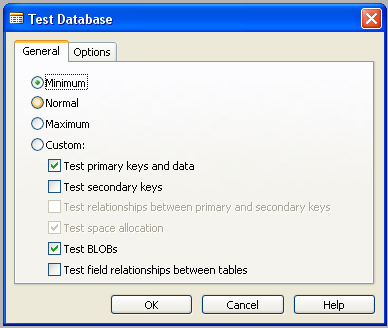
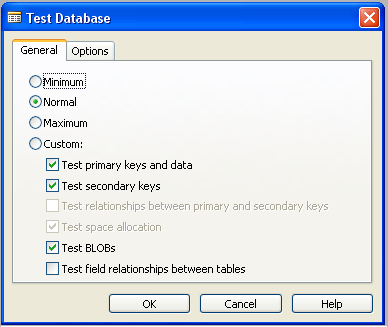
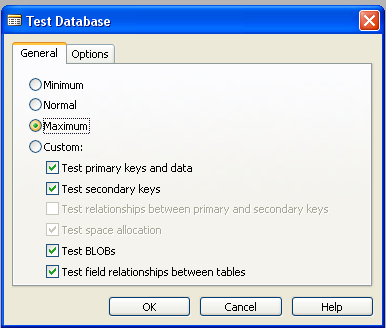
The following options can be selected before starting the test:
Minimum: This
is the test that the Dynamics NAV backup process automatically
initiates. This includes testing primary keys and data, and also testing
all BLOB fields in the database. When run, this test validates the data
in the primary keys, which is readable and sorted appropriately, and
all the BLOB fields in the database can be read.


On the SQL Server database, most of these tests involve running the SQL Server Database Consistency Checker (DBCC).
Viewing the output of the database
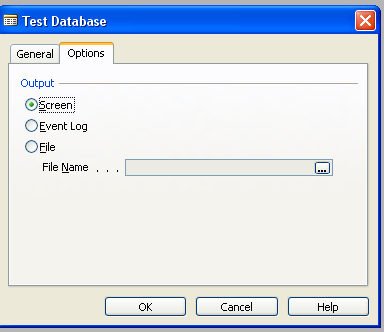
Output of the database can be viewed using the following different options, which can be selected from the Options tab of the Test Database window:

Screen:
Selecting this option would pop up error messages during the running of
the database test. User intervention will be needed to continue the test
beyond the displayed error message.
Event Log: This option, if selected, would display the error messages in the event log of the server.
File: This option will output all error messages in a text file. The location of the text file must be specified in the File Name field below this option.