After you have installed a DNS server, you might
perform several different tasks to maintain or enhance the operation of
DNS in your network. For example, you might need to make changes to the
IP address of the server, change the way that DNS works with Active
Directory, or maybe change the default settings of DNS to improve the
security of your environment. Each of these tasks will change the
function of DNS slightly, allowing you some flexibility in how you
implement DNS in your network and, more important, how DNS operates
within your network infrastructure.
1. Change the Address of a DNS Server
If circumstances arise that
demand you to change the IP address of your DNS server, you will need
to make a simple change to the A record. If the name of the server has
not changed, then neither the NS record nor the SOA record will need to
be changed. Make sure that you make the change in the zone records as
well as check the records of the parent zone. Remember that your DNS
server is updating records to zone database files. Therefore, a change
in a single location does not guarantee updates to parents or other
zones. Verify that these changes are made; otherwise, your zone updates
may fail because of inconsistent records.
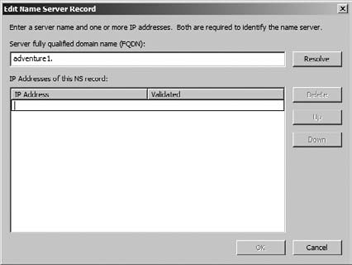
Right-click the forward lookup zone, and choose Properties.
Select the Name Servers tab.
Edit the IP address of the chosen name server, as shown in Figure 1.
Click OK to accept your changes.
2. Configure a DNS Server to Listen Only on a Selected Address
Let's say you have a server
that has more than one network adapter connected to your network. If the
server is running DNS, you may want to configure the server so that DNS
listens for queries on only a single network adapter. This can actually
increase the security of your server by allowing DNS to listen to
queries only on the network IP address that you have configured on the
clients.
The process is fairly easy to complete:
Right-click the DNS server, and choose Properties.
Select the Interfaces tab.
On the Interfaces tab, select Only The Following IP Addresses.
Select the boxes of the addresses you want to use, as shown in Figure 2.
By restricting the IP
address that the DNS server listens to, you can effectively limit access
to the single routed segment that your clients will be using to query
DNS and eliminate potential threats or unwanted queries from other
unrelated subnets.

3. Scavenge Properties for DNS
The DNS server performs
queries and then stores the results of those queries as part of the zone
database files. Over time the size of a DNS database can really grow.
Because of the nature of host name records, they will change over time.
IP addresses are changed, names are changed, or both. It doesn't make
sense to simply keep resolved queries in the zone database file
indefinitely. Instead, it is desirable that you age records in the
database and then scavenge
them out of the database when they are no longer valid. This is where
things get a little tricky. How long should a record stay in DNS? How
old is too old? What is the usable life of a cached DNS record? Windows
Server 2008 R2 uses two values associated with aging and scavenging
called the refresh interval and the no-refresh interval.
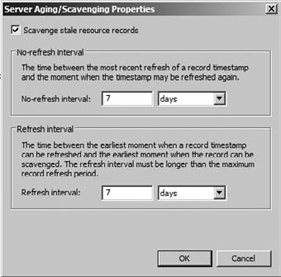
The refresh interval is
the time between the earliest moment when a record timestamp can be
refreshed and the earliest moment when the record can be scavenged. By
default this value is set to seven days. The question is, "Is seven days
the right value?" The answer is, "Probably!" We know that is not really
an answer, but in most cases seven days will work just fine. If you
have a reason to change the value, you are more than welcome to do so.
Please do not feel like you have to keep the default value if something
else will work better for your network.
The
no-refresh interval is the time between the most recent refresh of a
record timestamp and the moment when the record can be refreshed again.
This value is also set by default to seven days. Like the refresh
interval, the no-refresh interval can be changed to suit the needs of
your organization. In layman's terms, the no-refresh interval is really
just a definition of how long DNS should wait until it refreshes a
record. You want to make sure that your DNS server is not constantly
refreshing records. Once a record is refreshed, the no-refresh interval
defines how long to wait until the record is refreshed.
You can change both of these values using DNS Manager:
Right-click the DNS Server, and choose Set Aging/Scavenging for all zones.
Select Scavenge Stale Resource Records. (This is not enabled by default.)
Change the no-refresh interval to your desired value.
Change the refresh interval to your desired value, as shown in Figure 3, and click OK.