The second most common operation after migrating user
accounts is migrating computers themselves. Migrating computers can
save you a lot of headaches. Can you imagine how big of a pain it would
be if you couldn't migrate computer accounts? You would have to manually
reconnect each of your computers. Yuck! In Exercise 2, you'll go through the process of migrating computer accounts again with your preexisting domain.com and domain2.com domains.
Prerequisites: To perform this
exercise, you must have at least two domains and two domain controllers
operating Windows Server 2008. These domains must be fully networked
and accessible to each other. Additionally, you must have at least one
computer account in the source domain. In this exercise, the domains are
named domain.com and domain2.com, and the servers are named server and
server2.
Make sure you are logged in as either a domain or enterprise administrator.
Open the Active Directory Migration Tool by selecting Start => Administrative Tools => Active Directory Migration Tool.
Select the Action menu, and then select Computer Account Migration Wizard. Click Next.
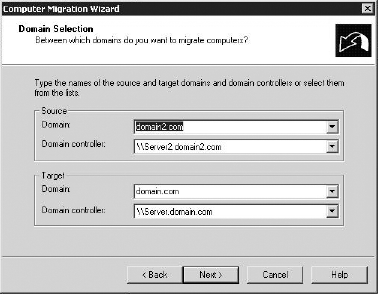
You
will see a screen asking for the source and target domain and domain
controller. In the Source area, you will type the domain and the name of
the domain controller from the source you want to migrate computer
accounts from. In the Target area, you place the destination for your
computer accounts with its domain and domain controller. In this
example, we're using domain.com as the source domain and domain2.com as
the new domain. You can see this in Figure 1.

On the next screen, you will be asked how you would like to select computers that you want to migrate. (This is similar to Exercise 1.)
One option is to choose the computers from a particular domain, and the
other is to choose them from an include file. For this exercise, you
will choose them from a domain, so make sure that radio button is
selected, and click Next.
The
next screen you will see is the Computer Account Migration screen.
Here, you can choose computers you want to migrate from one domain to
another. Most likely, this will appear blank. If so, click the Add
button, type a known name into the Enter... box, and check the name. In
this exercise, we chose the computer Workstation1. Once it's validated,
you can close that box. Click OK and then Next.
Note: Keep in mind that you
can alternatively click the Advanced button after you have clicked Add,
then click Find Now, and finally select your computer.
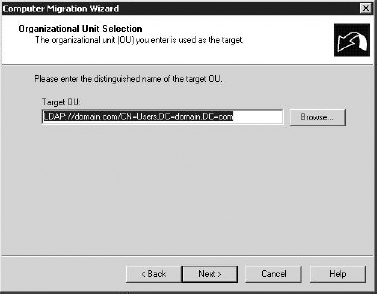
The
next screen will ask you for the originating OU where the computers
reside. Click the Browse button. Once there, you can select where your
target OU will reside. If you don't have any OUs set up, you can just
select the Computers folder. Afterward, the LDAP-distinguished name will
appear in your selection box, as shown in Figure 2. Click Next.

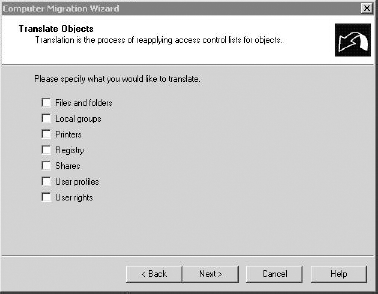
After
you've clicked Next, you'll be presented with some options in moving
your computers from one domain to another. For this exercise, you will
again leave them blank. Click the Next button, and then click Next again
to confirm the five-minute restart after the wizard completes (see Figure 3).

Leave the Object Property Exclusion page blank, and click Next.
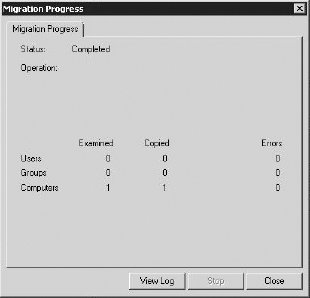
Click
Next on the conflict management screen, and then click Finish. Once
you've click Finished, you will be presented with the migration log, as
shown in Figure 4.
