3. Custom Commands
The
Run Command Line task is your ticket to infinite customization of a
task sequence. It provides the ability to run any command already
available in Windows or that you include in a package. Figure 19.15,
displayed previously, is an example of how to update the Registry. You
can also import a Registry file using regedit.exe, run a custom script,
or install an otherwise annoying device driver from a vendor-supplied
.exe.
Using a Run Command Line task, you can add a
user interface that enables users to provide input into your task
sequence. An excellent example of this is the OSDAppChooser, available
at http://osdappchooser.codeplex.com.
Another example of using a custom executable
from a Run Command Line task is presented by Hewlett Packard (HP) in
“Deployment of HP ProLiant Servers Using System Center Configuration
Manager 2007 White Paper,” available at http://h20392.www2.hp.com/portal/swdepot/displayProductInfo.do?productNumber=HPSCCMOSDWP.
The document details the use of the SmartStart Scripting Toolkit to
provision ProLiant server hardware automatically during a deployment.
This includes things such as firmware upgrades, BIOS settings, and
physical drive preparation.
The Microsoft Deployment Guys (http://blogs.technet.com/deploymentguys/default.aspx)
present a handful of very useful scripts to run using a Run Command
Line task. Many examples are geared toward the MDT, but are applicable
to OSD with some minor tweaking in a few cases.
The possibilities are limited only by your
resourcefulness and ability. With a little elbow grease and an example
or two, you should be able to find or create a script or executable that
automates anything and everything required by your deployment.
4. Task Sequence Targeting
Task sequences are advertised to collections in a
manner similar to software distribution packages. To create a task
sequence advertisement, right-click the desired task sequence and select
Advertise; this launches the New Advertisement Wizard (shown in Figure 12),
which is nearly identical to the Software Distribution New
Advertisement Wizard. Reinforcing their similarity is the fact that task
sequences advertisements are actually stored under the Software
Distribution -> Advertisements node in the ConfigMgr console.
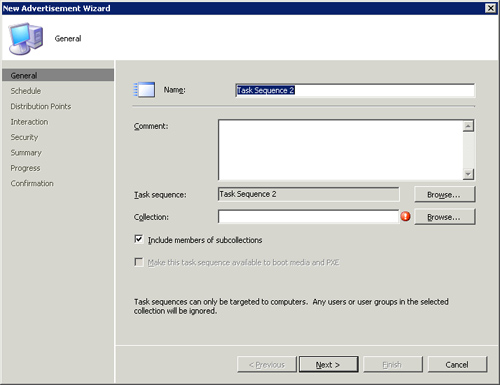
The wizard steps you through the process of creating the advertisement by prompting you for the following information:
- Target collection
- Include subcollections
- Advertisement start time
- Advertisement expiration time
- Mandatory advertisements times
- Priority (for site-to-site task sequence distribution)
- Distribution
point retrieval method; you can download content locally when needed,
download all content before starting, access content directly
- Use remote distribution point when no local one is available
- Use an unprotected point when no protected one is available
- Display reminders
- Show task sequence progress
- Security
Tip: Multicasting and Distribution Points
If you use multicasting to deliver an image, be
sure the distribution point retrieval method is set to download all
content before starting the task sequence. Multicasting is not an
on-demand delivery system and cannot be used with the option to access
content directly from a distribution point, which essentially is
on-demand.
A good approach is creating a set of collections
with permanent advertisements. When you need to use a specific task
sequence, you can just add the resource to the collection. For
example, in a simple scenario where you plan to use a build and capture
task sequence, such as a task sequence to deploy an image and a task
sequence to capture user settings only, you can build a parent
collection with three child collections named for the task sequence
advertised to it, as displayed in Figure 13.

This technique works well for systems that have a
ConfigMgr client agent on them already; you simply use a direct
membership rule to add them to the collection.
Using nonmandatory advertisements requires user
intervention because a prompt appears forcing the choice of which task
sequence, if any, to run. This might be desirable and is something to
consider when designing your collections. To maintain the zero-touch
approach, it is best to create one collection per task sequence and use
mandatory assignments for each task sequence. If some user or technician
intervention is acceptable, using nonmandatory assignments can simplify
your collection hierarchy. A menu displays all task sequences available
to a system, and the current operator of the system can choose which
one to run.
You must create an advertisement for a task
sequence regardless of which method you choose to deploy the task
sequence: PXE, media, or ConfigMgr. If you use PXE and mandatory
advertisements, subsequent PXE-based boots of the same system ignore the
advertisement. If this is not desired and there is a need to rerun the
advertisement, right-click the computer resource and select the Clear
Last PXE Advertisement option. You can also do this for an entire
collection.
5. Change Control and Portability
Nothing is specifically built-in to assist in
managing changes for task sequences, although there are several things
you can do to avoid losing work:
Always duplicate a task sequence for
backup purposes after it is created, and any time you are about to edit.
This is an easy and quick step you can perform by right-clicking any
task sequence and clicking Duplicate. You can also set up a dedicated
folder to move your duplicates into to avoid clutter.
Export
the task sequence from the ConfigMgr console by right-clicking it and
choosing Export. This exports the task sequence to an XML file that you
can enter into a source control system or just store in a file system.
You can re-import exported task sequences by clicking on the Task
Sequences node and choosing Import. Note that passwords and Windows
product keys are stripped from the exported XML files.
Exporting task sequences to XML files is also an
approach for copying a task sequence to an unconnected ConfigMgr site.
You simply need to copy the exported XML file to a location accessible
by the destination site and import it. Copying a task sequence to an
unconnected site does add a few complexities though because task
sequences depend on packages. The exported XML file contains references
to packages and their IDs on the source site; these will, of course, not
exist on the destination site and must be created. You also need to
update the task sequence to reference the proper Package IDs and add in
any necessary passwords and product keys.
For connected ConfigMgr sites, task sequences,
like most other objects created in ConfigMgr, flow down a hierarchy of
child sites. This allows you to create a master task sequence at a
parent site for use at child sites. You must also ensure that the
packages referenced in the task sequence are available to child sites.
6. Customizing Task Sequences
The two default task sequence types, Build and
Capture and Deployment, are useful when beginning your use of OSD and
task sequences. However, do not lock yourself into the tasks the New
Task Sequence Wizard places into these default task sequences. These two
task sequences are just starting points for all but the most basic
deployments. Remember that they are fully editable, allowing you to
customize them as much or as little as you want. Ultimately, using these
two task sequence types is not even required. You could start from a
blank task sequence by choosing Custom in the New Task Sequence editor
and start with a completely clean slate.
Interestingly enough, although task sequences
are built for OSD, you can use them for software deployment or any other
system configuration activity requiring multiple steps and possibly
state maintenance during those steps. This gives rise to the scenario of
allowing the activity to continue even after a reboot.
Many in-house or legacy
applications require installing multiple packages or performing other
configuration tasks in a specific sequence while also surviving a single
or multiple intervening reboots. Repackaging these installations often
proves challenging if not impossible because of their nature. Task
sequences are a perfect way to accomplish the many steps involved in
these types of installations.
