Assigning DHCP Options
DHCP
options provide clients with additional configuration data, such as
specific server addresses, along with an address lease. For example,
when the Transmission Control Protocol/Internet Protocol (TCP/IP)
properties of a client computer have been configured to obtain a DNS
server address automatically, that computer is relying on DHCP options
configured at the DHCP server to acquire a DNS server address (or set of
addresses).
You can configure options
at the reservation level, scope level, or server level. Options set at
the reservation level override all others, and scope-level options
override server-level options.
To configure options
for a reservation, select the particular reservation’s icon in the DHCP
console tree, and then from the Action or shortcut menu, select
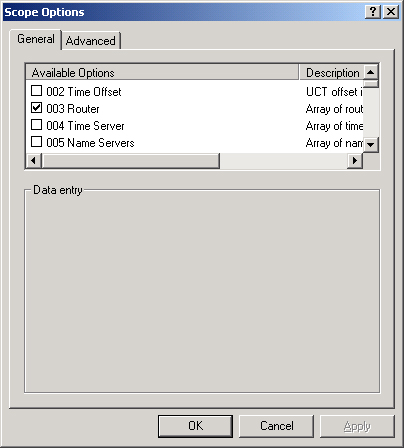
Configure Options. To configure options for a scope (after completing
the New Scope Wizard), select the Scope Options folder in the DHCP
console tree, and then from the Action or shortcut menu, select
Configure Options. To configure options for a server, select the Server
Options folder in the DHCP console tree, and then from the Action or
shortcut menu, select Configure Options. The dialog box that opens after
each of these procedures is virtually the same. The Scope Options
dialog box is shown as an example in Figure 5.
More than 60 standard DHCP options are available. The most common of these include the following:
003 Router
A preferred list of IP addresses for routers on the same subnet as DHCP
clients. The client can then contact these routers as needed to forward
IP packets destined for remote hosts.
006 DNS Servers The IP addresses for DNS name servers that DHCP clients can contact and use to resolve a domain host name query.
015 DNS Domain Name
An option that specifies the domain name that DHCP clients should use
when resolving unqualified names during DNS domain name resolution. This
option also allows clients to perform dynamic DNS updates.
044 WINS/NBNS Servers The IP addresses of primary and secondary WINS servers for the DHCP client to use.
046 WINS/NBT Node Type
A preferred NetBIOS name resolution method for the DHCP client to
use—such as b-node (0x1) for broadcast only or h-node (0x8) for a hybrid
of point-to-point and broadcast methods.
051 Lease
An option that assigns a special lease duration only to remote access
clients. This option relies on user class information advertised by this
client type.
Activating a Scope
After you define and configure a scope, the scope must be activated
before the DHCP server can begin providing service to clients. However,
you should not activate a new scope until you have specified the DHCP
options for it.
To activate a scope, complete the following steps:
1. | Open the DHCP console.
|
2. | In the console tree, select the applicable scope.
|
3. | From the Action menu, select Activate.
|
Note
The
Action menu command changes to Deactivate when the selected scope is
currently activated. In production environments, you should not
deactivate a scope unless you are retiring it permanently from use on
your network. |
Tip
Expect
to see a question in which DHCP is not functioning because either the
scope has not been activated or the server has not been authorized. |
Configuring the Client
To
configure a client to receive its IP address information from a DHCP
server, open the Internet Protocol (TCP/IP) Properties dialog box for
the appropriate network connection. By selecting the Obtain An IP
Address Automatically option, you enable the client to obtain from the
DHCP server an IP address, subnet mask, and all DHCP options except for
DNS options. To configure the client to receive DNS options from the
DHCP server, select the Obtain DNS Server Address Automatically option.
If you are migrating
the client from a statically assigned address, you can apply the new
configuration simply by closing the open dialog boxes.
Migrating from APIPA or Alternate Configurations
If a client has already been configured to obtain an IP address and DNS server address automatically, and the network is not using ICS, you merely need to renew the IP configuration to apply the settings from the newly configured DHCP server.
To renew a configuration, enter the ipconfig /renew
command at the command prompt. Alternatively, you can restart the
client computer, and the new IP configuration is applied as the computer
reboots.
Migrating from an ICS Connection |
ICS
is a shared dial-up connection on a server that provides Internet
access to network clients and automatically configures client computers
with an address in the 192.168.0.x
subnet range. Because this service competes with the DHCP Server
service, you should delete any shared (ICS-enabled) dial-up connections
on the server and restart the server computer before installing the DHCP
Windows component or adding the DHCP Server role.
ICS
clients are already configured to obtain an IP address automatically,
so in theory, they require no reconfiguration beyond a simple reboot if
you want to migrate to DHCP. However, you might find that in practice,
ICS clients stubbornly cling to their ICS addresses even after DHCP is
deployed. To prevent such complications, you can first apply a manual
(static) address to the client computers after the ICS connection is
deleted; this procedure breaks the ICS connection. Then restart the
client computers. After the clients restart, they will migrate cleanly
to DHCP as soon as you reconfigure them to obtain an address
automatically. |
|
After the DHCP
server is installed and configured, you can apply the new automatic
configuration to the client as you would to any statically configured
client—by selecting the Obtain An IP Address Automatically option and
(optionally) the Obtain DNS Server Address Automatically option in the
Internet Protocol (TCP/IP) Properties dialog box.
Verifying the Configuration
After
you configure your DHCP server, and after you have authorized the
server and activated the scope, you need to verify that the service is
working on your client computers. Restart your DHCP client computers (or
use Ipconfig /renew) and then enter the ipconfig /all
command at the command prompt. With the /all switch, the Ipconfig
command displays all of the parameters you have configured for the
lease, including DHCP options.
Tip
You
can assign users to the domain local security group DHCP Users if you
want to allow them to read DHCP information without being able to manage
or modify this data. |
