1. | Open the Security Configuration Management .
|
2. | Right-click IP Security Policies On Local Computer and select Create IP Security Policy.
The IP Security Policy Wizard appears.
|
3. | Click Next on the welcome page.
|
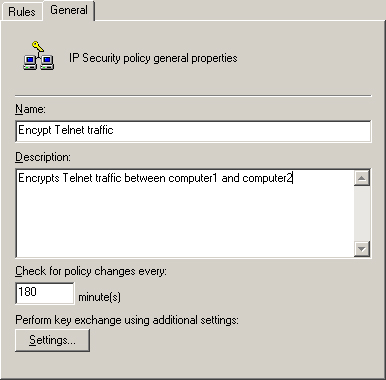
4. | In the name text box, type encrypt telnet traffic. Type a description, and click Next.
|
5. | Clear the Activate The Default Response Rule check box, click Next, and then click Finish.
|
6. | In the policy properties dialog box, click the General tab (shown in Figure 21), and then click Settings to locate and adjust the key exchange settings.
|
7. | In the Key Exchange Settings dialog box, shown in Figure 22, click Methods.
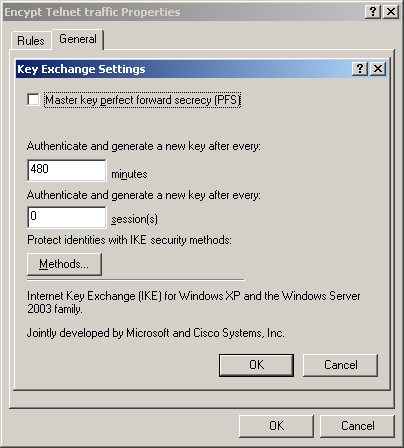
The Key Exchange Settings dialog box is the location for changing master key generation particulars. Table 11-6 defines the parameters. Although frequent rekeying creates a more secure transport, it might also affect performance.
|
8. | In
the Key Exchange Security Methods dialog box, select the fourth (last)
default security method and click the Remove button. Then select the
third security method and remove it as well. Two methods remain (Figure 23).
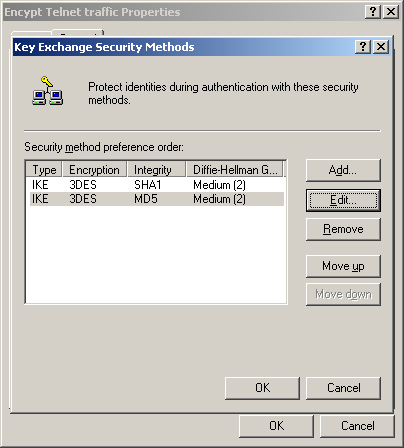
Removing
two of the security methods and changing the Diffie-Hellman group of
the remaining security methods increases the security of the master key
but might affect performance. A computer that attempts to negotiate a
connection must be able to use at least one of the two remaining
methods, or no connection will be made.
|
9. | Select one of the security methods remaining and click Edit.
|
10. | In the IKE Security Algorithms dialog box, in the Diffie-Hellman Group dropdown list, select High (2048), as shown in Figure 24. Then click OK. Repeat this process for the second security method.
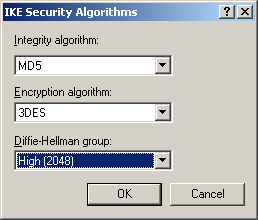
Changing the Diffie-Hellman group to high increases security in
two ways. First, larger prime numbers are used in the calculation of the
master key; second, communications can occur only with other computers
running Windows Server 2003, because only they can use this parameter.
Selecting the highest Diffie-Hellman group can cause problems because
legitimate users might attempt connections using downlevel machines. It
can also potentially affect performance, and the result is a larger key,
and thus a longer time for encryption.
|
11. | Click OK twice to return to the General tab. Then select the Rules tab.
|
12. | Ensure that the Use Add Wizard box is selected and click Add to add a rule.
The Create IP Security Rule Wizard launches.
|
13. | Click Next on the Welcome page.
|
14. | Click Next on the Tunnel Endpoint page.
This policy will not use a tunnel.
|
15. | On the Network type page, click Next to accept the default, All Network Connections.
This policy remains effective no matter where the connection is coming from.
|
16. | On the IP Filter List page, click Add to add a filter list.
|
17. | In the Name text box, type negotiate. In the Description text box, type a description.
|
18. | Select the Use Add Wizard check box and click Add to add a filter.
The IP Filter Wizard launches.
|
19. | On the IP Filter Wizard welcome page, click Next.
|
20. | In the Description text box, type a description for the filter and click Next.
|
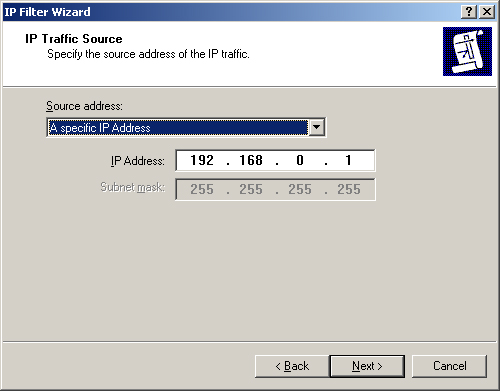
21. | For the IP traffic source, as shown in Figure 25, in the Source Address dropdown list, select A Specific IP Address.
|
22. | In the IP Address text box, type the IP address of Computer1. Then click Next.
|
23. | On
the IP Traffic Destination page, in the Destination Address drop-down
list, select A Specific IP Address and type the IP address for
Computer2. Then click Next.
|
24. | On the IP Protocol Type page, select TCP. Then click Next.
|
25. | Click To This Port, type 23, click Next, and then click Finish.
|
26. | Click OK to return to the IP Filter List page in the Security Rule Wizard.
|
27. | Click Negotiate, and then click Next.
|
28. | Click Require Security, and then click Next.
|
29. | Select Kerberos for the authentication method, click Next, and then click Finish.
|
30. | Click OK to complete the rule; then click OK again to finish the procedure.
|
