Exercise 4: Use Netsh to Monitor IPSec
After you have created and assigned the IPSec policy using Netsh, use Netsh commands to monitor the session.
1. | From either computer, start Netsh:
|
2. | Use the Show command and review the active policy to see whether your policy application worked:
show policy name=telnet level=verbose
|
3. | |
4. | Set the diagnostic value to log all events (the default is 0 or no logging) using this command:
set config property=ipsecdiagnostics value=7
|
5. | Set the IPsecloginterval value to 60 seconds:
set config property=ipsecloginterval value=60
|
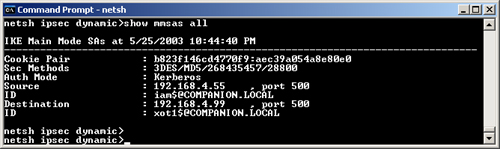
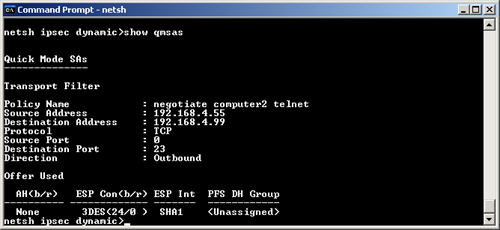
6. | Display information about Main Mode and Quick Mode SAs using the Show Mmsas All (Figure 27) and Show Qmsas All (Figure 28) commands.
|
7. | |
Exercise 5: Use IP Security Monitor to Monitor an IPSec Connection
In this exercise, you monitor IPSec activity using the IP Security Monitor snap-in.
1. | Open IP Security Monitor on both computers by adding the snap-in to an MMC.
|
2. | Check that the active IPSec policy is the one you assigned.
|
3. | Examine the details about the active policy. Are the details what you expected?
|
4. | Select the Main Mode (Figure 29) and Quick Mode (Figure 30) Security Associations nodes and double-click the SA in the details pane.
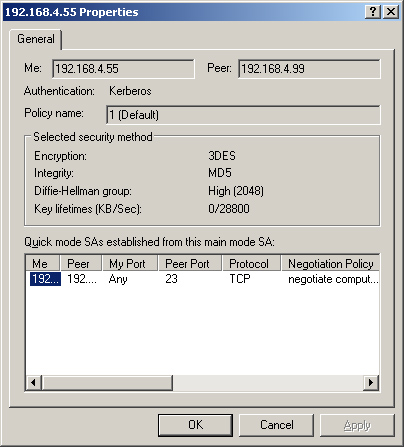
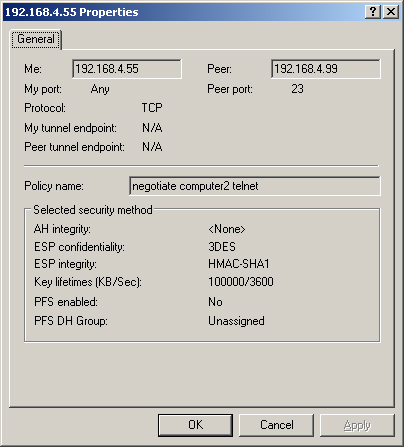
This step tells you which encryption is being used.
|
5. | Examine the Quick Mode Statistics node.
|
6. | Close the windows.
|
Exercise 6: Use Netcap to Capture Network Security Protocol Information
1. | On
Computer1, create a Test1.txt file by right-clicking the Shared
Captures folder in Windows Explorer, selecting New, and clicking Text
Document. Then type the name test1.txt and click OK.
|
2. | On Computer2, Click Start, select All Programs, select Windows Support Tools, and click Command Prompt.
|
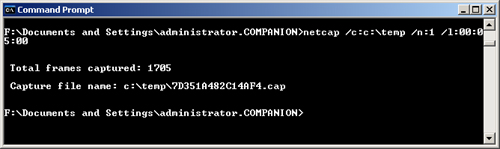
3. | Run Netcap with a buffer size of 1 MB and save the capture file to C:\Authentication.cap (Figure 31). To do so, type this command:
netcap /c:c:\authentication.cap /n:0
|
4. | While
the capture is running, connect to the \\Computer1\My Captures share on
the domain controller and double-click the Test1.txt file to open it in
Notepad.
|
5. | Make a change in the file and save it.
An Access Denied error message appears because the default share permissions are Everyone Read.
|
6. | From another command prompt, telnet to the domain controller using the following command:
|
7. | Return to the command prompt for Netcap and press the Spacebar to stop the capture.
The name of the capture file is listed.
|
8. | Open the capture file in Network Monitor and look for evidence of the file being read.
The text in the file should be displayed in clear text.
|
9. | Close the capture files and close Network Monitor.
|
