There are times when a broadcast administrator wants
to combine several media files but only has the ability to publish just
one video stream. The individual media files are added to a playlist,
and the playlist is then published so that a single publishing point
will play back the entire playlist of files. The playlist concept is
frequently used for audio files where a playlist of music files are
combined, yet only a single stream is distributed. Or the playlist file
can be constantly updated to include new media files that are needed for
publishing and distribution. The benefit of creating a playlist and
combining the content into a single broadcast is the ability to have
just a single broadcast point that brings multiple files to users.
Configuring a Server for Playlist Broadcasting of Multiple Files
To configure a Windows
Media server for broadcasting multiple files into a single stream, a
publishing point needs to be configured for playlist broadcasting. The
configuration process is as follows:
1. | In
the Windows Media Services MMC, right-click on Publishing Points in the
navigation tree, and select Add Publishing Point (Wizard).
|
2. | Click Next to move past the Welcome screen.
|
3. | Enter
a publishing point name that describes the function. When broadcasting a
playlist of multiple files, you might choose something like Playlist of Conf Content. Click Next to continue.
Note
The name of a publishing
point should not have special characters such as <, >, \, ?, %,
&, ‘, #, “, {, }, [, ], or *. These characters can interfere with
the successful publishing of the broadcast over the Internet.
|
4. | Select the Playlist (A Mix of Files and/or Live Streams That You Combine into a Continuous Stream) option, and click Next.
|
5. | Choose either Broadcast Publishing Point or On-Demand Publishing Point.
|
At this point,
whether you selected Broadcast Publishing Point or On-Demand Publishing
Point in step 5 will determine what options are available in the
remaining steps of the wizard.
If you selected On-Demand Publishing Point in step 5, you will be prompted with a series of questions:
1. | You
will be prompted whether you want to add a new publishing point (or
playlist), which you will typically want to do, or create an existing
playlist. Select Add a New Publishing Point, and click Next.
|
2. | You
will be prompted to add the name of a playlist where the published
files will be listed and stored. Enter the name of an existing playlist,
or select the Create a New Playlist option. Click Next to continue.
|
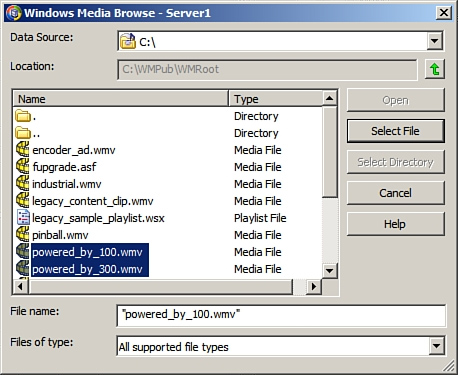
3. | If
you choose to create a new playlist, you will be prompted to add media
and add advertisements into your playlist file, as shown in Figure 1. Click Next.
|
4. | Enter a name for your playlist, and then click Next.
|
5. | A
choice to select content playback gives you the option to loop videos,
shuffle videos, both, or none.
|
6. | Select the Enable Logging option if you want to log media events, and then click Next.
|
7. | The
next screen shows a summary of the created publishing point. You can
choose to start the publishing point when the wizard is finished, and if
you want to capture and archive the live event, select the Start
Archiving When Publishing Point Starts option. Click Next to continue.
|
If you selected the Broadcast Publishing Point option in step 5, you will be prompted with several other options:
1. | Select Unicast or Multicast as the delivery option for the broadcasting publishing point, and then click Next.
|
2. | If
you choose to create a new playlist, you will be prompted to add media
and add advertisements into your playlist file. Click Next.
|
3. | Enter a name for your playlist, and then click Next.
|
4. | A
choice to select content playback gives you the option to loop videos,
shuffle videos, both, or none.
|
5. | Select the Enable Logging option if you want to log media events, and then click Next.
|
6. | The
next screen shows a summary of the created publishing point. You can
choose to start the publishing point when the wizard is finished, and if
you want to capture and archive the live event, select the Start
Archiving When Publishing Point Starts option. Click Next to continue.
|
For either the
broadcast or on-demand publishing options, before finishing the Add
Publishing Point Wizard, you are prompted to choose between three file
creation options:
Create an Announcement File (.asx) or Web Page (.htm)—
An announcement file is similar to an invitation file that can be used
to notify users of a pending live broadcast or the availability of an
on-demand video playback session.
Create a Wrapper Playlist (.wsx)—
A wrapper playlist is content that can be added to either the start or
end of a broadcast. An example of wrapper content might be a welcome or
closing message, advertisements, or broadcast identification.
Create a Wrapper Playlist (.wsx) and Announcement File (.asx) or Web Page (.htm)—
Choosing this option launches both the Announcement File and Wrapper
Playlist Wizards to create the invitation announcement, as well as the
capability to add content at the start or end of a broadcast.
Choose one of these three
options or deselect the After the Wizard Finishes check box if you don’t
want to choose any of the options. Click Finish when complete.
Starting a Playlist from Within the Playlist Publishing Point
A playlist can be launched
to initiate the playback of media contained within the playlist file.
Depending on the option selected, a user simply enters the URL of the
directory publishing point (such as mms://media.companyabc.com/Corp
Playlist). The playlist of files will begin to publish the first of the
media clips and will continue through the entire playlist until the
list is complete. If the loop option was selected in the publishing
point configuration settings, the playlist will continuously loop the
media content of the playlist. If shuffle was selected, the files within
the playlist will be played randomly.
Any of the
options selected from within the configuration setting can be modified
at any time to change or reconfigure settings initially created in the
wizard installation process.
