During any deployment of a new operating system, you
are bound to run up against unforeseen obstacles. The key to overcoming
these obstacles is to be armed to the teeth with lots and lots of
knowledge. You may not have the exact answer for each and every problem
encountered, but having a well-rounded set of information regarding
plausible problems sometimes allows you to extrapolate from one known
issue a workaround for an unforeseen obstacle.
The main areas that you should be aware where problems can occur during a deployment are as follows:
Ensuring the proper acquisition of user state data from the source machines.
Loading the target computers with the previously acquired user state data.
Creating
appropriate answer files with all the necessary drivers. (This is an
especially difficult issue in diverse heterogeneous environments.)
Gathering
correct specifications for all computers to ensure compatibility with
the newer Windows Vista features (Windows Aero and BitLocker Drive
Encryption).
Troubleshooting dual- and multi-boot configurations.
Troubleshooting corrupt operating system files.
Finally,
the biggest headache is ensuring users have access to their previous
profile to ensure connectivity to printers and applications or, at the
very least, access to the data within their previous profile.
Troubleshooting User State Migration
The
biggest obstacle to acquiring user state data is understanding the
options for USMT and the account the tools are run under. Running the
tools under Administrator mode acquires all user accounts as well as all
data. Often, users run under an account that is not a member of the
local Administrators group, and items from your own user state data go
missing; plus, no other accounts on that system or the corresponding
user state data are migrated.
Migrating EFS data presents a few
problems. To migrate EFS, you must ensure you have acquired all EFS
certificates and encrypted files. Using USMT’s ScanState utility with
the /efs:copyraw option, you can acquire
all EFS encrypted files, along with the user’s certificates. If no EFS
options are enabled, ScanState suffers an error and fails immediately.
There is no corresponding requirement with the use of LoadState when
restoring the user state data to the target machine because the EFS
options are not required or supported.
If ScanState encounters an
error, the default behavior is to halt. This can cause numerous issues
for an entire scripted solution because any error on any system stops
the retrieval of user state data from those computers. To avoid this
problem, you should use the ScanState.exe /c option. This allows the ScanState utility to complete its processing as long as the errors are nonfatal.
The use of the LoadState
utility has some nuances you need to be aware of. When restoring the
user state data to a system, you must understand that the local user
accounts more than likely will require creation of such data. Therefore,
you need to use the option /lac to create the user accounts. If you use this option without the /lae option, the user accounts are created but disabled. The /lae option enables them.
In addition, if the user
performing the restoration of user state data is not an IT
administrator, possibly due to security concerns for EFS data on a
laptop and so forth, issues will arise because the user performing the
user state restore does not have permissions to certain directories such
as \Program Files. An easy way around this situation is to have the user perform the migration with an elevated set of privileges by using LoadState /q. The /q
option allows the migration of the user state to be written to all
areas and a successful completion for any user who is not a member of
the local Administrators group.
Remember, though, a
similar situation using ScanState is not quite the same issue when
acquiring the user state data. A normal user account should have little
to no difficulty, in most circumstances, running ScanState to begin the
migration process of acquiring its own user state data. The big issue
with this scenario is that the user is only able to acquire his user
state data.
Troubleshooting Driver and Application Compatibility with Windows Vista Images
Drivers
present several areas of concern. The primary issue in deploying
systems with proper drivers is compatibility with Windows Vista. Many
older drivers have little to no compatibility with Windows Vista. You
probably need to replace your 16-bit drivers by contacting your
manufacturer for 32-bit drivers made for Windows Vista.
Hardware Compatibility
The first place to begin
searching for compatible drivers is the Windows Vista Hardware
Compatibility List (HCL). This list is found on Microsoft’s website. The
URL for this website is
http://winqual.microsoft.com/hcl/Default.aspx
Caution
Which HCL Should You Use?
It is strongly suggested that you always search Microsoft’s Windows
Vista Hardware Compatibility List; any static list is obsolete within
days. The website is updated daily.
Figure 1
shows the Windows Vista HCL. Notice the breadth of hardware device
types to search through. You are also able to search though computer
systems offered by manufacturers that are shipping and Windows Vista
Capable or Windows Vista Premium Ready.
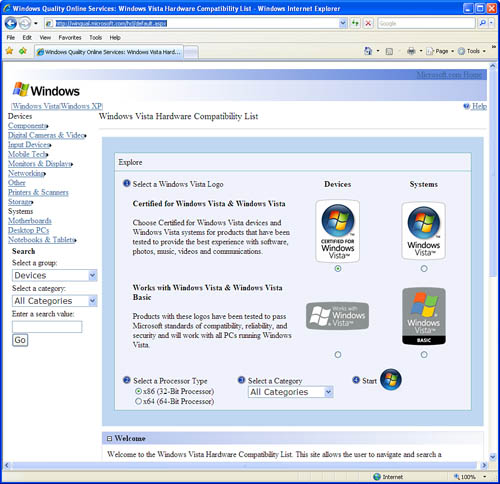
The
Windows Vista HCL is best used for spot checks for unique device
considerations. Another useful purpose of the HCL would be to qualify
which new device or computer to purchase when decisions are being made
to implement a device or deploy a specific computer.
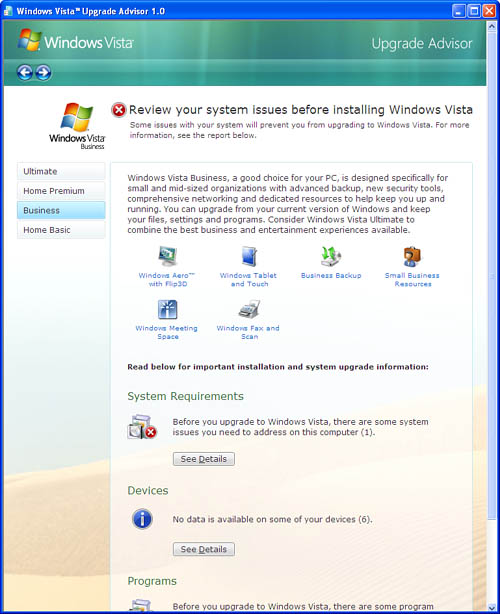
Windows Vista Upgrade Advisor
Another utility that is useful for small offices or special-purpose systems is the Windows Vista Upgrade Advisor.
This tool is launched on the local system after being downloaded from
the Web and installed. Running Windows Vista Upgrade Advisor determines
whether the computer is ready for the upgrade and which edition of
Windows Vista is best suited. It offers solutions where possible for
every issue raised with each Windows Vista edition. In Figure 2. the Windows Vista Upgrade Advisor has been run and is offering solutions to several of the issues discovered.
Windows Vista Hardware Assessment Tool
Microsoft has also created the Windows Vista Hardware Assessment tool.
This tool uses the Windows Management Instrumentation Interface (WMI)
to inventory and perform a detailed analysis of the devices discovered
on a computer. The inventory detail contains the information for the
location of the drivers for the devices on the computer and provides
recommendations for hardware upgrades or possible device driver updates.
The Windows Vista Hardware Assessment tool is recommended in
environments larger than the small office/home office (SOHO)
because it is able to assess from the dozens of desktops into the
thousands. The Windows Vista Upgrade Advisor, discussed previously, is
adequate in small environments or in special circumstances where an
immediate assessment is needed.
The Windows Vista
Hardware Assessment tool uses Active Directory Domain services, the
Computer Browser service, and WMI to perform the Windows Vista
assessment. The tool seeks out systems within the local environment by
initially requesting credentials for any workgroup system as well as
credentials for any domain that is found. It uses Active Directory
Domain services to seek out all computer accounts, including servers,
which are to be discovered and assessed.
The assessment tool requires
access to the systems but does not require any agent to be installed on
the remote systems to operate. It does require that the Client for Microsoft Networks
and File and Print Sharing for Microsoft Networks be installed and
enabled because it uses the server message block (SMB) protocol.
Workgroup systems require the sharing security model to be Classic
versus the Simple or Guest model that is on by default. If firewalls are
in use on these systems, exceptions need to be made to enable Remote
Administration and File and Print Sharing.
Two reports are generated by the Windows Vista Hardware Assessment tool:
One report is a
Windows Word document that offers a thorough appraisal of the computers
in the environment that have been discovered and successfully assessed.
This document offers percentages of computers that comply with an
upgrade as is and what percentage will comply with Windows Vista
requirements when the suggested hardware upgrades have been made.
Another report gives a detailed report concerning the current hardware and which devices on the system require an upgrade.
In addition to
recommendations given for upgrades to hardware and the BIOS, both
reports, before and after the upgrades, indicate whether the computer
meets the Windows Vista Capable or Windows Vista Premium Ready
specifications.
The Windows Vista
Hardware Assessment tool is not capable of properly identifying a
computer’s capability to utilize Windows BitLocker. Windows BitLocker
Drive Encryption was designed for systems that have a compatible Trusted
Platform Module (TPM) version 1.2. There are design guidelines for
systems that do not have a compatible TPM chip and BIOS. You must
research Windows BitLocker using the manufacturer’s specifications for a
given system.
The Windows Vista Hardware Assessment tool is available for download at
http://www.microsoft.com/downloads/details.aspx?FamilyId=67240B76-3148-4E49-943D-4D9EA7F77730&displaylang=en
Windows Vista Application Compatibility Toolkit 5.0
To ensure application
compatibility, you can use another Microsoft tool for testing
applications, whether they conform to User Account Control (UAC), and if
they conform to the specifications for Windows Vista or Windows Vista
compatibility. The Windows Application Compatibility Toolkit (ACT)
version 5.0 tests all these functions and provides guidelines for
creating an application to conform to these and other Windows Vista
requirements. This tool does not provide any hardware or driver-related
information for a Windows Vista upgrade.
The best way to
troubleshoot upgrades that require the Windows Aero feature of Windows
Vista is to use the tools discussed here. These tools offer solutions to
ensure the compatibility level of the display adapter and whether it is
Windows Aero capable. The main issue is to have a display adapter that
has an available device driver that is Windows Vista Display Driver
Model (WDDM) compliant.
Troubleshooting Dual and Multiboot Configurations
Multiboot configurations
present problems concerning how the BIOS and the Master Boot Record
(MBR) interact with the boot sector to load one of the installed
operating systems. The first rule in dealing with multiboot
configurations is to ensure the proper order of operating system
installation. In other words, install the most current Windows operating
system last; for desktops, Windows Vista should be installed after any
other Windows desktop operating system. The second rule is see rule
number one again because fixing issues with the supplied tools does not
always work.
If, for some unknown reason,
you are presented with the issue of a multiboot system no longer
offering the choice of Windows Vista yet it is still installed on the
system, the boot sector of the system drive is probably the issue. More
than likely, a new copy of another operating system such as Windows XP
is installed on the system. You must now use Bootsect to update the master boot code to switch from booting NTLDR of Windows XP to booting BootMgr. Bootsect has now replaced FixFAT and FixNTFS.
To begin fixing the system, follow these steps:
1. | Either boot to the Windows XP installation or boot the system with a Windows Vista or a customized WinPE 2.0 DVD with the Windows Recovery Environment (Windows RE) and the Bootsect.exe utility added.
|
2. | Select to repair the installation.
As long as there is no damage to the Windows Vista system files, Windows RE should find a Windows Vista installation to repair.
|
3. | At the command prompt, type the following command:
Bootsect /nt60 c:
(assuming C: is the partition marked active)
|
4. | Reboot the system. The MBR should now call on BootMgr of Windows Vista to manage the boot process.
|
If a deployment already
included a Windows RE partition for an automatic repair, more than
likely it would not have performed its prescribed automated partition
repair function either. The Windows XP installation would have destroyed
any automated failover procedure that would have called on Windows RE.
Troubleshooting Answer Files
With the new XML answer file
format, the new Windows SIM tool, along with many new features and
configuration passes in which an answer file supplies information for an
unattended installation, there is, of course, more complexity. Windows
SIM comes packed full of help information for every setting, as well as
where and when a setting applies. In addition, ensuring proper placement
of the answer file and its naming is important for functionality. These
two areas are where you need to concentrate your effort.
Note
Understanding the Answer File
This section does not correlate well to any specific question on the
exam. It is recommended that you have an understanding of the answer
file and where portions of the answer file apply in relation to the
Windows installation process. This will help in understanding issues
related to troubleshooting use of an answer file and its placement.
When you are using
Windows AIK and creating the answer file, make sure you understand the
relationship between the configuration passes and the different
executables that are part of the installation of Windows. The following
guidelines aid in this understanding and list the Windows executables
and the stages that are affected or used by the executables in the order
they are processed.
The
Windows PE executable has only the windowsPE configuration pass, which
has two portions: Windows PE settings and Windows Vista Setup settings.
The Windows PE settings affect the Windows PE executable.
The Windows Vista Setup
executable has four configuration passes that affect it. The
configuration pass windowsPE and its Windows Vista Setup settings, such
as the product key and disk configuration, come first. Next is the
configuration pass offlineServicing, where updates to the Windows image
and packages are applied, including fixes and security updates. The
specialize configuration pass follows, and this is where answers to
network configuration, international settings, and domain information
are utilized. At this point, one of two tangents is possible: one is the
oobeSystem configuration pass, or the configuration passes auditSystem,
and auditUser is run.
If the master computer is
running through the answer file for the first time prior to acquiring
the master image, the oobeSystem configuration pass runs next and
processes the answers related to Windows Welcome.
If the image has already been acquired from the master computer and Sysprep called for use of the /audit option, the auditSystem and auditUser configuration passes occur.
The Sysprep
executable has three configuration passes of concern. The most prominent
is the generalize configuration phase. This phase is called on the next
time you reboot a computer where the image was laid down. You already
learned how the configuration passes auditSystem and auditUser come into
play. Audit mode is most useful to corporations because they can have a
sealed image that can have a minimal set of drivers. This image sealed
with audit mode allows these corporations to then add drivers to this
reference image when the hardware platform in use is modified or
updated.
Using the Window Recovery Environment to Repair a Failed System
The Windows RE replaces
the Windows Recovery Console from Windows XP. Windows RE runs
automatically for many of the typical Windows Vista failures
encountered. This occurs only if your deployment follows the directions
of Microsoft’s Windows Recovery Solution. This solution builds a hidden
1GB partition in front of a Windows Vista installation. When this is
done, it is available as a selection from the F8 selection menu when you
are booting up the system.
If
this has not been done in your environment, you need to build a custom
Windows PE boot disk and add the Windows RE package. By doing so, you
have a bootable Vista PE image with Windows RE and any added custom
tools. After you have created your custom Windows RE bootable CD/DVD
with all the essential tools such as Bootsect, ImageX, BCDedit,
and so forth, you are able to perform many of the essential fixes
manually as well as the included automated functions. For instance, you
are able to perform the recovery procedure using Bootsect, which was
mentioned previously.
Caution
Where Is Windows RE?
Microsoft has pulled the Windows Recovery Environment (Windows RE)
package, so you are no longer able to add it to a Windows PE image in
the usual fashion. As of this writing, the only alternative way of
adding this package is to retrieve this package from the Windows Vista boot.wim file on a Windows Vista DVD. By doing this, you are unable to add any additional packages to your image because the boot.wim file on any Windows Vista DVD has already had the /prep option applied.
Troubleshooting Corrupt Operating System Files
A concern that has been around
since the dawn of computer programming is how to deal with corruption
with the operating system files. These files have to be clean and
operational; otherwise, possibly none of the safeguards put in place by
the operating system will keep your computer or data safe and secure.
Microsoft has been adding to its recent operating system safeguards to
the core operating system itself. These tools and automated functions of
the operating system help protect the system files from being corrupted
on disk due to hardware failure or malicious substitution from malware,
or accidental substitution from improperly programmed installations for
applications from third-party vendors. And there is some protection
from the desktop users from accidental or intentional destruction.
One of the tools you can use to
manually detect such problems in the system files is the System File
Checker (SFC) tool. This tool checks the integrity of all protected
system files. If the tool finds an incorrect version of the file,
depending on the options in use, you can replace the incorrect versions
with the correct Microsoft versions. Table 1 lists all the options available for SFC.
Table 1. System File Checker Options
| Option | Description |
|---|
| /scannow | Scans
the integrity of all protected system files and repairs problems by
replacing the files with the correct Microsoft version. |
| /verifyonly | Scans the integrity of all protected system files and reports the problems. No repairs are made. |
| /scanfile=filename | Scans the integrity of the specified file and repairs this file if a problem is discovered. |
| /verifyfile=filename | Scans the integrity of the specified file and reports the problems. No repair is made. |
| /offbootdir=OfflineBootDirectory | Performs an integrity scan of an offline boot directory. |
| /offwindir=OfflineWindowsDirectory | Performs an integrity scan of an offline Windows directory. |
For example, to repair suspected corruption in the %WINDIR%\system32 directory, you run the following from a command prompt:
To repair corruption of the kernell32.dll file, you run the following from a command prompt:
C:\sfc /scanfile= c:\windows\system32\kernel32.dll
To repair corruption of a
Windows Vista installation that is offline (dual-boot system), you run
the following from a command prompt:
C:\scf /scanfile=d:\windows\system32\kernel32.dll /OFFBOOTDIR =d:\ /OFFWINDIR=d:\windows
The preceding example could be run from a command prompt in which the computer was booted with Windows PE 2.0 CD/DVD.
Troubleshooting User Profiles
User profiles have always
been a problem area when rolling out new computers or new operating
systems. It is important that you concentrate on the key issues with
profile management and offer solutions for each of the issues that are
discussed.
When dealing with profiles and the users’ access to their customize settings, you can use the following guidelines:
- If an in-place
upgrade has already been decided, the user accounts and profiles on the
computer are brought forth in the ensuing upgrade to Windows Vista if
the computer meets all the guidelines for an upgrade.
- Remember
you are only able to upgrade from some of the versions of Windows XP
when upgrading to Windows Vista. If Windows 2000 is the operating
system, a migration is required. In this case, you are forced to use
USMT.
- If an in-place upgrade has already been decided
but users have roaming profiles, you are forced to use USMT to migrate
the profiles.
- When dealing with a migration, whether it
is a wipe-and-replace or a side-by-side migration, you need to use USMT
in either case to acquire the profile and store it temporarily and then
restore the profile to the computer when Vista has been completely
installed.
- When dealing with EFS, you can allow the
users themselves to be responsible for their EFS encrypted data if there
is a security concern in acquiring and storing it. If this is the case,
the users gather their EFS certificates and EFS encrypted data. The
users need to use the Certificate MMC to export their public and private
keys as well as make a backup of their EFS encrypted files. If you
migrate the user state data on the computers or in a roaming profile,
you need to use the /efs:skip option when using ScanState. If the encrypted data is migrated through use of USMT, the /efs:copyraw option works.
- The
users’ printers are migrated with the user state data when using USMT
on a source computer that is installed with Windows XP. There should be
no other issues with printers other than testing them after the
migration from Windows XP. With Windows 2000, you are forced to manually
install or script a solution for printer deployment or use Group Policy
on the upgraded computers with Windows Vista.
