Logo
programming4us
programming4us
programming4us
programming4us
Home
programming4us
XP
programming4us
Windows Vista
programming4us
Windows 7
programming4us
Windows Azure
programming4us
Windows Server
programming4us
Windows Phone
 
Windows XP

Accessing Network Resources - Using My Network Places

- Free product key for windows 10
- Free Product Key for Microsoft office 365
- Malwarebytes Premium 3.7.1 Serial Keys (LifeTime) 2019
3/13/2011 4:17:28 PM

You can get to My Network Places using any of the following methods:

  • Select Start, My Network Places. (If you don’t see My Network Places on the Start menu, launch Control Panel’s Taskbar and Start Menu icon, display the Start Menu tab, click Customize, select the Advanced tab, and activate the My Network Places check box.)

  • In Windows Explorer, click My Network Places in the Folders list.

  • In the task pane of the Network Connections window, click My Network Places.

  • In most Open and Save As dialog boxes, click the My Network Places icons.

In Windows XP, a network place is a shared folder on a network computer (it can also be a location on a web or FTP server). When you set up a network place, you can access its files as though they reside on your own computer (subject to any restrictions that the owner of the network place has imposed). By 
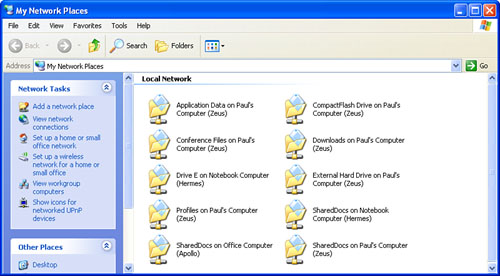
default, the My Network Places folder shows the network places that were defined when you set up your computer for networking. The name of each network place uses the following format:

ShareName on Description (ComputerName)

Here, ShareName is the name that the owner of the network place gave to the shared resource; Description is the description of the computer where the network place resides; and ComputerName is the name of that computer . Figure 1 shows some examples.

Figure 1. My Network Places contains icons for shared network resources.

In addition to viewing the contents of the shared resources by double-clicking a network place’s icon, My Network Places also enables you to do the following:

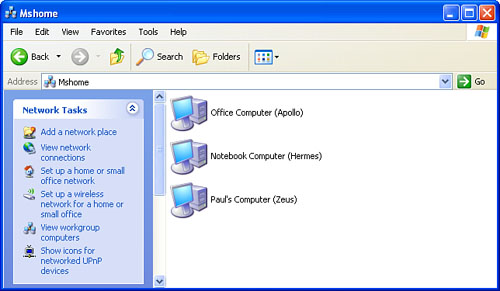
  • See the other computers in the workgroup— Click the task pane’s View Workgroup Computers to see a new window that 
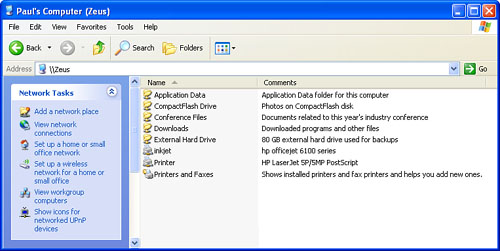
contains an icon for each computer in your workgroup (see Figure 2). Double-click a computer’s icon to see all the resources shared by that computer. For example, Figure 3 shows a computer that’s sharing an external hard drive, a couple of printers, and several folders. (Use the Details view to see the Comments column.)

    Figure 2. Each computer in the workgroup has its own icon.
    Figure 3. Open a workgroup computer to see the resources that computer is sharing with the network.
  • See all the workgroups in your network— Click View Workgroup Computers and then click the Up button (you can also either select View, Go To, Up One Level, or press Backspace). This displays the Microsoft Windows Network folder, which contains an icon for each workgroup in your network. Double-click an icon to see that workgroup’s computers.

Tip

If you don’t have the task pane displayed, you can display workgroup computers using the Folders list. First open the following folder:

   My Network Places\Entire Network\Microsoft Windows Network

From there, open the folder for the workgroup you want to display.

Other -----------------
- Setting Up a Peer-to-Peer Network : Working with Network Settings
- Setting Up a Peer-to-Peer Network : Implementing Wireless Network Security
- Setting Up a Peer-to-Peer Network : Configuring a Wireless Gateway
- Setting Up a Peer-to-Peer Network : Running the Network Setup Wizard
- A Modem Communications Primer - Serial Ports: Communicating One Bit at a Time
- A Modem Communications Primer - Modems: The Inside Story
- Troubleshooting Device Problems
- Managing Your Hardware with Device Manager
- Tips and Techniques for Installing Devices
- Setting Up and Accessing a Small Network - Walking the Walk: Topology and the Lay of the LAN
 
 
Top 10
- Microsoft Visio 2013 : Adding Structure to Your Diagrams - Finding containers and lists in Visio (part 2) - Wireframes,Legends
- Microsoft Visio 2013 : Adding Structure to Your Diagrams - Finding containers and lists in Visio (part 1) - Swimlanes
- Microsoft Visio 2013 : Adding Structure to Your Diagrams - Formatting and sizing lists
- Microsoft Visio 2013 : Adding Structure to Your Diagrams - Adding shapes to lists
- Microsoft Visio 2013 : Adding Structure to Your Diagrams - Sizing containers
- Microsoft Access 2010 : Control Properties and Why to Use Them (part 3) - The Other Properties of a Control
- Microsoft Access 2010 : Control Properties and Why to Use Them (part 2) - The Data Properties of a Control
- Microsoft Access 2010 : Control Properties and Why to Use Them (part 1) - The Format Properties of a Control
- Microsoft Access 2010 : Form Properties and Why Should You Use Them - Working with the Properties Window
- Microsoft Visio 2013 : Using the Organization Chart Wizard with new data
 
programming4us
Windows Vista
programming4us
Windows 7
programming4us
Windows Azure
programming4us
Windows Server