3. Working with Scanners and Fax Machines
Unlike printers, scanners and fax machines use helper applications
when receiving and sending documents. The default helper application is
Windows Fax and Scan.
3.1. Scanning images
Most scanners have a menu option that allows you to scan
images to your computer, to a memory card, or to an email message.
With this in mind, you can scan an image by completing the following
steps:
Put the image you want to scan on the scanner bed.
Click the Scan button on the scanner. This should display a
Scan menu. You can also click the New Scan button from within
Windows Fax and Scan.
On the Scan menu, select the appropriate scanning option,
such as Scan to PC, and then press the OK or Start button. If you
are scanning from Windows Fax and Scan, select the appropriate
options and click the Preview button to preview and select the
scanning area, then click Scan to create the final scan.
3.2. Managing scanned documents
You can access a scanner management window for your scanner by
completing these steps:
Click Start→Devices and Printers. In Devices And Printers,
double-click the scanner you want to work with. This opens Windows
Fax and Scan.
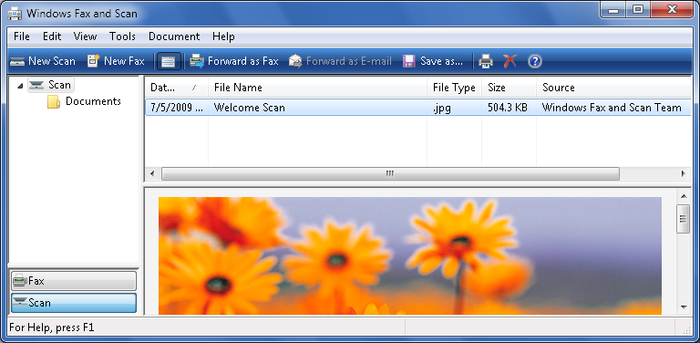
To view scans sent to the computer, click Scan in the
Navigation pane. As shown in Figure 3, scans are listed
by date, filename, file type, size, and source.
You can preview a scan by selecting it in the Documents
list.
Use the following options on the toolbar to manage the
scan:
Delete
Deletes the scan from the computer
Forward as Fax
Forwards the scan as a fax file
Forward as E-mail
Forwards the scan as an attachment to an email
message
Save as
Saves the scan to a file on your computer
Print
Prints the scanned document to a printer
3.3. Managing faxed documents
You can access a fax management window for your fax
machine by completing these steps:
Click Start→Devices and Printers. In Devices and Printers,
double-click the scanner you want to work with. This opens Windows
Fax and Scan.
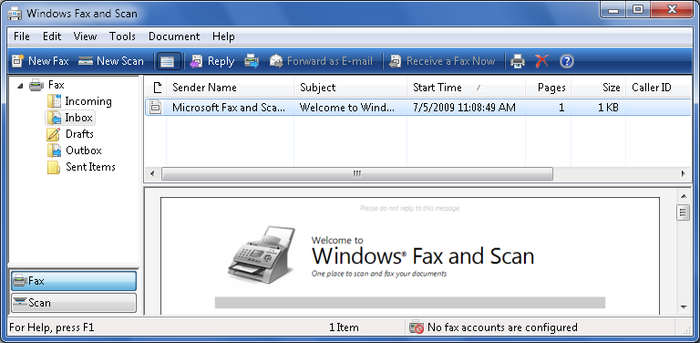
To view faxes sent or received by the computer, click Fax in
the Navigation pane, as shown in Figure 4.
In the Navigation pane, select one of the following to view
related options:
Incoming
Shows incoming faxes that are in the process of being
received
Inbox
Shows incoming faxes that have been received and are
waiting for your attention
Drafts
Shows drafts of faxes that have not been
sent
Outbox
Shows outgoing faxes that are in the process of being
sent
Sent Items
Shows outgoing faxes that have been sent
Use the following options on the toolbar to manage
faxes:
Delete (shown as an X)
Deletes the fax from the computer
Forward as Fax (shown as a Fax machine with an
arrow)
Forwards the fax to another fax machine
Forward as E-Mail
Forwards the fax as an attachment to an email
message
Print (shown as a printer)
Prints the faxed document to a printer
You can save a fax as a TIFF image file on your computer
by following these steps:
In Windows Fax and Scan, select the fax you want to
save.
Click “Save as” on the File menu.
In the “Save as” dialog box, select a save location, type a
name for the file, and then click Save.
3.4. Receiving faxes
Most fax machines will receive faxes automatically if
they are connected to a telephone line. If your computer has a fax
card or your fax machine can send you faxes directly, the fax should
be received automatically into the Inbox of Windows Fax and Scan. In
some cases, you may need to tell your computer to receive the fax. In
Windows Fax and Scan, you can answer an incoming phone call and
receive a fax by clicking the Receive a Fax Now button on the
toolbar.
