After you install printers, scanners, and fax machines, you
can use the devices with your computer. When you are printing, scanning,
or faxing, all you need to do is select the device in your application. If
you want other people on your network to be able to use printers,
scanners, and fax machines you’ve installed, you can do that, too.1. Sharing Printers and Fax Machines
After you install a physically attached or network-attached
printer or fax machine, you can allow anyone else on your network to
connect to it by sharing it. Friends and coworkers on your network can
then connect to the shared printer or fax machine.
You can share a printer or fax machine by following these
steps:
Ensure that printer sharing is enabled on your computer. To do
this, click Start→ Control Panel→Network and Internet→Network and
Sharing Center. In the left pane, click Change Advanced Sharing
Settings. Access the appropriate network profile, such as Home or
Work. Under File and Printer, “Turn on file and printer sharing” should be selected.
If this option isn’t selected, select it and then click Save
Changes.
Click Start→Devices and Printers. In Devices and Printers,
right-click the printer you want to configure and then select
Printer Properties (not Properties).
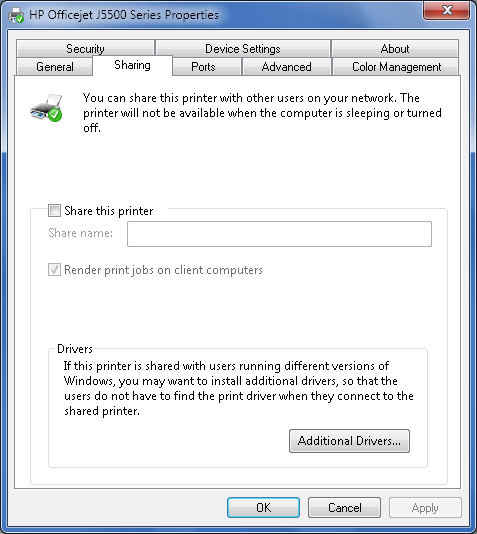
On the Sharing tab, you’ll see any current sharing options. If
there are no current sharing options, all sharing options are
dimmed, as shown in Figure 1.
NOTE
Some types of fax machines cannot be shared. If this is the case
with your fax machine, this will be stated on the Sharing tab.
To change the sharing options, select the “Share this printer”
checkbox, Windows 7 fills in a share name for you. You can change
the default name as necessary.
By default, print jobs are generated on the computer of the
person printing a document. This is usually the desired setting. If
you want to generate the print file on your computer, clear the
“Render print jobs on client computers”
checkbox.
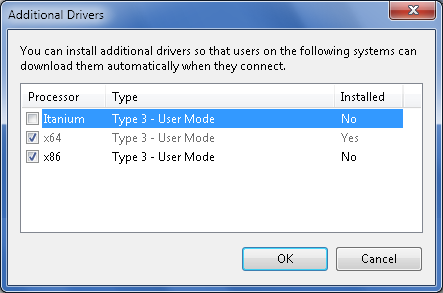
Click Additional Drivers. In the Additional Drivers dialog
box, select the types of processors other people on the network are
using to ensure that your computer provides the appropriate drivers
during setup. If you are using an X86-based computer, you’ll likely
need to enable printers for X64-based computers. Similarly, if you
are using an X64-based computer, you’ll likely need to enable
printers for X86-based computers (see Figure 2).
2. Connecting to Shared Printers and Fax Machines
When you are sharing printers and fax machines, you need to keep
in mind that other people on your network might not be running Windows
7. Don’t worry, though: connecting to a shared printer with Windows 2000
or later is easy. Why? Because computers running Windows 2000 or later
can install the printer drivers automatically once a printer is shared.
The trick, of course, is to ensure that your computer provides the
necessary drivers when someone tries to connect to your printer or fax
machine. When you were sharing your printer or fax machine, you selected
drivers for other computers as part of the sharing configuration. If you
need to, you can add drivers for other types of computers by completing
the following steps:
Click Start→Devices and Printers. In Devices and Printers,
right-click the printer you want to configure and then select
Printer Properties (not Properties).
On the Sharing tab, click Additional Drivers.
In the Additional Drivers dialog box, select the types of
processors other people on the network are using to ensure that your
computer provides the appropriate drivers during setup.
Once you’ve shared the printer and ensured that the drivers are
available, anyone running Windows 2000 or Windows XP can connect to and
use the printer by following these steps:
In Windows Explorer, click the Folders button on the toolbar
to display the Folders pane.
Expand My Computer, expand the Control Panel, and then select
Printers and Faxes.
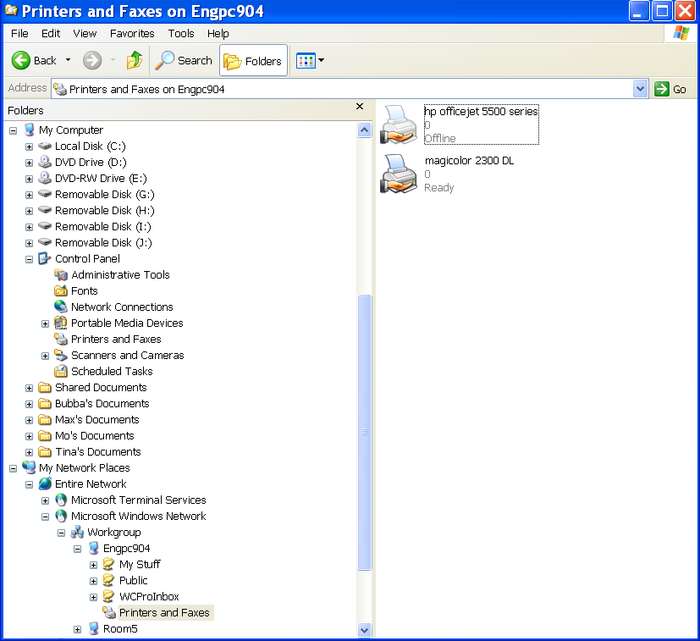
In the Folders pane, expand My Network Places and then
navigate My Network Places to the computer sharing the
printer.
When you select the Printers and Faxes node on this computer,
you’ll see the shared printers and fax machines (see Figure 3).
Click the printer or fax machine and drag it to My
Computer→Control Panel→Printers and Faxes.
Anyone running Windows Vista or later can connect to and use the
printer by following these steps:
Click Start→Devices and Printers.
Open a second window by clicking Start and then clicking
Network.
In the Network window, double-click the computer sharing the
printer.
In the Network window, click the printer or fax machine and
drag it to the Devices and Printers window.
3. Sharing and Connecting to Scanners
Physically attached and network-attached scanners cannot
be shared in the same way as printers and fax machines can. Physically
attached scanners must be connected directly to the computer of the
person who wants to use the scanner. Although network-attached scanners
are technically shared, they don’t have sharing settings you need to
configure through your computer. You connect to and use a
network-attached scanner by performing an install, as discussed
previously.
