Using the built-in publish, print, email, and burn
features,
getting your media out of your gallery is just as easy as getting it
into
your gallery. You can publish pictures to online albums, print
copies of
your pictures and videos, save copies of your media to data CDs and
DVDs,
and email pictures and videos to friends.1. Publishing Your Pictures
When you are
signed in to the Windows Live service you
have a variety of options for publishing your pictures online. To
get
started, select the picture or pictures you want to publish, click
Publish and then do one of the following:
Click Online Album to publish
the selected picture or pictures
to a personal album in your account online at the Windows Live
website.
Click
Group Album to share the selected picture or pictures
with a Windows Live group in which you are a member.
Click Event Album to share the
selected picture or pictures on
an event page you or someone you know is hosting.
Click More Services and then
click Publish On Flickr to
publish to your Flick account, providing you are a member of
the
service.
2. Printing Your
Pictures
Windows Live Photo Gallery features a smart
printing
feature that allows you to print enhanced, high-quality pictures.
You
can print multiple pictures at a time by selecting them before you
start
printing. You can then print pictures at full-page size, or you
can
combine pictures and print them at these smaller sizes:
4 × 6 with two pictures per page
5 × 7 with two pictures per page
8 × 10 with one picture per page
3.5 × 5 with four pictures per page
Wallet size with nine
pictures per page
Contact sheet with 35
pictures per page
When you’re printing
pictures, keep the following in mind:
If you’re printing at a size larger than the
original picture
size, you may get a blurry picture. For the best results,
print
pictures using a size equal to or smaller than the original
picture
size.
If
you’re printing to regular paper or paper not designed for
photos, you won’t get the best results. For the best quality,
print
pictures on premium photo paper. With premium glossy or matte
paper,
you’ll usually want to print to the shiniest side.
In Windows Live Photo
Gallery, you can print pictures by
completing the following steps:
Select the pictures you want to
print.
Click the Print button on the
toolbar and then select
Print.
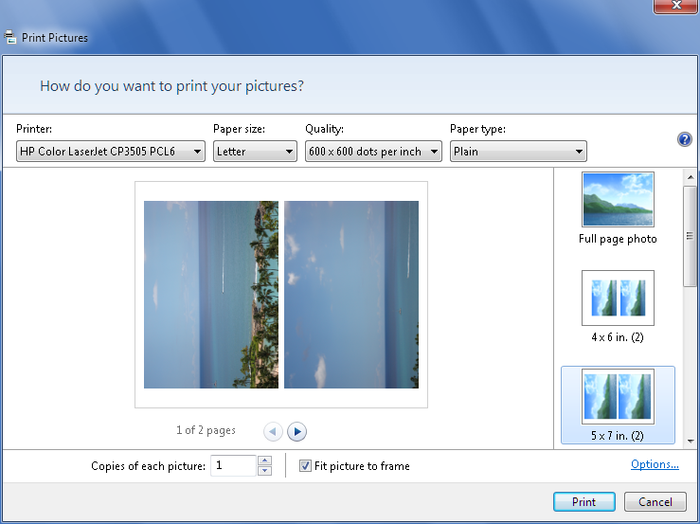
In the Print Pictures dialog
box, shown in Figure 1, use the Printer list to
select the printer you want to use.
Use
the “Paper size” list to select the paper size you want to
use, such as Letter or Legal. To use a size not listed, choose
More
and then click the size you want to use, or click “User
defined
size” at the bottom of the list.
Use
the Quality list to select the print quality, such as 600
× 600 dots per inch (dpi). In most cases, you’ll want to print
using
the highest dpi setting that the printer supports.
In
the left pane, select the picture size, such as 4 × 6
in.
Select the “Fit picture to frame” checkbox to
have Windows
enlarge the picture to fit the exact size you’ve selected. If
you
want the picture to print at its original proportions, clear
this
checkbox, but keep in mind that you may have gaps because the
digital picture isn’t proportioned exactly to the dimensions
you
selected.
Use the “Preview next print page”
and “Preview previous print
page” buttons to review how the pictures will print.
NOTE
By default, the pictures are enhanced and sharpened before
printing and the Print Pictures dialog box hides options that
may not
be compatible with your printer. To change these print settings,
click
the Options link.
Click Print to
print your pictures.