The text on a Visio shape is located in a text block.
You can reposition the text within a text block with several buttons
located on the Visio ribbon. You can also reposition the entire text
block by using the Text Block tool you learned about in the previous
exercise.
In this exercise, you will reposition text within a text block and you will move the text block to a new location.
Note:
You need the Orient Shapes and Text drawing that you used in the preceding exercise. Open the drawing in Visio if it is not already open.
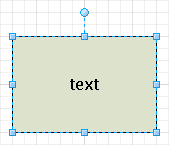
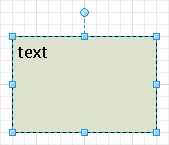
Click once on the rectangle that contains the word text.
Tip:
When you select a shape,
the illuminated buttons in the Paragraph group show the current text
alignment for that shape. For example, after clicking the rectangle, the
Paragraph group should look like the following graphic, indicating that
the text is centered both vertically and horizontally.
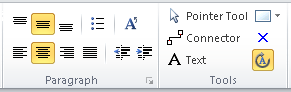
On the Home tab, in the Paragraph
group, click any of the buttons to observe the effect. For example, if
you click the Align Top button and then the Align Left button, the shape
will look like the following graphic.
Text Block

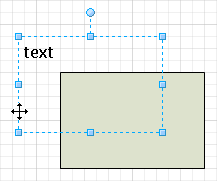
On the Home tab, in the Tools group, click the Text Block button, and then click once on the rectangle that contains the word text.
Click anywhere on the edge of the text block (the blue dashed lines) and drag the text block up and to the left.
When
the Text Block tool is active, the text block moves independently from
the underlying shape. If you use the Pointer Tool and move the
underlying shape, the text block also moves and remains in the same
position relative to the shape.
You
can also resize the text block whenever the Text Block tool is active
by dragging any of the resize handles. Although moving the text block on
this particular shape may not make a lot of sense, there are other
situations where knowing how to move and rotate text can be very
helpful.
In the Shapes window, click More Shapes, point to Network, and then click Computers and Monitors. The Computers And Monitors stencil opens.
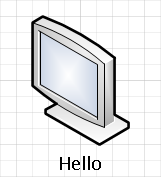
Drag an LCD monitor shape onto the page, drop it below the circle shape, and type Hello. Notice that this shape was designed so that the text block is located below the shape.
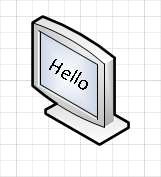
On the Home tab, in the Tools group, click the Text Block button. Reposition and rotate the text block so the word Hello appears on the LCD screen at approximately the same angle as the screen itself.
Tip:
Repositioning and rotating the
text in the LCD monitor is an excellent situation in which to use the
zoom feature in Visio. Zoom in to enlarge the shape before attempting to
relocate and rotate the shape, and you will be able to complete this
step more easily and more precisely.
Note:
Save your changes to the Orient Shapes and Text drawing, and then close it.
Note:
For another perspective on text block positioning, go to www.visguy.com/2007/11/07/text-to-the-bottom-of-the-shape/.
